 |
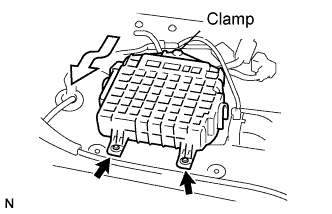
Separate the 2 clips and clamp.
ECM > REMOVAL |
| 1. CHECK FOR COMPENSATION CODE |
Using the intelligent tester, check that the ID codes registered in the injector assemblies installed on each cylinder match the ECM (Click here).
If the codes do not match, correct the registered data and recheck the problem symptom by following the steps below.
Using SST, manually correct the registered ID code (Click here).
Check if the same symptom, occurs when the vehicle was brought in.
| 2. REMOVE BATTERY SERVICE HOLE COVER (w/ Sub-battery) |
| 3. DISCONNECT CABLE FROM NEGATIVE BATTERY TERMINAL |
| 4. REMOVE FRONT DOOR SCUFF PLATE RH |
| 5. REMOVE FRONT SEAT ASSEMBLY RH (for Hi-back Seat Type) |
| 6. REMOVE FRONT SEAT ASSEMBLY RH (for Low-back Seat Type) |
| 7. REMOVE ECM |
Separate the floor carpet.
|
Separate the 2 clips and clamp.
Disconnect the 4 ECM connectors.
Remove the ECM w/ cover.
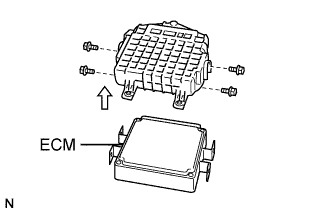 |
Remove the 4 bolts and the ECM cover.