 |
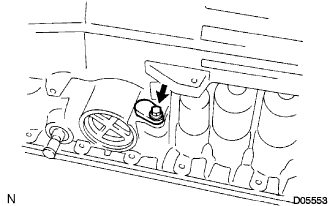
Remove the bolt and pull out the plug.
AUTOMATIC TRANSMISSION UNIT > DISASSEMBLY |
| 1. REMOVE DRAIN (ATM) PLUG SUB-ASSEMBLY |
| 2. REMOVE BREATHER PLUG HOSE |
| 3. REMOVE TRANSMISSION CONTROL SHAFT LEVER LH |
Remove the nut, the washer and the control shaft lever.
| 4. REMOVE TRANSMISSION CASE PLUG ASSEMBLY |
|
Remove the bolt and pull out the plug.
Remove the O-ring from the plug.
| 5. REMOVE PARK/NEUTRAL POSITION SWITCH ASSEMBLY |
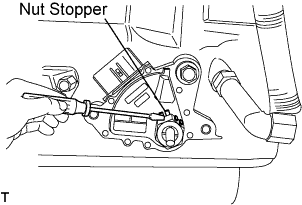 |
Using a screwdriver, pull up the lock washer.
Remove the nut and lock washer.
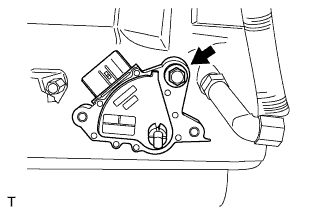 |
Remove the bolt and the park/neutral position switch.
| 6. REMOVE OIL COOLER TUBE UNION |
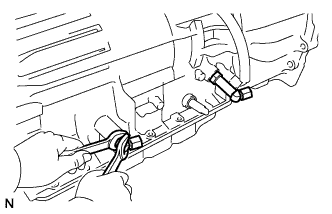 |
Remove the 2 oil cooler tube unions.
Remove the O-rings from the oil cooler tube unions.
| 7. REMOVE TEMPERATURE SENSOR |
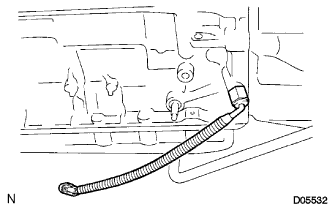 |
Remove the temperature sensor.
Remove the O-ring from the sensor.
| 8. REMOVE SPEED SENSOR |
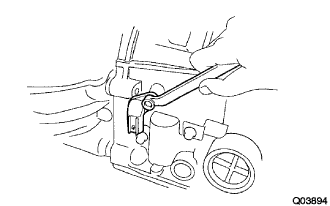 |
Remove the bolt and speed sensor.
Remove the O-ring from the sensor.
| 9. REMOVE TRANSMISSION REVOLUTION SENSOR |
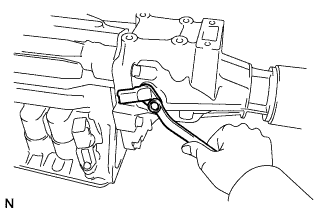 |
Remove the bolt and the transmission revolution sensor.
Remove the O-ring from the sensor.
| 10. REMOVE EXTENSION HOUSING SUB-ASSEMBLY |
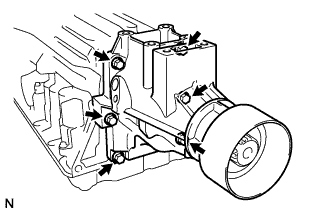 |
Remove the 6 bolts.
Remove the extension housing and the gasket.
| 11. REMOVE EXTENSION HOUSING BUSH APPLY TUBE GASKET |
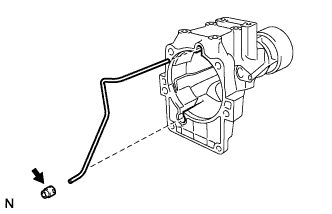 |
Remove the bush apply tube gasket.
| 12. REMOVE EXTENSION HOUSING BUSH APPLY TUBE |
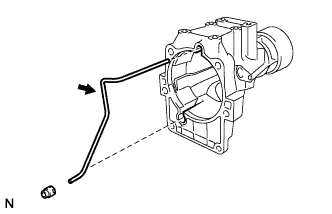 |
Remove the bush apply tube.
| 13. REMOVE AUTOMATIC TRANSMISSION EXTENSION HOUSING OIL SEAL |
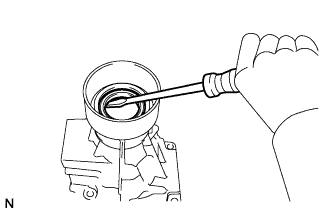 |
Using a screwdriver, remove the extension housing oil seal.
| 14. REMOVE EXTENSION HOUSING DUST DEFLECTOR |
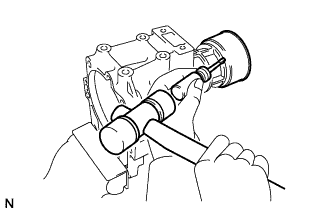 |
Mount the extension housing in a soft jaw vise.
Using a screwdriver and a hammer, remove the extension housing dust deflector.
| 15. INSPECT EXTENSION HOUSING SUB-ASSEMBLY |
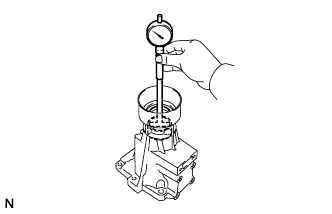 |
Using a cylinder gauge, measure the inside diameter of the extension housing bushing.
| 16. REMOVE SENSOR ROTOR |
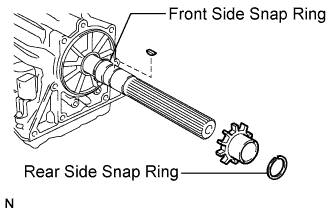 |
Using a snap ring expander, remove the rear side snap ring.
Remove the sensor rotor and the key.
Using a snap ring expander, remove the front side snap ring.
| 17. REMOVE AUTOMATIC TRANSMISSION HOUSING |
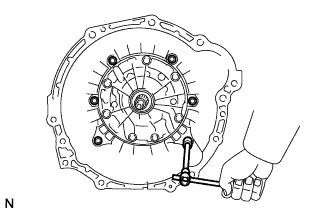 |
Remove the 6 bolts.
Remove the transmission housing.
| 18. FIX AUTOMATIC TRANSMISSION CASE SUB-ASSEMBLY |
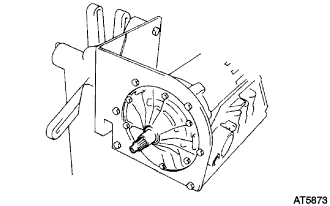 |
Install the transmission case on the overhaul attachment.
| 19. REMOVE AUTOMATIC TRANSMISSION OIL PAN SUB-ASSEMBLY |
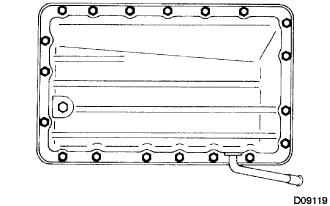 |
Remove the 19 bolts.
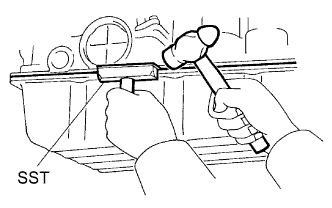 |
Install the blade of SST between the transmission case and oil pan, and cut off the applied sealer.
Remove the pan by lifting the transmission case.
| 20. INSPECT AUTOMATIC TRANSMISSION OIL PAN SUB-ASSEMBLY |
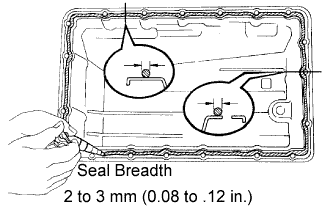 |
Remove any FIPG material and be careful not to drop oil on the contacting surfaces of the transmission case and the oil pan.
Apply FIPG to the oil pan.
Install the oil pan with the 19 bolts.
| 21. REMOVE VALVE BODY OIL STRAINER ASSEMBLY |
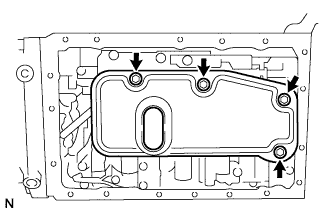 |
Remove the 4 bolts and oil strainer case.
| 22. REMOVE TRANSMISSION WIRE |
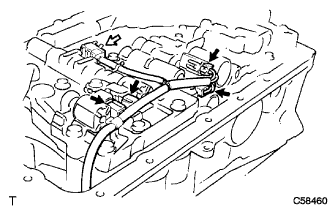 |
Disconnect the 4 connectors from each shift solenoid valve.
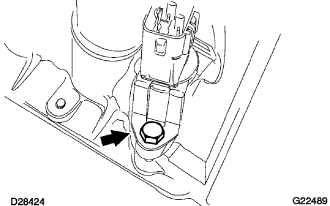 |
Remove the bolt.
Pull out the solenoid wiring from the transmission case.
Remove the O-rings from the solenoid wiring.
| 23. REMOVE TRANSMISSION VALVE BODY ASSEMBLY |
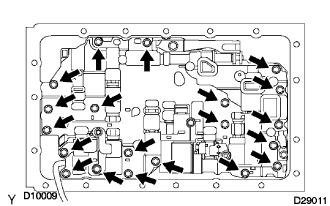 |
Remove the 20 bolts.
| 24. REMOVE CHECK BALL BODY |
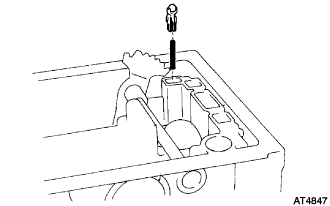 |
Remove the check ball body and the spring.
| 25. REMOVE B-2 ACCUMULATOR PISTON |
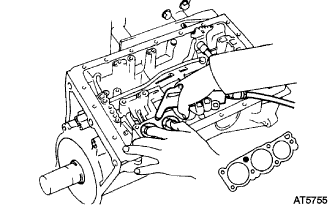 |
Applying compressed air to the oil hole, remove the B2 accumulator piston and the spring.
Remove the O-rings from the piston.
| 26. REMOVE C-2 ACCUMULATOR PISTON |
|
Applying compressed air to the oil hole, remove the C2 accumulator piston and the springs.
Remove the O-rings from the piston.
| 27. REMOVE B-0 ACCUMULATOR PISTON |
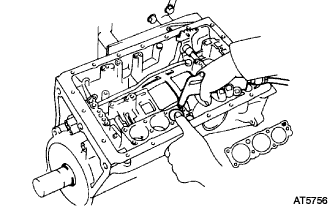 |
Applying compressed air to the oil hole, remove the B0 accumulator piston and the spring.
Remove the O-rings from the piston.
| 28. REMOVE C-0 ACCUMULATOR PISTON |
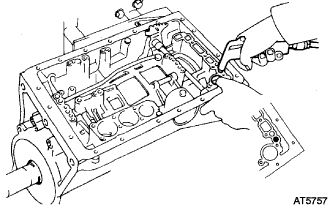 |
Applying compressed air to the oil hole, remove the C0 accumulator piston and the springs.
Remove the O-ring from the piston.
| 29. REMOVE PARKING LOCK PAWL BRACKET |
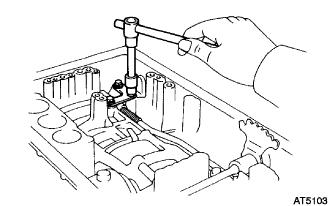 |
Remove the 3 bolts and the parking lock pawl bracket.
| 30. REMOVE PARKING LOCK ROD SUB-ASSEMBLY |
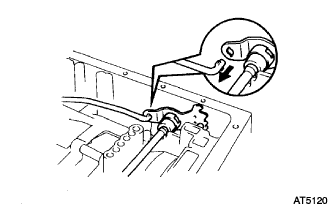 |
Disconnect the parking lock rod from the manual valve lever.
| 31. REMOVE PARKING LOCK PAWL SHAFT |
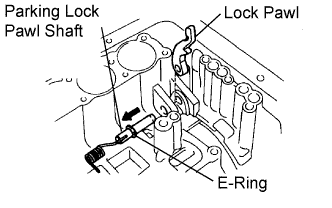 |
Pull out the parking lock pawl shaft from the front side, then remove the lock pawl and the spring.
Remove the E-ring from the shaft.
| 32. REMOVE MANUAL VALVE LEVER SUB-ASSEMBLY |
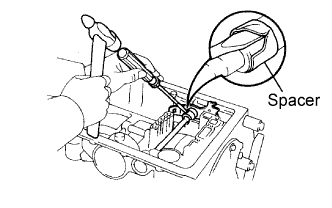 |
Using a hammer and a screwdriver, cut off the spacer and remove it from the shaft.
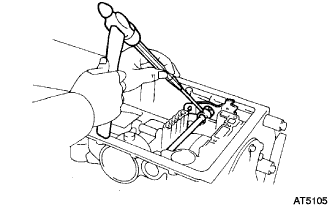 |
Using a pin punch and a hammer, drive out the pin.
Pull out the manual valve lever shaft through the case, and remove the manual valve lever.
| 33. REMOVE MANUAL VALVE LEVER SHAFT OIL SEAL |
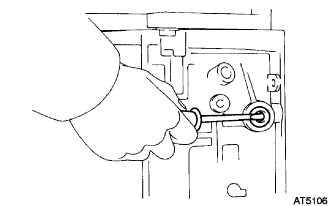 |
Using screwdriver, remove the 2 manual valve lever shaft oil seals.
| 34. REMOVE OIL PUMP ASSEMBLY |
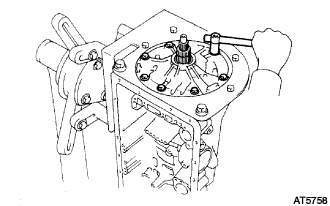 |
Stand up the transmission.
Remove the 7 bolts holding the oil pump to the transmission case.
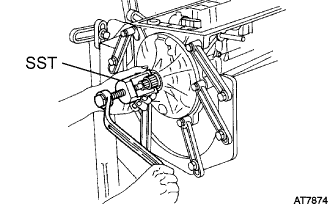 |
Using SST, remove the oil pump.
Remove the O-ring from the oil pump.
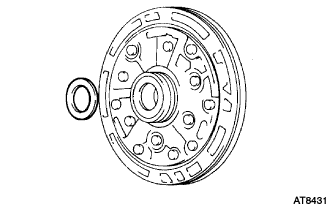 |
Remove the race from the oil pump.
| 35. REMOVE OVERDRIVE PLANETARY GEAR ASSEMBLY |
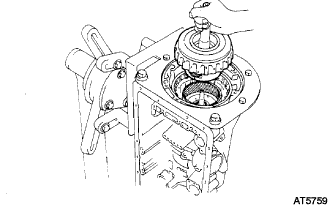 |
Remove the O/D planetary gear, O/D direct clutch and one-way clutch from the transmission case.
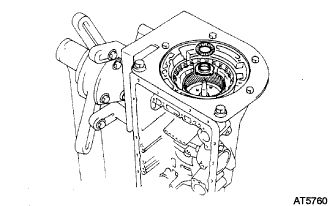 |
Remove the bearing and the race.
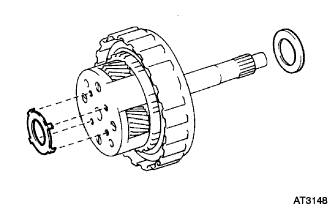 |
Remove the race and bearing.
| 36. REMOVE OVERDRIVE PLANETARY RING GEAR |
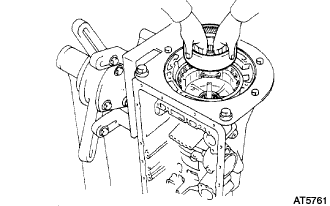 |
Remove the O/D planetary ring gear from the transmission case.
| 37. INSPECT OVERDRIVE BRAKE PISTON |
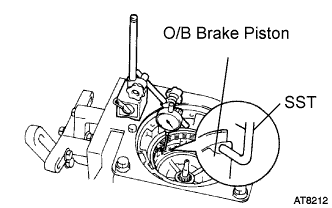 |
Place SST and a dial indicator onto the O/D brake piston.
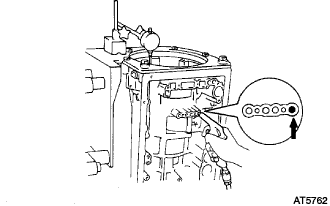 |
Measure the stroke while applying and releasing compressed air (392 to 785 kPa, 4.0 to 8.0 kgf/cm2, 57 to 114 psi).
| No. | Thickness | No. | Thickness |
| 77 | 3.3 mm (0.130 in.) | 81 | 3.8 mm (0.150 in.) |
| 78 | 3.5 mm (0.138 in.) | 82 | 3.9 mm (0.154 in.) |
| 79 | 3.6 mm (0.142 in.) | 83 | 4.0 mm (0.157 in.) |
| 80 | 3.7 mm (0.146 in.) | - | - |
| 38. REMOVE OVERDRIVE BRAKE PACK |
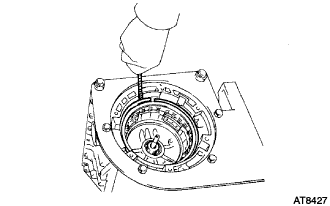 |
Using a screwdriver, remove the snap ring.
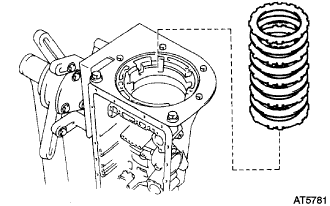 |
Remove the overdrive brake pack.
| 39. INSPECT PISTON STROKE OF 2ND COAST BRAKE |
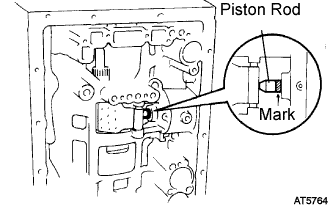 |
Place a mark on the 2nd coast brake piston rod as shown in the illustration.
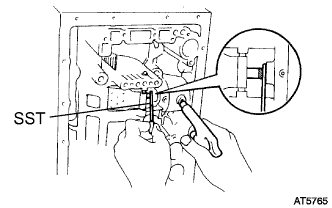 |
Using SST, measure the stroke while applying and releasing compressed air (392 to 785 kPa, 4.0 to 8.0 kgf/cm2, 57 to 114 psi).
| 40. REMOVE 2ND COAST BRAKE PISTON |
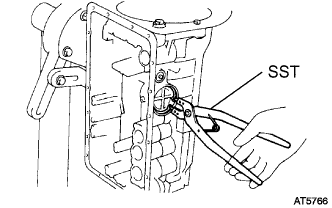 |
Using SST, remove the snap ring.
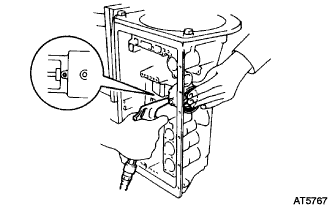 |
Applying compressed air to the oil hole, remove the 2nd coast brake cover, piston and spring.
Remove the 2 O-rings from the cover.
| 41. REMOVE OVERDRIVE SUPPORT SUB-ASSEMBLY |
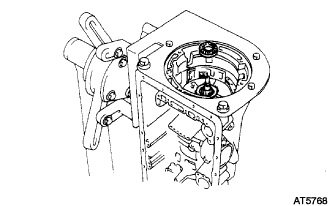 |
Remove the bearing.
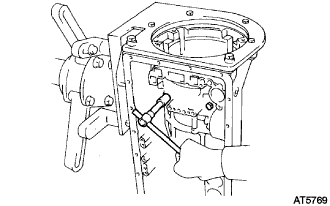 |
Remove the 2 bolts holding the O/D support sub-assembly to the case.
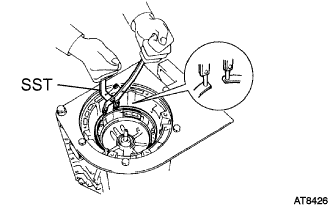 |
Using SST, remove the snap ring.
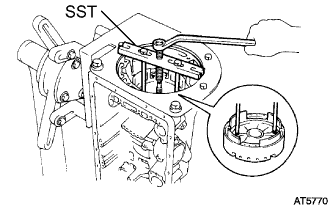 |
Using SST, remove the O/D support sub-assembly.
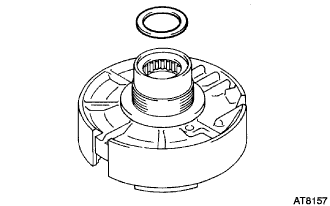 |
Remove the race.
| 42. REMOVE DIRECT CLUTCH ASSEMBLY |
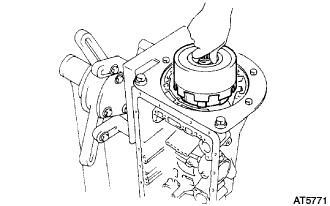 |
Remove the direct clutch with the forward clutch from the case.
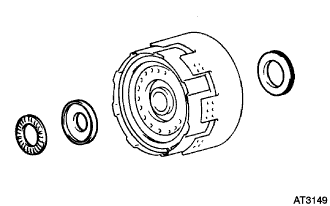 |
Remove the 2 bearings and the race.
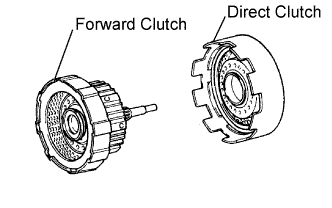 |
Remove the direct clutch from the forward clutch.
Remove the bearing and thrust washer from the forward clutch.
| 43. REMOVE 2ND COAST BRAKE BAND ASSEMBLY |
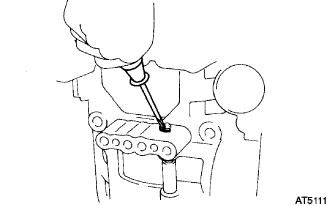 |
Using a screwdriver, remove the E-ring from the pin.
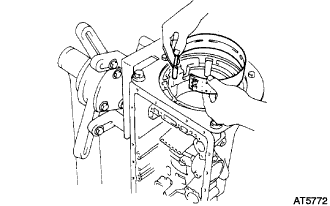 |
Remove the 2nd coast brake band from the case.
Remove the pin from the brake band.
Remove the E-ring from the pin.
| 44. REMOVE FRONT PLANETARY RING GEAR SUB-ASSEMBLY |
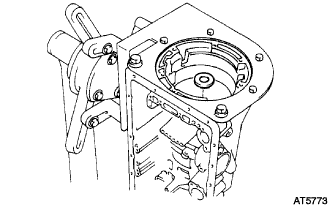 |
Remove the race.
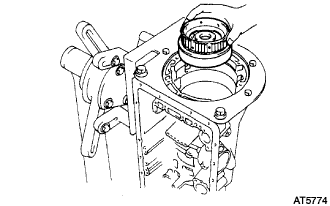 |
Remove the front planetary ring gear from the case,
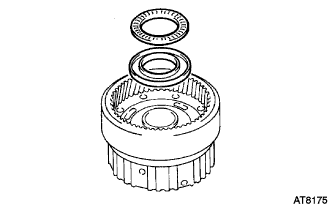 |
Remove the bearing and race.
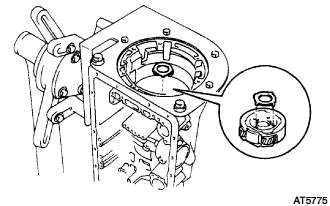 |
Remove the race from the front planetary gear.
| 45. INSPECT FRONT PLANETARY RING GEAR SUB-ASSEMBLY |
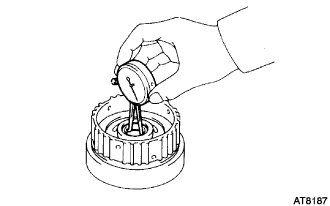 |
Using a dial indicator, measure the inside diameter of the planetary ring gear bushing.
| 46. REMOVE FRONT PLANETARY GEAR ASSEMBLY |
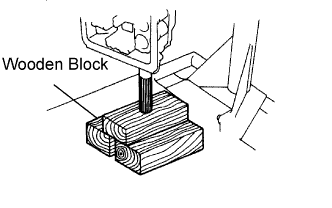 |
With wooden blocks or equivalent under the output shaft, stand the transmission on the output shaft.
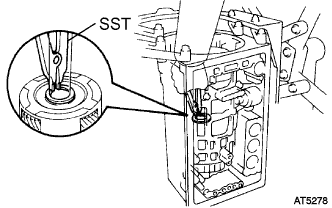 |
Using SST, remove the snap ring.
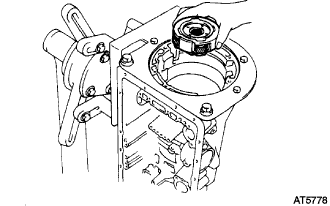 |
Remove the front planetary gear from the case.
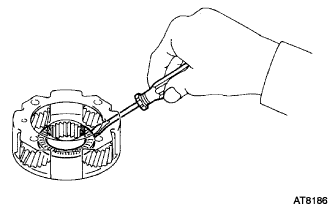 |
Using a screwdriver, remove the bearing and the race from the front planetary gear.
| 47. INSPECT PLANETARY PINION GEAR THRUST CLEARANCE |
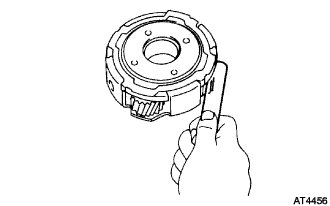 |
Using a feeler gauge, measure the planetary pinion gear thrust clearance.
| 48. REMOVE PLANETARY SUN GEAR SUB-ASSEMBLY |
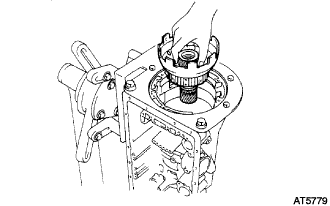 |
Remove the planetary sun gear sub-assembly.
Remove the thrust washer.
| 49. INSPECT PACK CLEARANCE OF SECOND BRAKE |
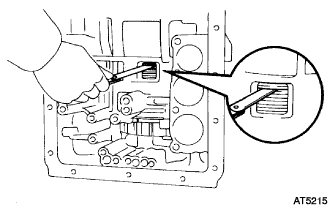 |
Using a feeler gauge, measure the clearance between the snap ring and the flange.
| 50. REMOVE 2ND BRAKE PACK |
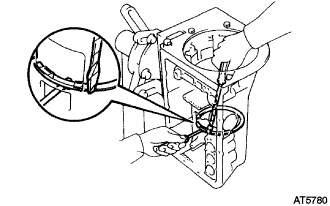 |
Using a screwdriver, remove the snap ring.
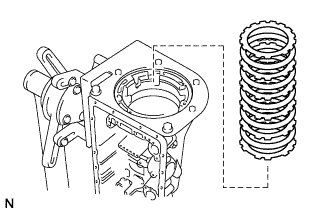 |
Remove the flange, the plates and the discs as a set.
| 51. INSPECT PACK CLEARANCE OF FIRST AND REVERSE BRAKE |
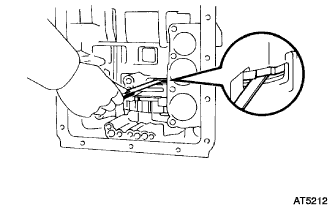 |
Using a feeler gauge, measure the clearance between the plate and the 2nd brake drum.
| No. | Thickness | No. | Thickness |
| 67 | 5.4 mm (0.213 in.) | 52 | 4.6 mm (0.181 in.) |
| 66 | 5.2 mm (0.205 in.) | 53 | 4.4 mm (0.173 in.) |
| 50 | 5.0 mm (0.197 in.) | 54 | 4.2 mm (0.165 in.) |
| 51 | 4.8 mm (0.189 in.) | 55 | 4.0 mm (0.157 in.) |
| 52. REMOVE 2ND BRAKE PISTON SLEEVE |
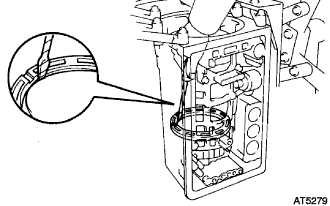 |
Using a screwdriver, remove the 2nd brake piston sleeve.
| 53. REMOVE REAR PLANETARY GEAR ASSEMBLY |
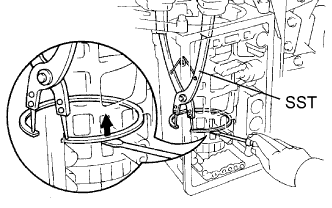 |
Using SST and a screwdriver, remove the snap ring.
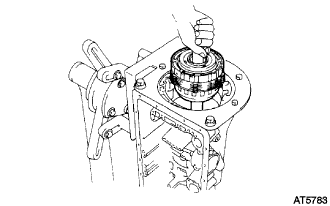 |
Remove the rear planetary gear, the 2nd brake drum, the 1st and reverse brake pack and output shaft as an assembly.
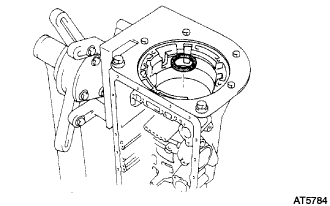 |
Remove the bearing from the case.
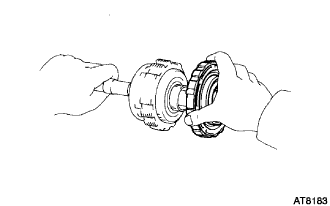 |
Remove the 2nd brake drum.
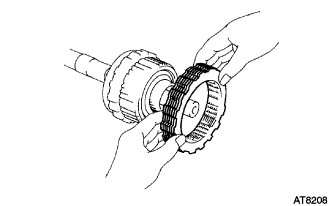 |
Remove the cushion plate, the flange, the plates and the discs of the 1st and reverse brake.
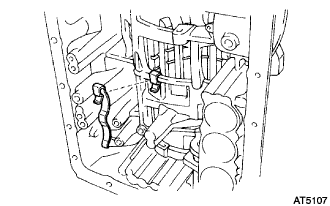 |
Remove the leaf spring.
| 54. INSPECT 1ST AND REVERSE BRAKE CLUTCH DISC |
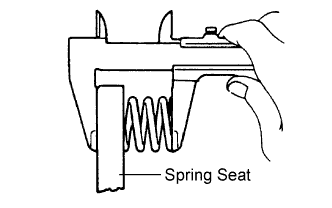 |
Using vernier calipers, measure the return spring free length together with the spring seat.
| 55. REMOVE BRAKE DRUM GASKET |
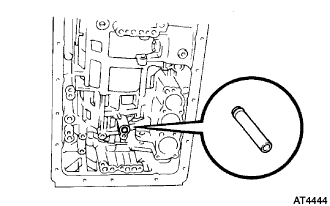 |
Remove the brake drum gasket.
| 56. INSPECT PISTON STROKE OF 1ST AND REVERSE BRAKE |
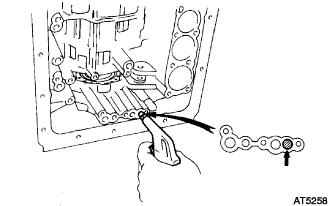 |
Make sure the 1st & reverse brake pistons move smoothly when applying and releasing the compressed air into the transmission case.
| 57. REMOVE 1ST AND REVERSE BRAKE RETURN SPRING SUB-ASSEMBLY |
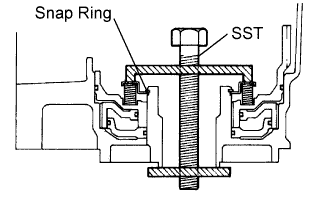 |
Set SST on the spring retainer, and compress the return spring.
Using snap ring pliers, remove the snap ring.
Remove the piston return spring.
Hold the 1st and reverse brake piston by hand, and apply compressed air to the transmission case to remove the 1st and reverse brake piston.
| 58. REMOVE 1ST AND REVERSE BRAKE PISTON NO.2 |
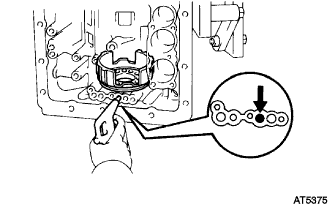 |
Remove the 1st and reverse brake piston.
If the piston does not pop out with compressed air, lift the piston out with the needle-nose pliers.
Remove the O-ring from the 1st and reverse brake piston.
| 59. REMOVE BRAKE REACTION SLEEVE |
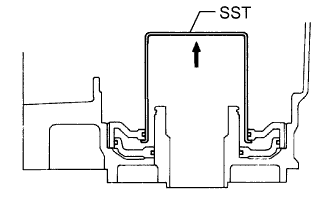 |
Install SST behind the reaction sleeve and gradually lift it out of the transmission case.
Remove the O-ring from the reaction sleeve.
| 60. REMOVE 1ST AND REVERSE BRAKE PISTON NO.1 |
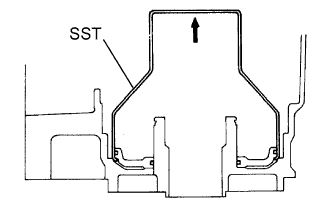 |
Install SST behind the 1st and reverse brake piston No.1, and gradually lift it out of the transmission case.
Remove the 2 O-rings from the 1st and reverse brake piston No.1.
| 61. INSPECT AUTOMATIC TRANSMISSION CASE SUB-ASSEMBLY |
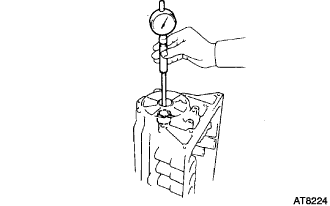 |
Using a cylinder gauge, measure the inside diameter of the transmission case rear bushing.