REMOVAL
Removal / installation · Vehicles built from Oct 2014
- HINT:
- Use the same procedure for RHD vehicles and LHD vehicles.
- The procedure listed below is for LHD vehicles.
- Use the same procedure for RHD vehicles and LHD vehicles.
| 1. REMOVE SHIFT LEVER CAP |

Using a screwdriver, detach the 2 claws and remove the shift lever cap from the floor shift position indicator housing sub-assembly.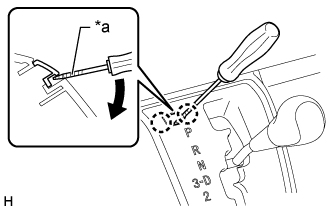

Text in Illustration *a
Protective Tape
- NOTICE:
- Be careful not to damage the shift lever cap and floor shift position indicator housing sub-assembly.
- HINT:
- Tape the screwdriver tip before use.
| 2. REMOVE SHIFT LEVER KNOB |
Twist the shift lever knob in the direction indicated by the arrow and remove it.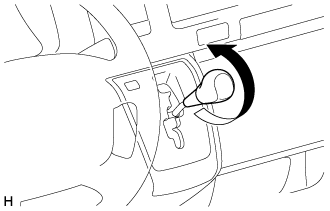
| 3. REMOVE FLOOR SHIFT POSITION INDICATOR HOUSING SUB-ASSEMBLY |
Detach the 8 claws and remove the floor shift position indicator housing sub-assembly.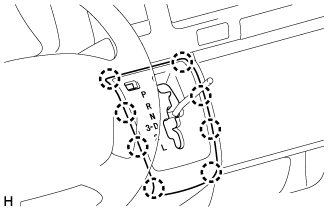
| 4. REMOVE INSTRUMENT PANEL UNDER COVER SUB-ASSEMBLY NO. 1 |
Using a clip remover, remove the 2 clips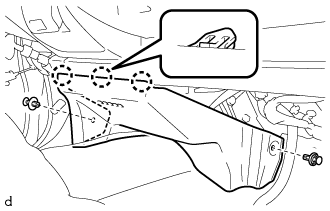
Detach the 3 claws and remove the instrument panel under cover sub-assembly No. 1.
| 5. REMOVE INSTRUMENT PANEL FINISH PANEL LOWER |
Using a clip remover, remove the 2 clips.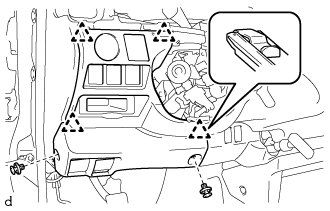
Detach the 4 clips and remove the instrument panel finish lower.
Disconnect each connector.
Push the positions indicated by the arrows in the illustration to disconnect the fuel lid lock control cable and bonnet (hood) control cable assembly from the instrument panel finish lower.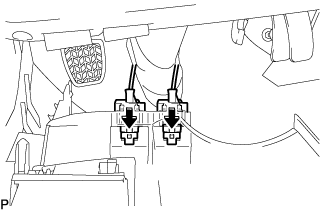
| 6. REMOVE PARKING BRAKE HOLE COVER |
Detach the 6 claws and remove the parking brake hole cover.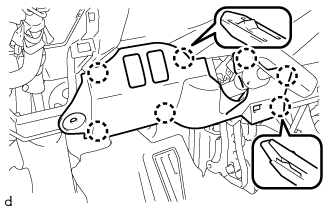
Disconnect each connector.
| 7. REMOVE INSTRUMENT PANEL FINISH PANEL LOWER CENTER |
Detach the 8 claws and remove the instrument panel finish panel lower center.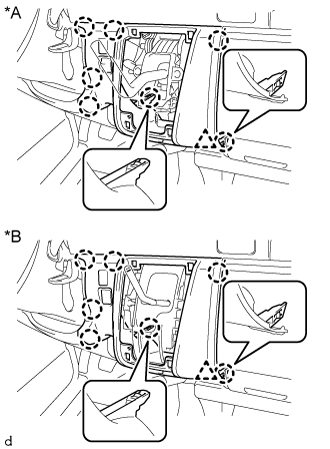
Text in Illustration *A
for Manual Transmission
*B
for Automatic Transmission
| 8. DISCONNECT TRANSMISSION CONTROL CABLE ASSEMBLY |
Move the shift lever to N.
Disconnect the end of the transmission control cable assembly from the shift lock control unit assembly.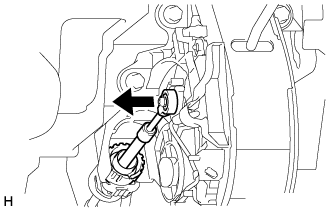
Using a screwdriver, pull out the stopper of the transmission control cable assembly.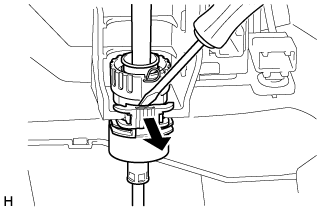
- HINT:
- Do not remove the stopper. If the stopper is removed, reinstall it to its original position.
Rotate the nut counterclockwise approximately 180° and, while holding the nut in that position, disconnect the transmission control cable from the shift lock control unit assembly.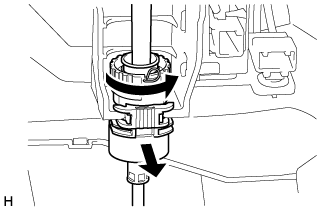
- NOTICE:
- Do not over-rotate the nut as it will come off the internal spring and the transmission control cable will not be reusable.
| 9. REMOVE SHIFT LOCK CONTROL UNIT ASSEMBLY |
Disconnect the 2 connectors and clamp from the shift lock control unit assembly.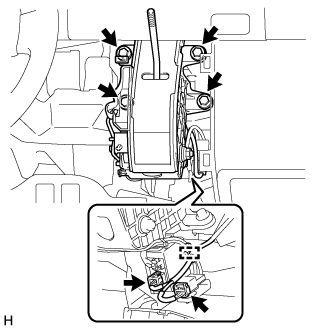
Remove the 4 bolts and shift lock control unit assembly.