REMOVAL
Removal / installation · Vehicles built from Oct 2014
| 1. REMOVE RADIATOR GRILLE |

Put protective tape around the radiator grille.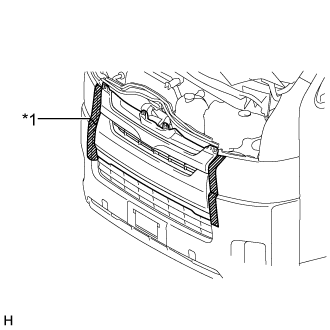

Text in Illustration *1
Protective Tape
Remove the 4 clips and 2 screws.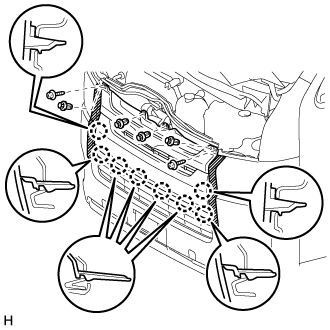
Detach the 8 claws and remove the radiator grille.
| 2. REMOVE UPPER RADIATOR GRILLE |
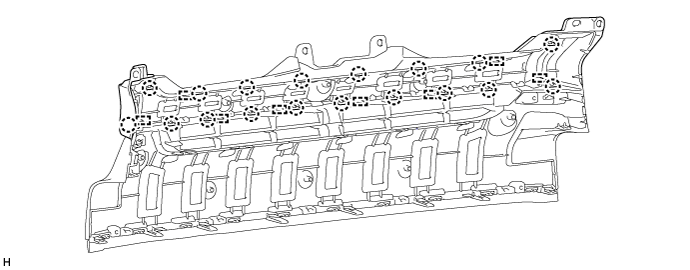
Detach the 18 claws and 8 guides and remove the upper radiator grille from the radiator inside grille.
| 3. REMOVE LOWER RADIATOR GRILLE |
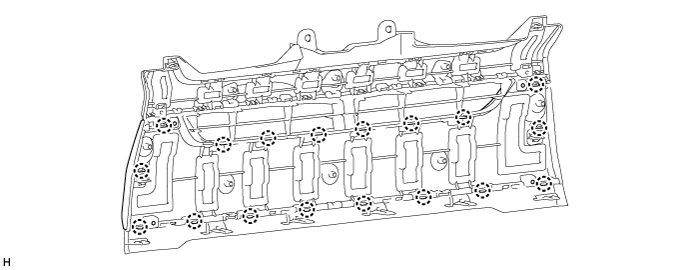
Detach the 18 claws and remove the lower radiator grille from the radiator inside grille.
| 4. REMOVE STEP PLATE COVER LH |
Remove the 4 clips.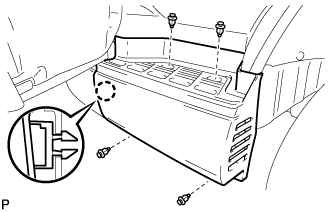
Detach the claw and remove the step plate cover LH.
| 5. REMOVE STEP PLATE COVER RH |
- HINT:
- Use the same procedure described for the LH side.
| 6. REMOVE FRONT BUMPER COVER |
Put protective tape around the front bumper cover.
Remove the 3 bolts and 6 clips.
w/ Fog Light:
Disconnect the No. 4 engine room wire connector.
Remove the 3 bolts and 6 clips.
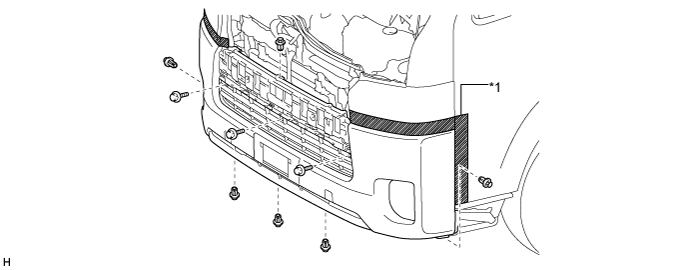
Text in Illustration *1
Protective Tape
-
-
Detach the 7 claws and guide.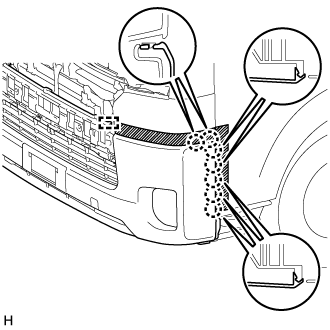
- HINT:
- Use the same procedure for the RH side.
Remove the front bumper cover.
| 7. REMOVE FRONT FLOOR CROSSMEMBER REINFORCEMENT SUB-ASSEMBLY RH |
Remove the 5 bolts and front floor crossmember reinforcement sub-assembly RH.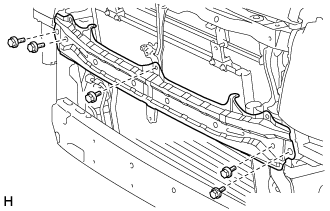
| 8. REMOVE FRONT BUMPER REINFORCEMENT |
Remove the 6 bolts and front bumper reinforcement.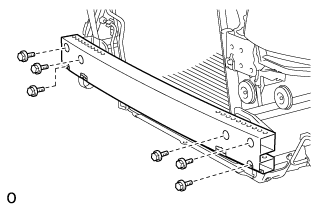
| 9. REMOVE FRONT BUMPER SIDE SUPPORT LH |
Remove the 2 screws.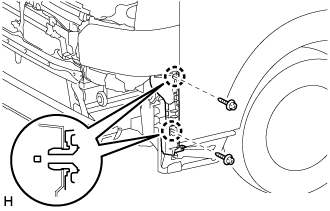
Detach the 2 claws and remove the front bumper side support LH.
| 10. REMOVE FRONT BUMPER SIDE SUPPORT RH |
- HINT:
- Use the same procedure described for the LH side.