2014-2019 Hiace · Service Manual ENGINE

REMOVAL

Removal / installation · Vehicles built Oct 2014 – Dec 2016

Versions by build date: Oct 2014 – Dec 2016 from Jan 2017


1. REMOVE ENGINE UNDER COVER NO.1

2. DRAIN ENGINE COOLANT

CAUTION:
Do not remove the radiator reservoir cap sub-assembly while the engine and radiator are still hot. Pressurized, hot engine coolant and steam may be released and cause serious burns.

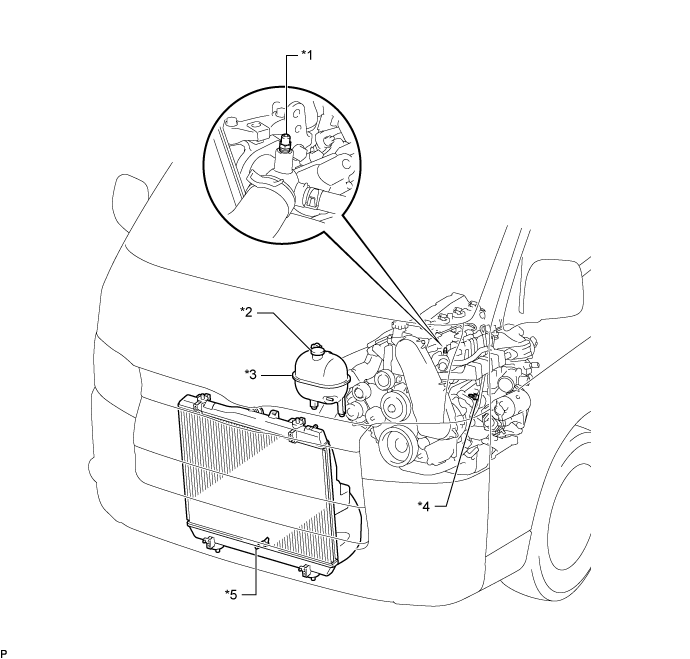
  1. Loosen the radiator drain cock plug.

    A316611E01

    Text in Illustration 
    *1
    Bleeder Plug
    *2
    Radiator Reservoir Cap Sub-assembly
    *3
    Radiator Reservoir Assembly
    *4
    Cylinder Block Drain Cock Plug
    *5
    Radiator Drain Cock Plug
    -
    -

  1. Remove the radiator reservoir cap sub-assembly.

  1. Loosen the cylinder block drain cock plug (on the engine oil cooler cover), and drain the engine coolant.

  1. Tighten the radiator drain cock plug.

  1. Tighten the cylinder block drain cock plug (on the engine oil cooler cover).

    Torque:
    8.0 N*m{ 82 kgf*cm , 71 in.*lbf }


3. DISCONNECT BATTERY NEGATIVE CABLE

4. REMOVE FRONT SEAT ASSEMBLY RH (for Hi-back Seat Type)
(Click here)

HINT:
Perform the same procedure as RH side on the LH side.


5. REMOVE FRONT SEAT ASSEMBLY RH (for Low-back Seat Type)
(Click here)

HINT:
Perform the same procedure as RH side on the LH side.


6. REMOVE FRONT DOOR SCUFF PLATE RH

7. REMOVE ENGINE SERVICE HOLE SUB COVER SUB-ASSEMBLY
  1. Roll up the carpet, and remove the engine service hole sub cover assembly.


8. REMOVE FENDER APRON MUDGUARD SEAL RH

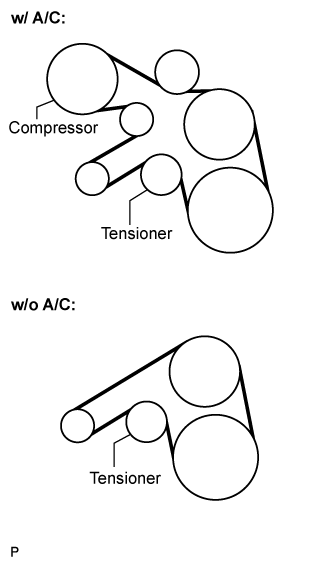
9. REMOVE FAN & GENERATOR V BELT

  1. A102808E03
    Remove the drive belt by rotating the tensioner pulley in clockwise direction to loosen its tension with the pulley set bolt of the tensioner.


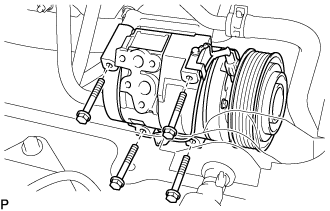
10. SEPARATE COMPRESSOR AND MAGNETIC CLUTCH (w/ Air Conditioning System)
  1. Disconnect the connector.

  1. E104245
    Remove the 4 bolts and compressor and magnetic clutch.


11. REMOVE AIR TUBE ASSEMBLY
  1. Remove the 2 clamps, 2 bolts and air tube assembly.


12. REMOVE AIR CLEANER HOSE ASSEMBLY
  1. Remove the bolt and air cleaner hose assembly.


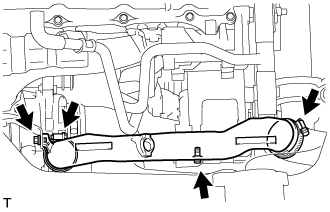
13. REMOVE COMPRESSOR OUTLET ELBOW

  1. A113753
    Remove the 2 bolts and 2 clamps, then remove the compressor outlet elbow.


14. REMOVE VENTILATION PIPE
  1. Remove the bolt and ventilation pipe.


15. DISCONNECT ENGINE WIRE
  1. Disconnect the engine wire from the bracket.


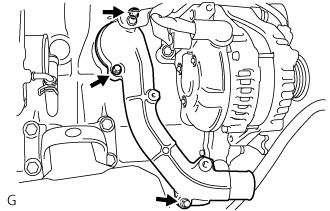
16. REMOVE WATER INLET

  1. A102455E01
    Remove the 3 bolts and water inlet.


17. REMOVE THERMOSTAT
  1. Remove thermostat and gasket.

← COMPONENTS (from Oct 2014)REMOVAL (from Jan 2017) →