2014-2019 Hiace · Service Manual ENGINE

REMOVAL

Removal / installation · Vehicles built Apr 2016 – Dec 2016

Versions by build date: Oct 2014 – Mar 2016 Apr 2016 – Dec 2016 from Jan 2017


1. RECOVER REFRIGERANT FROM REFRIGERATION SYSTEM (w/ Air Conditioning System)
  1. Start up the engine.

  1. Turn the A/C switch on.

  1. Operate the cooler compressor at an engine rpm of approximately 1,000 for 5 to 6 minutes to circulate the refrigerant and collect compressor oil remaining in each component into the cooler compressor as much as possible.

  1. Stop the engine.

  1. Using SST, let the refrigerant gas out.

    SST
    07110-58060   (07117-58080, 07117-58090, 07117-78050, 07117-88060, 07117-88070, 07117-88080)


2. DISCONNECT CABLE FROM NEGATIVE BATTERY TERMINAL

3. REMOVE NO. 1 ENGINE UNDER COVER (for Cold Area Specification Vehicles)
  1. Remove the 4 bolts and No. 1 engine under cover.


4. DRAIN ENGINE COOLANT

CAUTION:
Do not remove the radiator reservoir cap sub-assembly while the engine and radiator are still hot. Pressurized, hot engine coolant and steam may be released and cause serious burns.

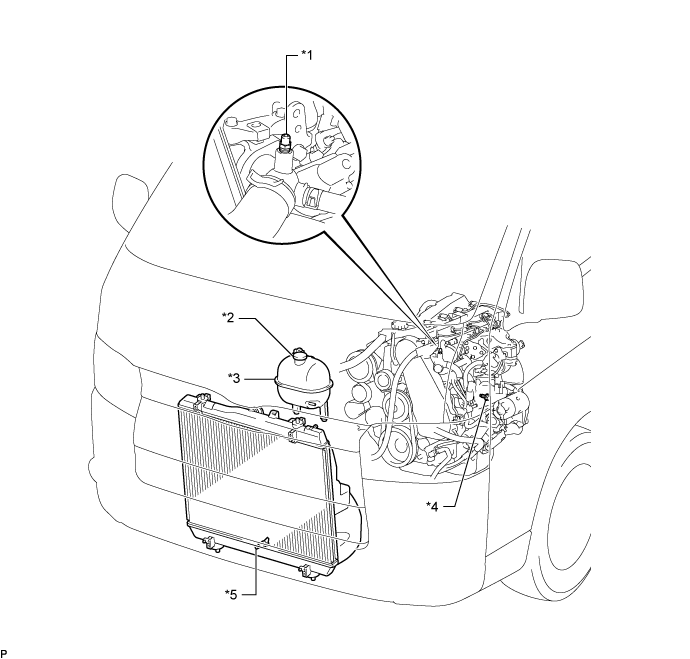
  1. Loosen the radiator drain cock plug.

    A316609E01

    Text in Illustration 
    *1
    Bleeder Plug
    *2
    Radiator Reservoir Cap Sub-assembly
    *3
    Radiator Reservoir Assembly
    *4
    Cylinder Block Drain Cock Plug
    *5
    Radiator Drain Cock Plug
    -
    -

  1. Remove the radiator reservoir cap sub-assembly.

  1. Loosen the cylinder block drain cock plug (on the engine oil cooler cover), and drain the engine coolant.

  1. Tighten the radiator drain cock plug.

  1. Tighten the cylinder block drain cock plug (on the engine oil cooler cover).

    Torque:
    8.0 N*m{ 82 kgf*cm , 71 in.*lbf }


5. REMOVE FRONT DOOR SCUFF PLATE RH
  1. Disengage the 5 clips and remove the front door scuff plate RH.


6. REMOVE FRONT SEAT ASSEMBLY RH

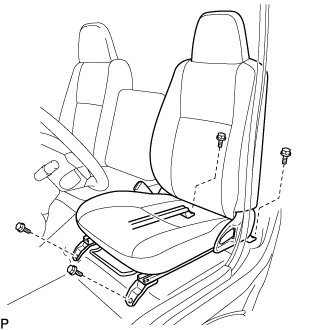
  1. B107528
    Move the front seat assembly fully forward.

  1. Remove the 2 bolts on the rear side of the seat.

  1. Move the front seat assembly to the rearmost position.

  1. Remove the 2 bolts on the front side of the seat.

  1. Move the front seat assembly to the center of the seat slide rail. Set the seatback in the upright position.

  1. Disconnect the front seat inner belt assembly connector.

  1. Remove the front seat assembly.


7. REMOVE ENGINE SERVICE HOLE SUB COVER SUB-ASSEMBLY
  1. Roll up the carpet and remove the engine service hole sub cover.


8. REMOVE FENDER APRON MUDGUARD SEAL RH
  1. Disengage the 3 clips and remove the fender apron mudguard seal RH.


9. REMOVE FAN AND GENERATOR V BELT

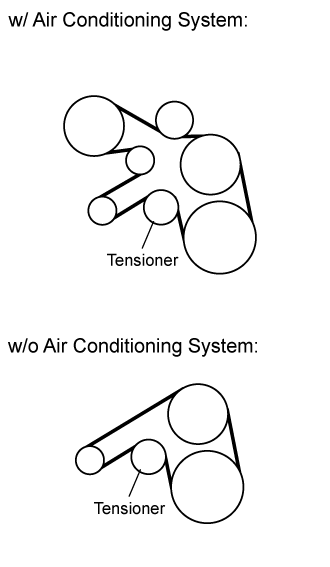
  1. A156649E01
    Remove the drive belt by rotating the tensioner pulley clockwise to loosen its tension with the pulley set bolt of the tensioner.


10. REMOVE NO. 1 AIR CLEANER HOSE

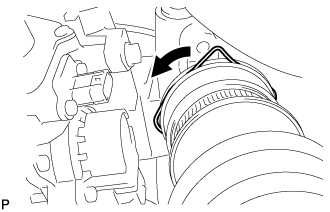
  1. A153649
    Pull the stopper upward and disconnect the No. 1 air cleaner hose from the compressor inlet elbow.


11. REMOVE AIR TUBE ASSEMBLY

  1. A272217
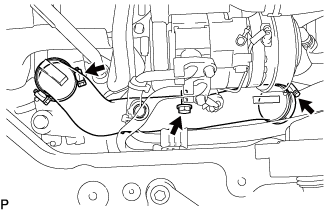
    Loosen the 2 hose clamps.

  1. Remove the 2 bolts, air tube assembly and No. 1 air cleaner hose.


12. REMOVE COMPRESSOR OUTLET ELBOW

  1. A313566
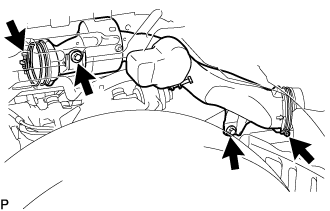
    Loosen the 2 hose clamps and remove the bolt and compressor outlet elbow.


13. DISCONNECT NO. 1 COOLER REFRIGERANT DISCHARGE HOSE (w/ Air Conditioning System)

  1. E104243
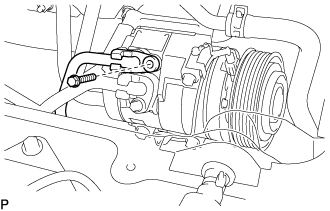
    Remove the bolt and disconnect the cooler refrigerant discharge hose from the compressor and magnetic clutch.

  1. Remove the O-ring from the cooler refrigerant discharge hose.

    NOTICE:
    Seal the openings of the disconnected parts using vinyl tape to prevent moisture and foreign matter from entering.


14. DISCONNECT NO. 1 COOLER REFRIGERANT SUCTION HOSE (w/ Air Conditioning System)

  1. E104244
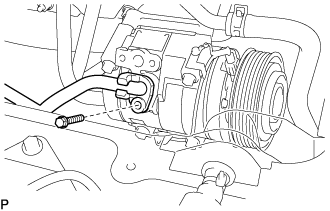
    Remove the bolt and disconnect the cooler refrigerant suction hose.

  1. Remove the O-ring from the cooler refrigerant suction hose.

    NOTICE:
    Seal the openings of the disconnected parts using vinyl tape to prevent moisture and foreign matter from entering.


15. REMOVE COMPRESSOR AND MAGNETIC CLUTCH (w/ Air Conditioning System)
  1. Disconnect the connector.

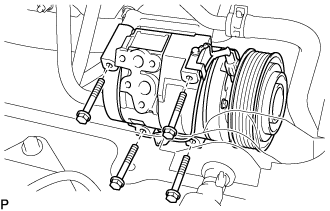
  1. E104245
    Remove the 4 bolts and compressor and magnetic clutch.


16. REMOVE NO. 1 COMPRESSOR MOUNTING BRACKET (w/ Air Conditioning System)

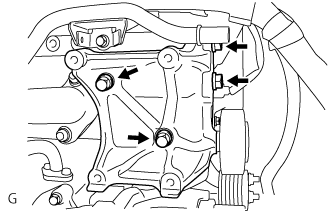
  1. A102453E01
    Remove the 4 bolts and No. 1 compressor mounting bracket.


17. REMOVE NO. 2 IDLE PULLEY ASSEMBLY (w/ Air Conditioning System)
  1. Remove the bolt, pulley plate, No. 2 idle pulley and spacer.


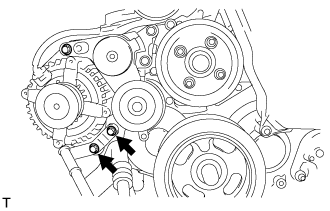
18. REMOVE GENERATOR BRACKET

  1. A102712E01
    Remove the 2 bolts, then remove the generator bracket.


19. REMOVE GENERATOR ASSEMBLY

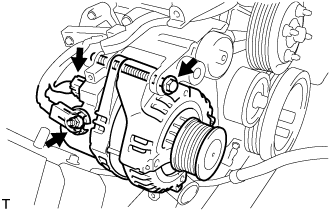
  1. A113682E01
    Disconnect the generator connector.

  1. Remove the terminal cap.

  1. Remove the nut and disconnect the wire harness from terminal B.

  1. Remove the bolt and generator.


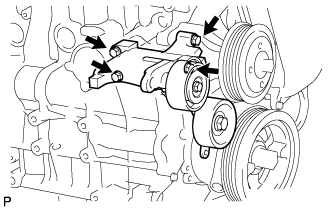
20. REMOVE V-RIBBED BELT TENSIONER ASSEMBLY

  1. A102857
    Remove the 4 bolts and V-ribbed belt tensioner.


21. DISCONNECT NO. 4 RADIATOR HOSE

22. DISCONNECT ENGINE WIRE (w/ DPF)

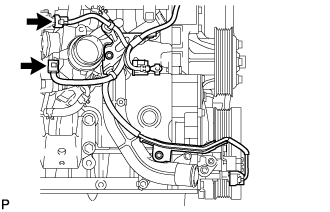
  1. A241499
    Disconnect the 2 connectors.

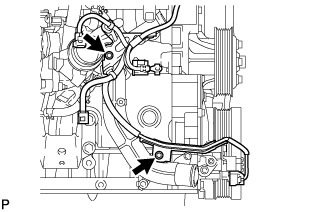
  1. A241500
    Remove the 2 bolts and disconnect the engine wire.


23. REMOVE WATER INLET

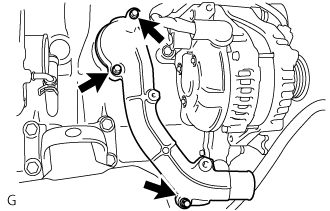
  1. A263722
    Remove the 3 bolts and water inlet.


24. REMOVE THERMOSTAT
  1. Remove thermostat and gasket.

← REMOVAL (Oct 2014 – Mar 2016)REMOVAL (from Jan 2017) →