REMOVAL
Removal / installation · Vehicles built from Jan 2015
- HINT:
- Use the same procedure for the RH and LH sides.
- The procedure listed below is for the LH side.
- Use the same procedure for the RH and LH sides.
| 1. REMOVE NO. 2 INSTRUMENT CLUSTER FINISH PANEL GARNISH |

Using a moulding remover D, detach the 3 claws and remove the instrument cluster finish panel garnish No. 2.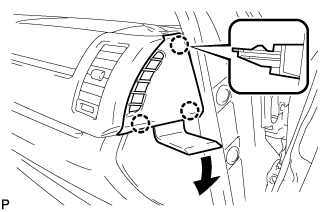

| 2. REMOVE CENTER INSTRUMENT CLUSTER FINISH PANEL SUB-ASSEMBLY |
for Standard Body:
Using a moulding remover D, detach the 4 claws in the order shown in the illustration.
for Wide Body:
Using a moulding remover D, detach the 5 claws in the order shown in the illustration.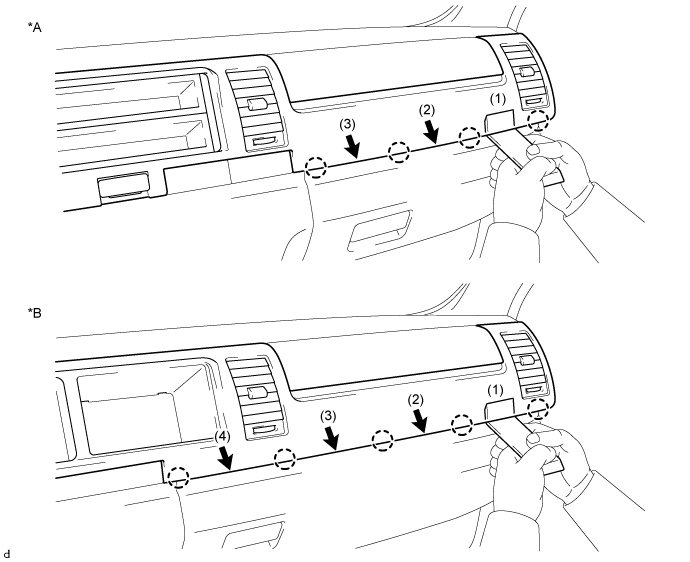
Text in Illustration *A
for Standard Body
*B
for Wide Body
Apply protective tape as shown in the illustration.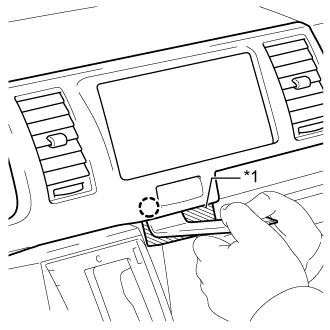
Text in Illustration *1
Protective Tape
Using a moulding remover D, detach the claw.
Detach the claw as shown in the illustration.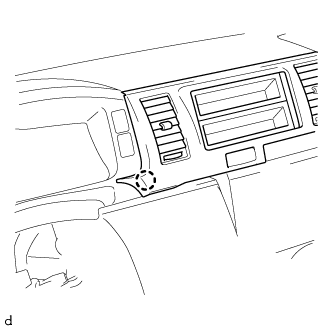
Detach the 3 claws as shown in the illustration.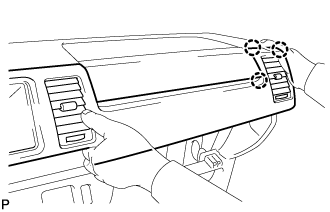
Detach the 2 claws as shown in the illustration.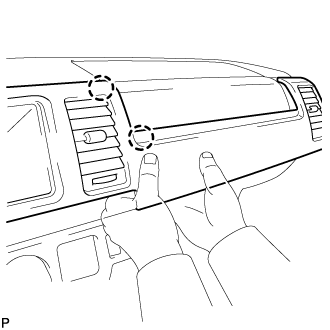
for Standard Body:
Detach the 3 claws and remove the instrument cluster finish panel sub-assembly center.
for Wide Body:
Detach the 4 claws and remove the instrument cluster finish panel sub-assembly center.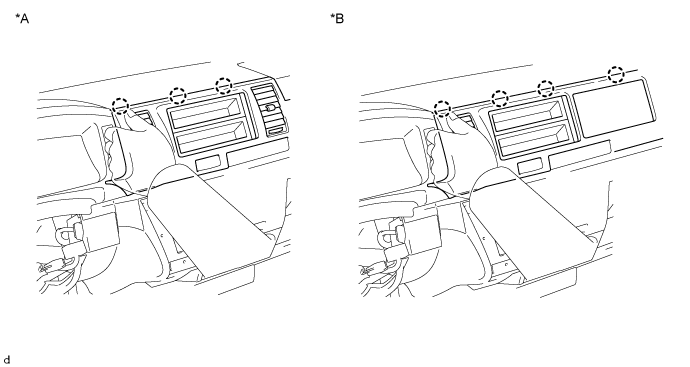
Text in Illustration *A
for Standard Body
*B
for Wide Body
| 3. REMOVE NO. 1 INSTRUMENT CLUSTER FINISH PANEL GARNISH |
Using a moulding remover D, detach the 3 claws and remove the instrument cluster finish panel garnish No. 1.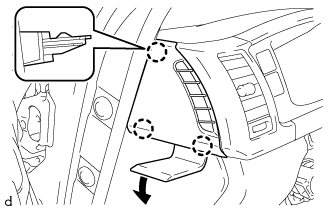
| 4. REMOVE INSTRUMENT CLUSTER FINISH PANEL ASSEMBLY |
Using a moulding remover D, detach the 4 claws and remove the instrument cluster finish panel assembly.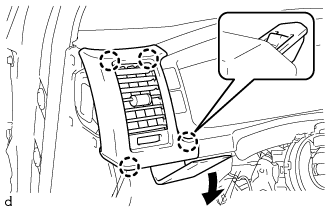
| 5. REMOVE NO. 2 INSTRUMENT CLUSTER FINISH PANEL SUB-ASSEMBLY |
Detach the 6 claws and 4 hooks and remove the instrument cluster finish panel sub-assembly.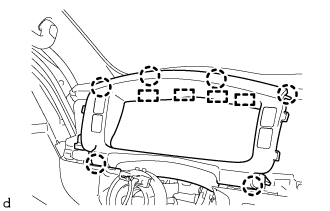
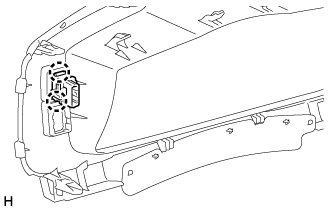
| 6. REMOVE VSC OFF SWITCH |
Disconnect the connector.
Detach the 2 claws and remove the VSC OFF switch from the No. 2 instrument cluster finish panel sub-assembly.