REMOVAL
Removal / installation · Vehicles built from Oct 2014
| 1. DISCONNECT CABLE FROM NEGATIVE BATTERY TERMINAL |
| 2. REMOVE ENGINE UNDER COVER NO.2 (w/ Engine Under Cover No.2) |

Remove the engine under cover No.2 together with the engine side under cover LH and engine side under cover RH (for Wide Body).
| 3. REMOVE FRONT SEAT ASSEMBLY RH (for Hi-back Seat Type) |
- HINT:
- Use the same procedures described for the LH side. (Click here)
| 4. REMOVE FRONT SEAT ASSEMBLY RH (for Low-back Seat Type) |
- HINT:
- Use the same procedures described for the LH side. (Click here)
| 5. REMOVE FRONT DOOR SCUFF PLATE RH |
| 6. REMOVE ENGINE SERVICE HOLE SUB COVER SUB-ASSEMBLY |
Roll up the carpet, and remove the 5 bolts and engine service hole sub cover.
| 7. REMOVE BATTERY SERVICE HOLE COVER |
Roll up the carpet.
Remove the battery service hole cover.
| 8. DISCONNECT AIR HOSE NO.5 |
Loosen the clip, and separate air hose No.5.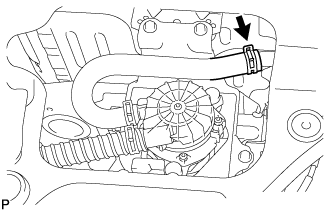

| 9. REMOVE AIR PUMP INLET PIPE |
Loosen the clip and disconnect the air hose No.6.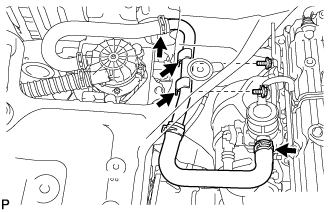
Loosen the clip and disconnect the air hose No.5.
Remove the 2 bolts and the air pump inlet pipe w/ air hose No.6.
| 10. REMOVE EXHAUST MANIFOLD HEAT INSULATOR NO.1 |
Remove the 4 bolts and the heat insulator No.1.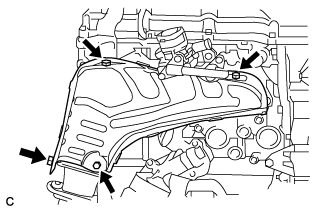
| 11. REMOVE INTAKE PIPE NO.4 |
Remove the 4 nuts and intake pipe No.4.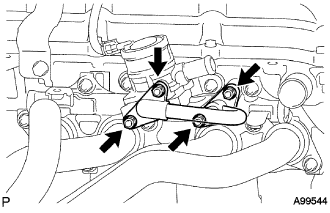
Remove the 2 gaskets.
| 12. REMOVE AIR SWITCHING VALVE ASSEMBLY |
w/ Manifold Absolute Pressure Sensor: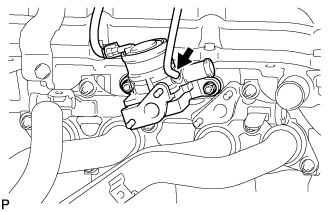
Disconnect the vacuum hose from the air switching valve assembly.
Disconnect the connector.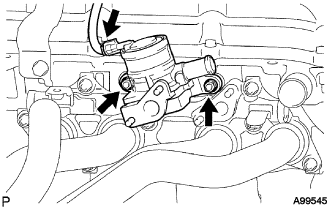
Remove the 2 nuts and the switching valve.