Home › BODY › INTERIOR › ROOF HEADLINING (w/ Roof Window Glass)REMOVAL
Removal / installation · Vehicles built Jan 2015 – Mar 2016
Versions by build date: Oct 2014 – Dec 2014 Jan 2015 – Mar 2016 Apr 2016 – Dec 2016 from Jan 2017
1.
PRECAUTION
NOTICE:
After turning the ignition switch off, waiting time may be required before disconnecting the cable from the negative (-) battery terminal. Therefore, make sure to read the disconnecting the cable from the negative (- ) battery terminal notices before proceeding with work (Click here ).
2.
DISCONNECT CABLE FROM NEGATIVE BATTERY TERMINAL
NOTICE:
When disconnecting the cable, some systems need to be initialized after the cable is reconnected (Click here ).
3.
REMOVE NO. 2 ROOM LIGHT ASSEMBLY
HINT:
Use the same procedure described for the other side.
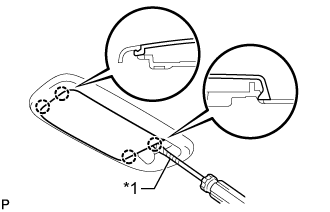
Using a screwdriver, detach the 4 claws and remove the light cover.
HINT:
Tape the screwdriver tip before use.
Text in Illustration
*1
Protective Tape
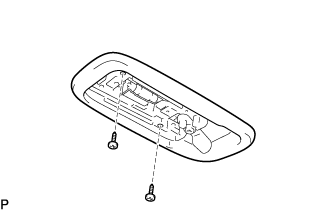
Remove the 2 screws and No. 2 room light assembly. Disconnect the connector.
4.
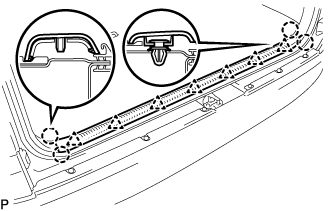
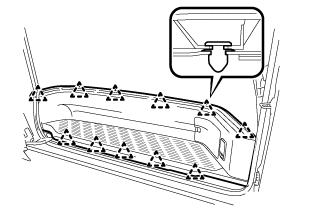
REMOVE BACK DOOR SCUFF PLATE (w/ Rear Air Conditioning System)
Detach the 7 clips and 4 claws and remove the back door scuff plate.
5.
REMOVE BACK DOOR WEATHERSTRIP (w/ Rear Air Conditioning System)
6.
DISCONNECT REAR NO. 4 SEAT BELT ASSEMBLY OUTER (w/ Rear Air Conditioning System)
HINT:
Use the same procedure described for the other side.
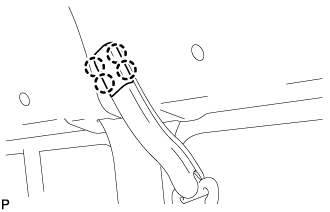
Using a screwdriver, detach the 4 claws and open the shoulder side cover of the rear No. 4 seat belt assembly outer.
HINT:
Tape the screwdriver tip before use.
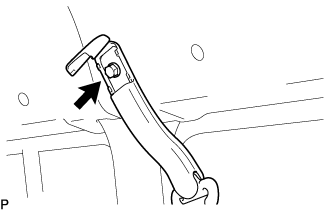
Loosen the bolt and disconnect the shoulder side of the rear No. 4 seat belt assembly outer.
7.
REMOVE ROOF HEADLINING MOULDING (w/o Rear Air Conditioning System)
Detach the 18 clips and 2 roof headlining mouldings.
HINT:
If any clip remains on the body side, use a clip remover.
8.
REMOVE REAR ROOF HEADLINING GARNISH (w/o Rear Air Conditioning System)
Detach the 18 clips and remove the rear roof headlining garnish.
9.
REMOVE REAR ROOF HEADLINING GARNISH (w/ Rear Air Conditioning System)
Detach the 18 clips and remove the rear roof headlining garnish.
10.
REMOVE ROOF CLIP (w/o Rear Air Conditioning System)
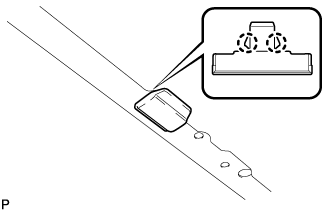
Using a screwdriver, detach the 2 claws and remove the roof clip.
HINT:
Tape the screwdriver tip before use.
11.
REMOVE NO. 4 ROOF HEADLINING (w/o Rear Air Conditioning System)
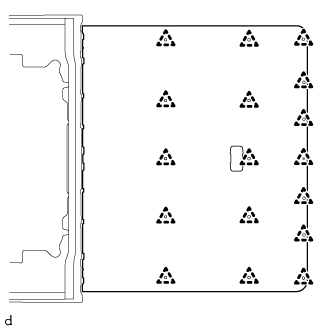
Remove the 17 clips and No. 4 roof headlining.
12.
REMOVE NO. 3 ROOF HEADLINING (w/o Rear Air Conditioning System)
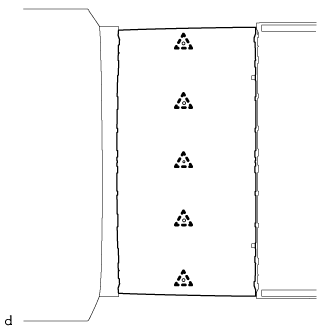
Remove the 3 clips and No. 3 roof headlining.
13.
REMOVE NO. 2 ROOF HEADLINING (w/o Rear Air Conditioning System)
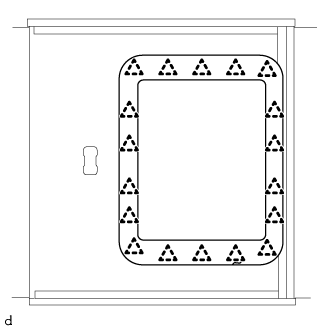
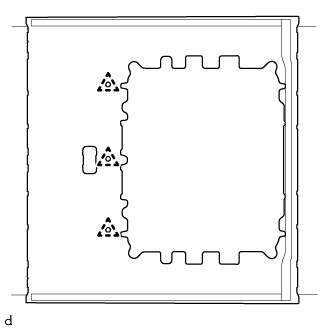
Remove the 5 clips and No. 2 roof headlining.
14.
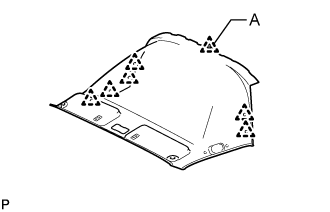
REMOVE NO. 2 ROOF HEADLINING (w/ Rear Air Conditioning System)
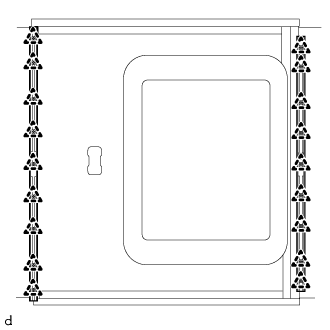
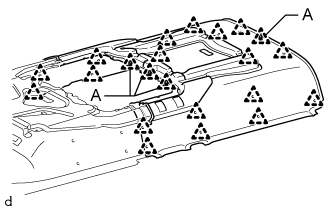
Using a clip remover, remove the 18 clips.
Using a clip remover, detach the 4 clips A and remove the No. 2 roof headlining.
15.
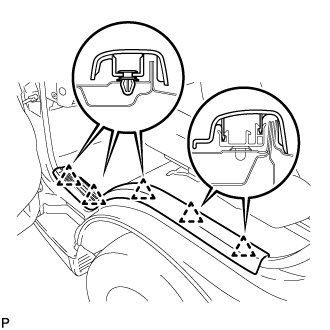
REMOVE FRONT DOOR SCUFF PLATE LH
Detach the 5 clips and remove the front door scuff plate LH.
16.
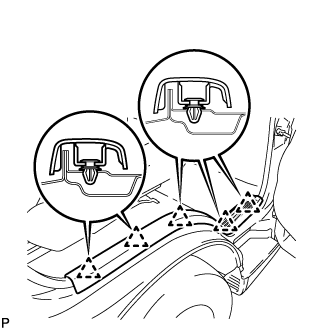
REMOVE FRONT DOOR SCUFF PLATE RH
Detach the 5 clips and remove the front door scuff plate RH.
17.
REMOVE FRONT DOOR OPENING TRIM RH
18.
REMOVE FRONT DOOR OPENING TRIM LH
19.
REMOVE ASSIST GRIP PLUG
Using a screwdriver, detach the 4 claws and remove the 2 assist grip plugs.
HINT:
Tape the screwdriver tip before use.
Use the same procedure described for the other side.
20.
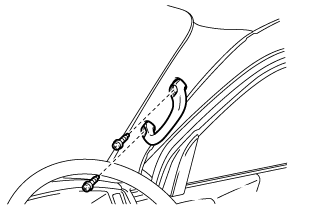
REMOVE ASSIST GRIP ASSEMBLY
Remove the 2 screws and assist grip assembly.
HINT:
Use the same procedure described for the other side.
21.
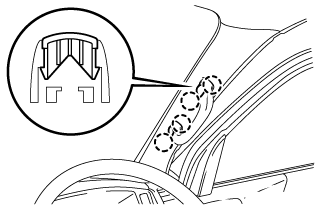
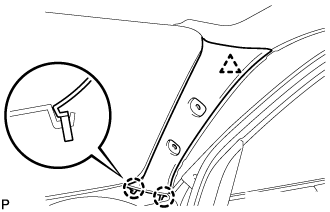
REMOVE FRONT PILLAR GARNISH RH
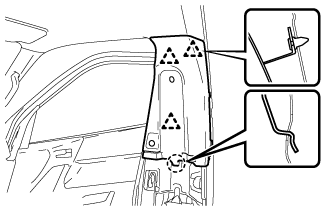
Detach the clip and 2 claws and remove the front pillar garnish RH.
22.
REMOVE FRONT PILLAR GARNISH LH
HINT:
Use the same procedure described for the RH side.
23.
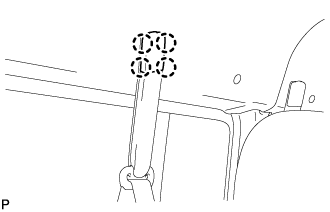
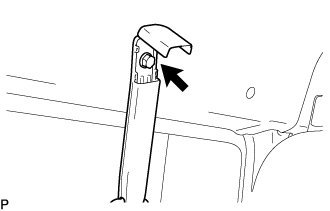
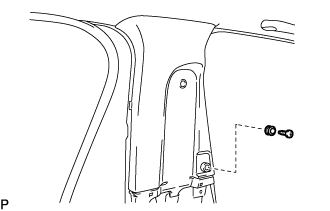
DISCONNECT REAR NO. 3 SEAT BELT ASSEMBLY OUTER (w/ Rear Air Conditioning System)
Using a screwdriver, detach the 4 claws and open the shoulder side cover of the rear No. 3 seat belt assembly outer.
HINT:
Tape the screwdriver tip before use.
Loosen the bolt and disconnect the shoulder side of the rear No. 3 seat belt assembly outer.
24.
REMOVE ASSIST GRIP (w/o Rear Air Conditioning System)
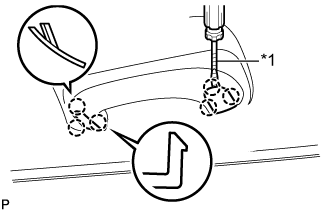
Using a screwdriver, detach the 6 claws and open the 2 assist grip covers.
HINT:
Tape the screwdriver tip before use.
Text in Illustration
*1
Protective Tape
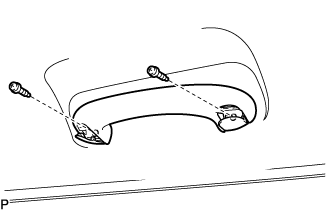
Remove the 2 screws and assist grip.
25.
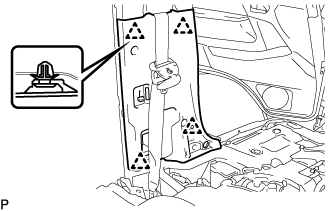
REMOVE CENTER PILLAR GARNISH COVER LOWER LH (w/ Rear Air Conditioning System)
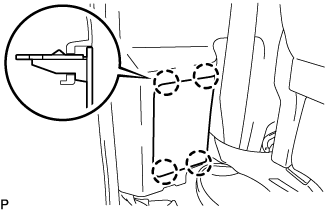
Using a screwdriver, detach the 4 claws and remove the center pillar garnish cover lower LH.
HINT:
Tape the screwdriver tip before use.
26.
REMOVE SEAT ASSEMBLY LH (w/ Rear Air Conditioning System)
Disconnect connector.
Remove the nut and 3 bolts. Remove the seat assembly LH.
27.
REMOVE SEAT BELT ANCHOR COVER (w/ Rear Air Conditioning System)
Remove the 2 clips. Detach the claw and then remove the seat belt anchor cover.
28.
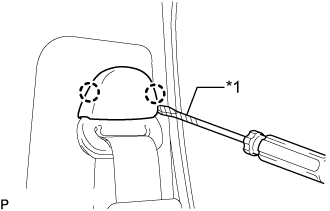
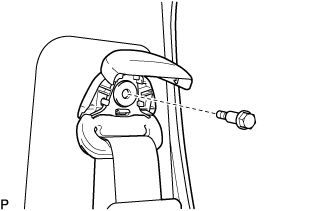
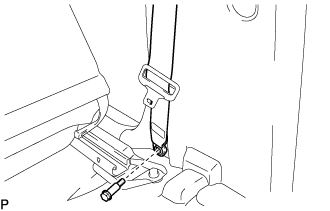
DISCONNECT FRONT SEAT OUTER BELT ASSEMBLY LH (w/ Rear Air Conditioning System)
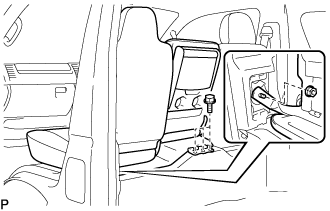
Remove the bolt and disconnect the front seat outer belt assembly LH.
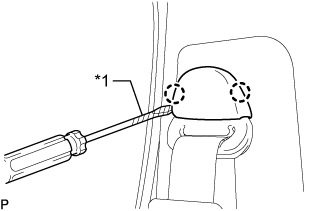
Using a screwdriver, detach the 2 claws and open the cover.
HINT:
Tape the screwdriver tip before use.
Text in Illustration
*1
Protective Tape
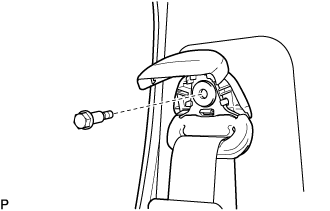
Remove the bolt and disconnect the front seat outer belt assembly LH.
29.
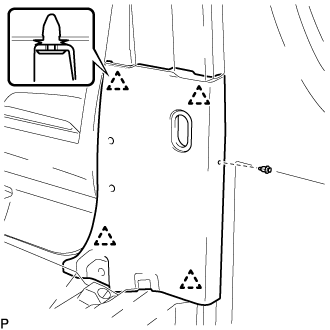
REMOVE CENTER PILLAR GARNISH LOWER LH (w/ Rear Air Conditioning System)
Using a screwdriver, detach the 4 clips and remove the center pillar garnish lower LH.
30.
REMOVE ENGINE SERVICE HOLE COVER HOOK NO. 2 LH (w/ Rear Air Conditioning System)
Remove the screw and the engine service hole cover hook No. 2 LH.
31.
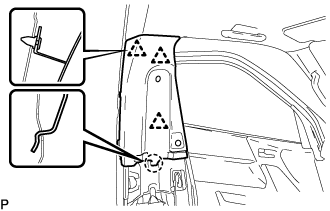
REMOVE CENTER PILLAR GARNISH LH (w/ Rear Air Conditioning System)
Using a screwdriver, detach the 3 clips and claw, and remove the center pillar garnish LH.
32.
REMOVE REAR DOOR SCUFF PLATE RH (w/ Rear Air Conditioning System)
Detach the 11 clips and remove the rear door scuff plate RH.
33.
REMOVE SLIDE DOOR WEATHERSTRIP NO. 1 RH (w/ Rear Air Conditioning System)
34.
DISCONNECT FRONT SEAT OUTER BELT ASSEMBLY RH (w/ Rear Air Conditioning System)
Remove the bolt and disconnect front seat outer belt assembly RH.
Using a screwdriver, detach the 2 claws and open the cover.
HINT:
Tape the screwdriver tip before use.
Text in Illustration
*1
Protective Tape
Remove the bolt and disconnect front seat outer belt assembly RH.
35.
REMOVE CENTER PILLAR GARNISH LOWER RH (w/ Rear Air Conditioning System)
Remove the clip. Using a screwdriver, detach the 4 clips and remove the center pillar garnish lower RH.
HINT:
Tape the screwdriver tip before use.
36.
REMOVE CENTER PILLAR GARNISH RH (w/ Rear Air Conditioning System)
Detach the 3 clips, claw and remove the center pillar garnish RH.
37.
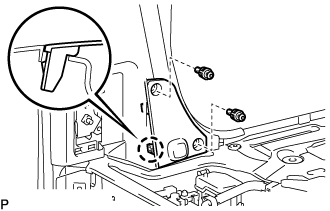
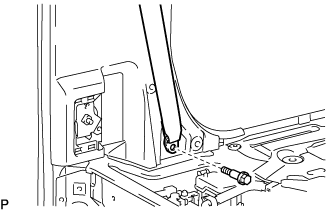
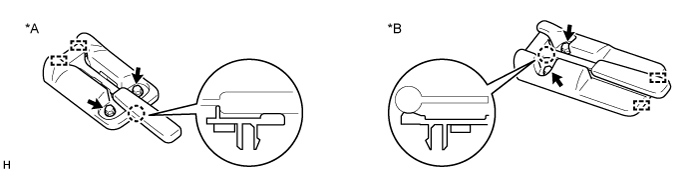
REMOVE BACK WINDOW GLASS HAMMER ASSEMBLY (w/ Rear Air Conditioning System)
HINT:
Use the same procedure for all back window glass hammers.
Remove the 2 bolts.
Detach the claw and 2 guides.
Disconnect the connector and remove the back window glass hammer.
Text in Illustration
*A
for Super Long Wheelbase
*B
for Long Wheelbase
38.
REMOVE NO. 1 ROOM LIGHT ASSEMBLY
Using a screwdriver, detach the 4 claws and remove the light cover.
HINT:
Tape the screwdriver tip before use.
Text in Illustration
*1
Protective Tape
Remove the 2 screws and No. 1 room light assembly. Disconnect the connector.
39.
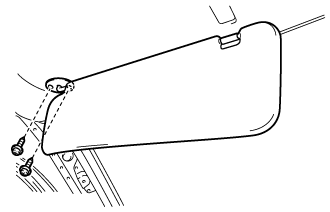
REMOVE VISOR ASSEMBLY LH
Remove the 2 screws and visor assembly LH.
40.
REMOVE VISOR ASSEMBLY RH
HINT:
Use the same procedures described for the LH side.
41.
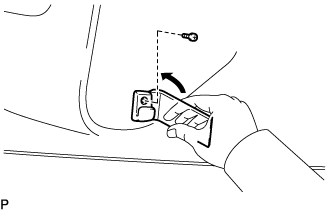
REMOVE VISOR HOLDER
HINT:
Use the same procedure described for the other side.
Remove the screw. Using a moulding remover, detach the claw and remove the visor holder.
42.
REMOVE REAR COOLER CONTROL PANEL (w/ Rear Air Conditioning System)
Release the 4 clips and 4 claws, and disconnect the rear cooler control panel. Disconnect the connector and remove the rear cooler control panel.
43.
REMOVE NO. 1 ROOF HEADLINING (w/o Rear Air Conditioning System)
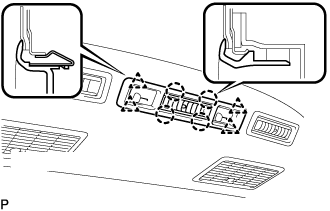
Using a clip remover, remove the 6 clips.
Using a clip remover, detach the clip A and remove the No. 1 roof headlining.
44.
REMOVE NO. 1 ROOF HEADLINING (w/ Rear Air Conditioning System)
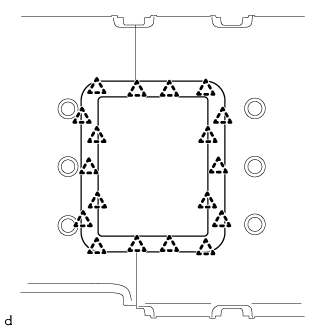
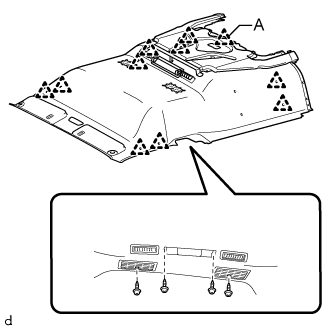
Remove the 4 screws.
Using a clip remover, remove the 10 clips.
Using a clip remover, detach the clip A and remove the roof headlining No. 1.