Removal / installation · Vehicles built from Oct 2014
1.
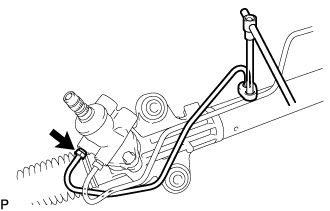
REMOVE STEERING LEFT TURN PRESSURE TUBE
Using a union nut wrench, remove the steering left turn pressure tube.
2.
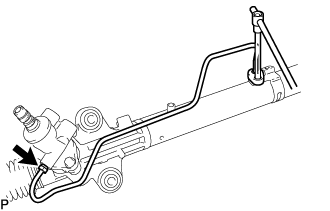
REMOVE STEERING RIGHT TURN PRESSURE TUBE
Using a union nut wrench, remove the steering right turn pressure tube.
3.
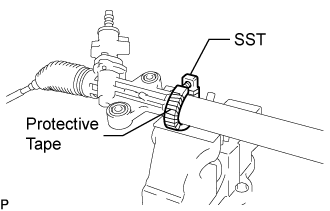
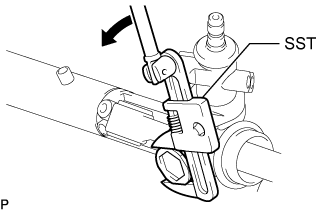
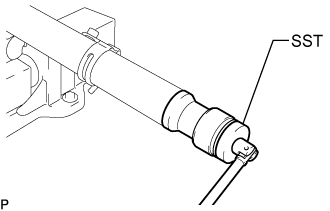
FIX POWER STEERING LINK ASSEMBLY
Using SST, secure the power steering link assembly.
SST
09612-00012
HINT:
Tape the SST before use.
4.
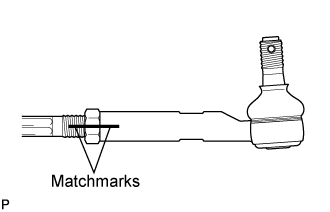
REMOVE TIE ROD END SUB-ASSEMBLY LH
Put matchmarks on the tie rod end sub-assembly LH and the steering rack end sub-assembly.
Loosen the lock nut, and remove the tie rod end sub-assembly LH and the lock nut.
5.
REMOVE TIE ROD END SUB-ASSEMBLY RH
HINT:
Perform the same procedure as for the LH side.
6.
REMOVE STEERING RACK BOOT CLIP
Using pliers, remove the 2 steering rack boot clips.
7.
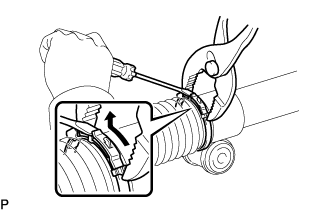
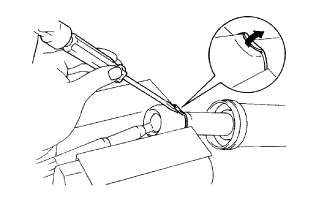
REMOVE STEERING RACK BOOT NO.2 CLAMP
Using pliers and a screwdriver, remove the steering rack boot No.2 clamp as shown in the illustration.
NOTICE:
Be careful not to damage the boot.
8.
REMOVE STEERING RACK BOOT NO.1 CLAMP
HINT:
Perform the same procedure as for the steering rack boot No.2 clamp.
9.
REMOVE STEERING RACK BOOT NO.2
10.
REMOVE STEERING RACK BOOT NO.1
11.
REMOVE STEERING RACK END SUB-ASSEMBLY
Using a screwdriver and a hammer, unstake the RH and LH claw washers.
NOTICE:
Avoid any impact to the steering rack.
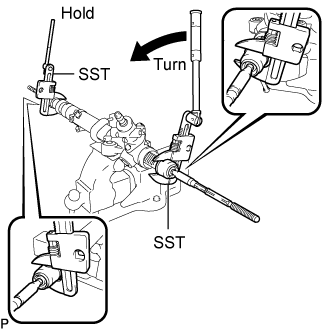
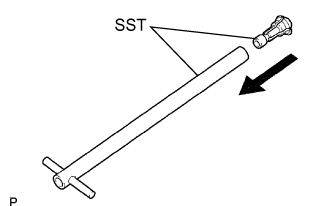
Using SST, remove the steering rack end sub-assembly (LH side) and the claw washer.
SST
09922-10010
NOTICE:
Use SST 09922-10010 following the direction shown in the illustration.
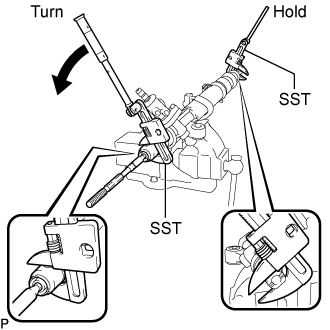
Using SST, remove the steering rack end sub-assembly (RH side) and the claw washer.
SST
09922-10010
NOTICE:
Use SST 09922-10010 following the direction shown in the illustration.
HINT:
Using SST, hold the rack and remove the steering rack end sub-assembly.
12.
REMOVE POWER STEERING RACK GUIDE
Using SST, remove the power steering rack guide spring cap nut.
SST
09922-10010
NOTICE:
Use SST 09922-10010 following the direction shown in the illustration.
Using a straight hexagon wrench 24 mm (0.94 in.), remove the power steering rack guide spring cap.
Remove the compression spring and the power steering rack guide.
Remove the rack guide seat from the power steering rack guide.
13.
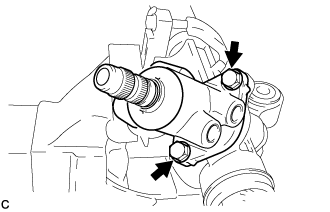
REMOVE POWER STEERING CONTROL VALVE ASSEMBLY
Remove the 2 bolts and the power steering control valve assembly.
Remove the gasket.
14.
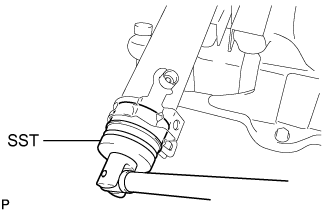
REMOVE CYLINDER END STOPPER
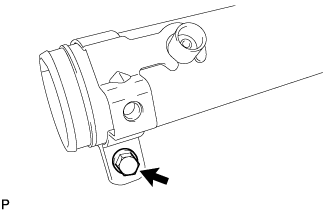
Body type narrow:
Loosen the bolt.
Using SST, remove the cylinder end stopper from the rack housing.
SST
09631-20120
Remove the tube support retainer.
Body type wide:
Using SST, remove the cylinder end stopper and the spacer from the rack housing.
SST
09631-20120
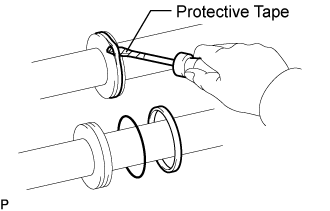
Using a screwdriver, remove the O-ring from the cylinder end stopper.
NOTICE:
Be careful not to damage the cylinder end stopper.
HINT:
Tape the screwdriver tip before use.
Using a screwdriver, remove the bushing from the cylinder end stopper.
NOTICE:
Be careful not to damage the cylinder end stopper.
HINT:
Tape the screwdriver tip before use.
15.
REMOVE POWER STEERING RACK
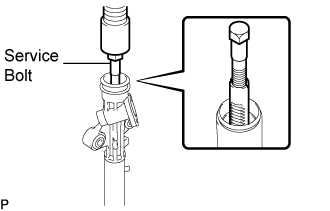
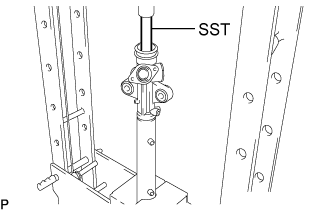
Temporarily install the service bolt to the power steering rack.
Recommended service bolt:
Thread diameter:
14 mm (0.55 in.)
Thread pitch:
1.5 mm (0.059 in.)
Using a press, remove the power steering rack.
Remove the cylinder end stopper oil seal from the power steering rack.
Using a screwdriver, remove the oil seal and the O-ring from the power steering rack.
NOTICE:
Be careful not to damage the oil seal groove on the power steering rack.
HINT:
Tape the screwdriver tip before use.
16.
REMOVE POWER STEERING CYLINDER TUBE OIL SEAL
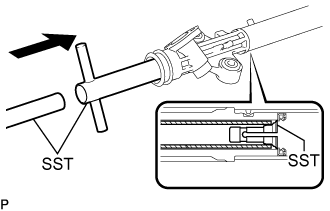
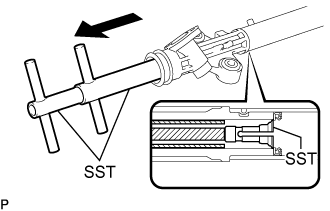
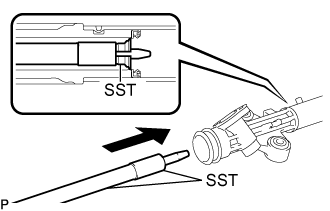
Install SST (09612-07120) to SST (09612-07210).
SST
09612-70100
(09612-07120, 09612-07210)
NOTICE:
Lightly apply MP grease to the tip of SST (09612-07230) and inside of SST (09612-07210 and 09612-07120) before use.
Completely install SST (09612-07120) to SST (09612-07210) to prevent damage to the inside of the rack housing.
Insert SST (09612-07210) into the rack housing at a slant until it comes in contact with the power steering cylinder tube oil seal. Install SST (09612-07220) to SST (09612-07210).