Remove the drain plug and gasket, and drain the oil.
Install the drain plug with a new gasket.
Torque:
49 N*m{
500 kgf*cm
, 36 ft.*lbf
}
2.
REMOVE PROPELLER SHAFT ASSEMBLY (for Super Long Wheelbase)
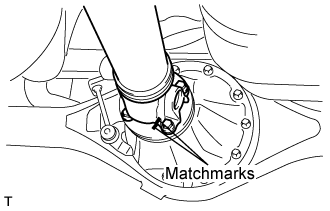
Put matchmarks on both flanges.
Remove the 4 nuts, bolts and washers.
HINT:
If the flange connection is hard to separate, temporarily tighten one nut only and evenly tap the flange with a brass bar and hammer to separate the propeller with center bearing shaft assembly from the differential companion flange.
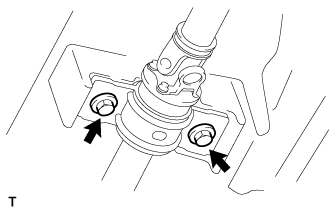
Remove the 2 bolts and center support bearing assembly No.1.
Remove the propeller with center bearing shaft assembly.
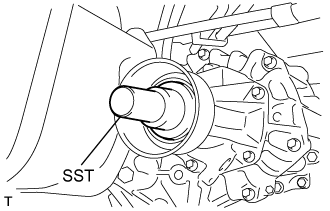
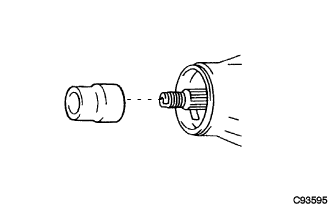
Insert SST in the transmission to prevent oil leakage.
NOTICE:
Do not damage the oil seal.
Use the following SST for the automatic transmission.
SST
09325-40010
Use the following SST for the manual transmission.
SST
09325-20010
3.
REMOVE PROPELLER SHAFT ASSEMBLY (for Long Wheelbase)
Put matchmarks on both flanges.
Remove the 4 nuts, bolts and washers.
HINT:
If the flange connection is hard to separate, temporarily tighten one nut only and evenly tap the flange with a brass bar and hammer to separate the propeller shaft assembly from the differential companion flange.
Remove the propeller shaft assembly.
Insert SST in the transmission to prevent oil leakage.
NOTICE:
Do not damage the oil seal.
Use the following SST for the automatic transmission
SST
09325-40010
Use the following SST for the manual transmission
SST
09325-20010
4.
REMOVE REAR DRIVE PINION NUT
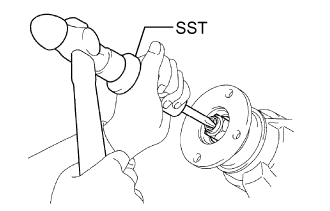
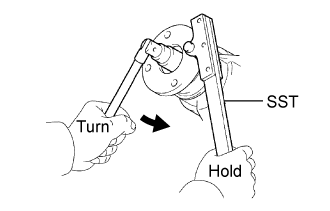
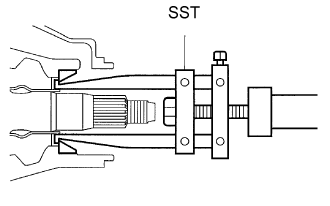
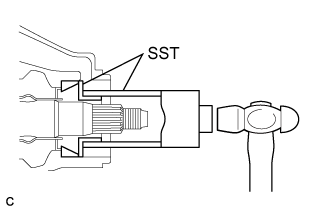
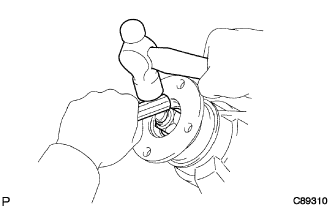
Using SST and a hammer, release the staked part of the drive pinion nut.
SST
09930-00010
NOTICE:
Be sure to use SST with the tapered surface facing the shaft.
Do not grind the tip of the SST with a grinder etc.
Completely loosen the staked part of the nut when removing it.
Do not damage the threads of the drive pinion.
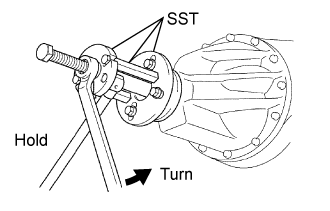
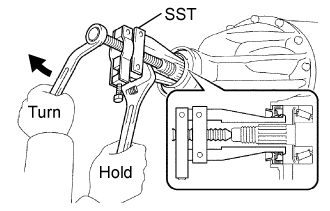
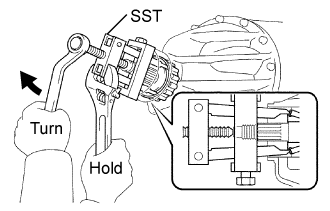
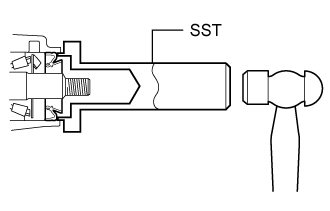
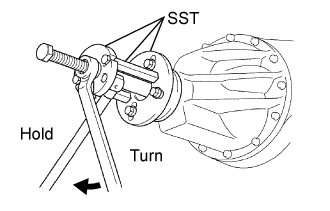
Using SST to hold the flange, remove the drive pinion nut.
Apply grease to the threads and tip of the SST center bolt before use.
Coat the threads of a new drive pinion nut with hypoid gear oil LSD.
Using SST, hold the flange.
SST
09330-00021
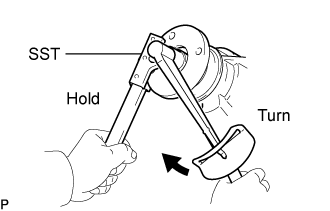
Using a socket wrench (30 mm) and torque wrench, gradually tighten the drive pinion nut within the adjustment range of the differential drive pinion preload.
Torque:
370 N*m{
3,770 kgf*cm
, 273 ft.*lbf
}
or less
17.
INSPECT AND ADJUST DIFFERENTIAL DRIVE PINION PRELOAD
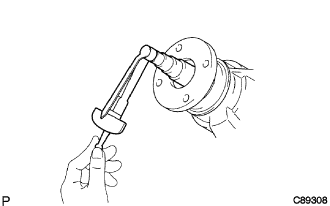
Using a torque wrench, measure the preload of the drive pinion.
Preload (at starting):
New bearing:
1.01 to 1.60 N*m (11 to 16 kgf*cm, 9 to 14 in.*lbf)
Reused bearing:
0.52 to 0.81 N*m (6 to 8 kgf*cm, 5 to 7 in.*lbf)
If the preload is less than the specified minimum value, check the preload while retightening the drive pinion nut by 5 to 10° to adjust it into the specified range.
If the preload is less than the specified minimum value even when the tightening torque of the drive pinion nut is greater than the specified maximum value, loosen the nut and check that the threads of the drive pinion nut and drive pinion are not stripped.
If the threads are not stripped, replace the bearing spacer. Apply hypoid gear oil LSD to the threads of the drive pinion and repeat the procedure.
18.
INSTALL REAR DRIVE PINION NUT
Using a chisel and hammer, stake the drive pinion nut.
19.
INSTALL PROPELLER SHAFT ASSEMBLY (for Super Long Wheelbase)
Remove the SST from the extension housing.
Install the propeller with center bearing shaft assembly in the extension housing.
Install the center support bearing assembly No.1, and temporarily tighten the 2 bolts.
Align the matchmarks on the propeller shaft flange and differential flange.
Install the propeller shaft assembly with the 4 nuts, 4 bolts and 4 washers.
Torque:
74 N*m{
755 kgf*cm
, 54 ft.*lbf
}
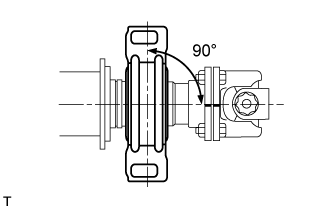
Check that the center line of the bracket is at right angles to the shaft axial direction.
Adjust the center support bearing assembly No.1.
HINT:
With the vehicle unladen, adjust the center support bearing No.1 to maintain the angles, as shown.
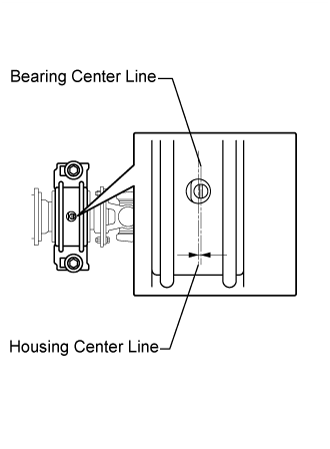
In the same conditions, check the center line in the axial direction. Adjust the bearing if necessary.
The center bearing center line and center bearing housing center line must be adjusted to within -1.0 to 1.0 mm (-0.0394 to 0.0394 in.) of each other in the vehicle's longitudinal direction with the vehicle unladen.
Tighten the 2 bolts.
Torque:
36 N*m{
369 kgf*cm
, 27 ft.*lbf
}
20.
INSTALL PROPELLER SHAFT ASSEMBLY (for Long Wheelbase)
Remove the SST from the extension housing.
Install the propeller shaft assembly in the extension housing.
Align the matchmarks on the propeller shaft flange and differential flange.
Install the propeller shaft assembly with the 4 nuts, 4 bolts and 4 washers.
Torque:
74 N*m{
755 kgf*cm
, 54 ft.*lbf
}
21.
FILL DIFFERENTIAL OIL
Remove the differential filler plug and gasket.
Fill with oil.
Oil grade:
Toyota Genuine Differential Gear oil GL-5 or equivalent
Recommended oil viscosity
Above -18°C (0°F)
SAE 90
Below -18°C (0°F)
SAE 80W or 80W-90
Standard differential oil capacity
Body Type
Specified Condition
Standard Body
3.10 liters (3.28 US qts, 2.73 Imp. qts)
Wide Body
3.25 liters (3.43 US qts, 2.86 Imp. qts)
Check the oil level.
Install the differential filler plug with a new gasket.
Torque:
49 N*m{
500 kgf*cm
, 36 ft.*lbf
}
NOTICE:
After replacing the oil, recheck the oil level after driving.
22.
INSPECT AND ADJUST DIFFERENTIAL OIL
Stop the vehicle on a level place.
Remove the differential filler plug and gasket.
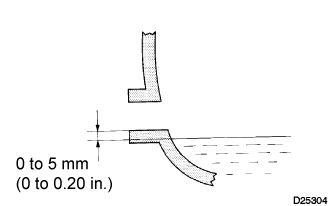
Check that the oil surface is within 5 mm (0.20 in.) of the lowest position of the inner surface of the differential filler plug opening.
NOTICE:
Excessively large or small amounts of oil may cause trouble.
After replacing oil, drive the vehicle and check the oil level.
HINT:
If necessary, fill the rear differential carrier with hypoid gear oil.
Check for oil leakage when the oil level is low.
Install the differential filler plug and a new gasket.