INSTALLATION
Removal / installation · Vehicles built from Jan 2017
Versions by build date: Oct 2014 – Dec 2016 from Jan 2017
| 1. INSTALL FRONT SEAT INNER BELT ASSEMBLY (for Separate Seat Type) |

Install the front seat inner belt assembly with the bolt.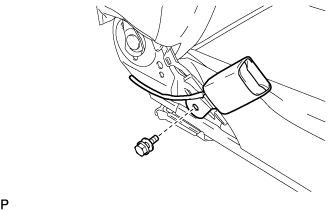

- Torque:
- 42 N*m{ 428 kgf*cm , 31 ft.*lbf }
for Driver side: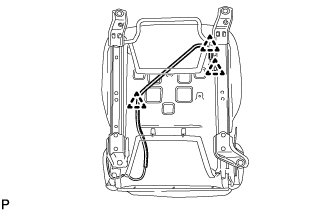
Install the 3 clamps.
for Passenger side: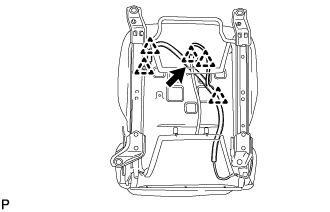
Install the 5 clamps.
Connect the connector.
| 2. INSTALL FRONT SEAT CUSHION SHIELD INNER LH (for Separate Seat Type) |
| 3. INSTALL FRONT SEAT ASSEMBLY (for Separate Seat Type) |
for Low-back seat type (Click here)
| 4. INSTALL FRONT SEAT INNER BELT ASSEMBLY (for Split Bench Seat Type) |
Install the front seat inner belt assembly with the bolt.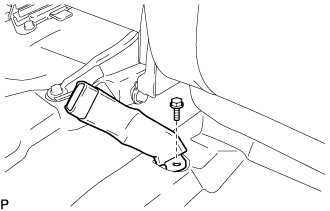
- Torque:
- 42 N*m{ 428 kgf*cm , 31 ft.*lbf }
w/ Seat belt warning:
Connect the connector.
| 5. INSTALL SEPARATE TYPE FRONT SEAT CUSHION COVER WITH PAD (for Split Bench Seat Type) |
w/o Seat belt warning occupant detection sensor: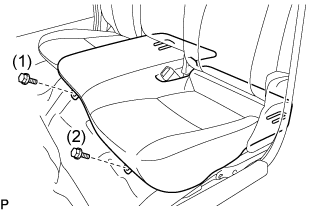
Install the separate type front seat cushion cover with pad with the 2 bolts.
- Torque:
- 39 N*m{ 398 kgf*cm , 29 ft.*lbf }
- NOTICE:
- Make sure that the wire frame of the separate type front seat cushion cover is completely engaged.
- Tighten the bolts in the following order.
- Temporarily tighten bolt (2).
- Fully tighten bolt (1).
- Fully tighten bolt (2).
- Make sure that the wire frame of the separate type front seat cushion cover is completely engaged.
w/ Seat belt warning occupant detection sensor: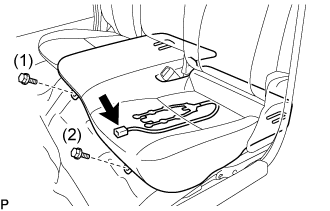
Connect the connector.
Install the separate type front seat cushion cover with pad with the 2 bolts.
- Torque:
- 39 N*m{ 398 kgf*cm , 29 ft.*lbf }
- NOTICE:
- Make sure that the wire frame of the separate type front seat cushion cover is completely engaged.
- Tighten the bolts in the following order.
- Temporarily tighten bolt (2).
- Fully tighten bolt (1).
- Fully tighten bolt (2).
- Make sure that the wire frame of the separate type front seat cushion cover is completely engaged.