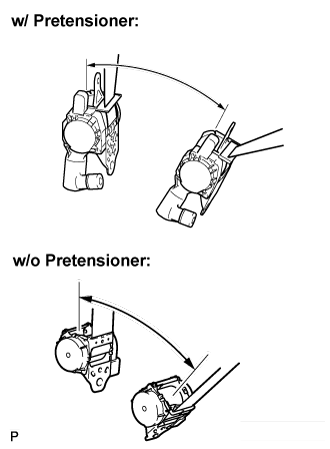
Check the degree of tilt when the ELR begins to lock.
Check that the belt does not lock at less than 15 degrees of tilt in any direction but locks at over 45 degrees of tilt when gently moving the installed retractor.
NOTICE:
Do not disassemble the retractor.
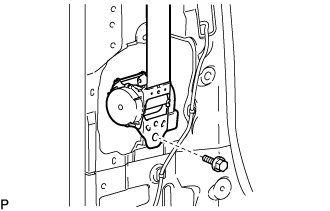
w/o Pretensioner:
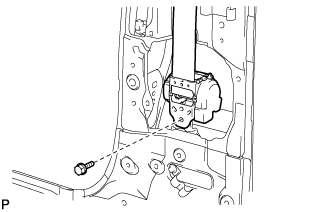
Install the front seat outer belt assembly LH with the bolt.
Torque:
42 N*m{
428 kgf*cm
, 31 ft.*lbf
}
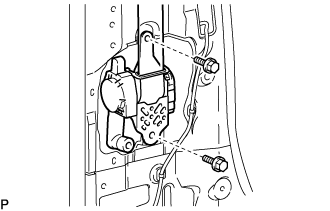
w/ Pretensioner:
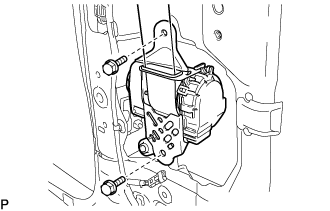
Temporarily install the front seat outer belt assembly LH with the 2 bolts.
Fully tighten the upper side bolt first, then the lower side bolt to install the front seat outer belt assembly LH.
Torque:
For upper bolt:
8.5 N*m{
87 kgf*cm
, 75 in.*lbf
}
For lower bolt:
42 N*m{
428 kgf*cm
, 31 ft.*lbf
}
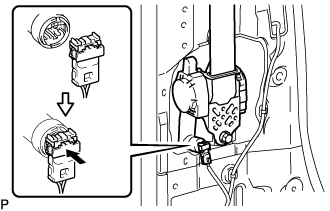
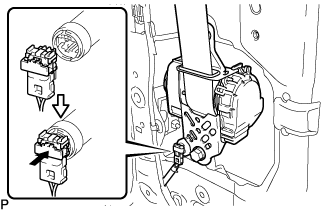
Connect the pretensioner connector and lock the locking button.
NOTICE:
Securely lock the locking button.
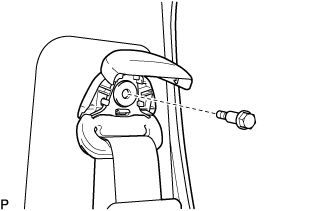
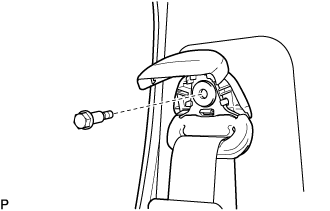
Connect the shoulder side of the front seat outer belt assembly LH shoulder side with the bolt.
Torque:
42 N*m{
428 kgf*cm
, 31 ft.*lbf
}
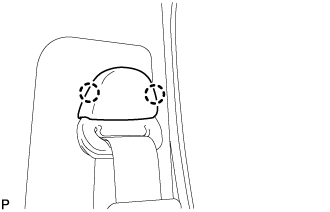
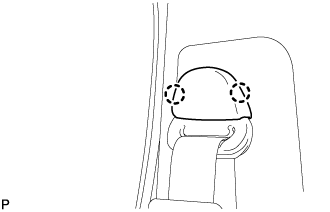
Engage the 2 claws to install the shoulder side cover of the front seat outer belt assembly LH.
2.
INSTALL SIDE NO.1 TRIM ASSEMBLY LH (for Full-trim)
3.
INSTALL QUARTER TRIM PANEL ASSEMBLY REAR LH (for Full-trim)
4.
INSTALL BACK DOOR WEATHERSTRIP (for Full-trim LH Side)
5.
INSTALL BACK DOOR SCUFF PLATE (for Full-trim LH Side)
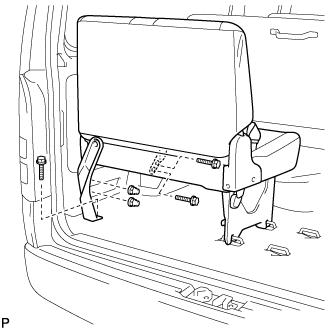
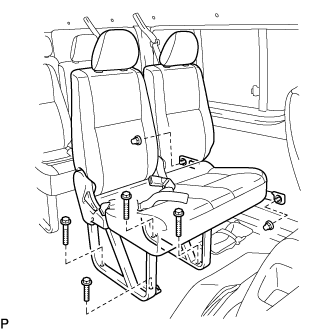
Secure the rear No.4 seat assembly with the 2 locks
Install the rear No.4 seat assembly with the 3 bolts and 2 nuts.
Torque:
39 N*m{
398 kgf*cm
, 29 ft.*lbf
}
NOTICE:
After installing the rear No.4 seat assembly, fold down the seatback onto the seat cushion, lift the side of the rear No.4 seat assembly, and drop it to engage the locks securely.
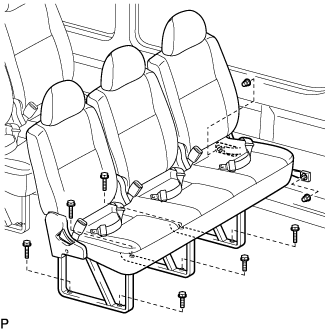
Install the rear No.2 seat assembly with the 4 bolts and 2 nuts.
Torque:
39 N*m{
398 kgf*cm
, 29 ft.*lbf
}
HINT:
Use the same procedure for the second row.
Use the same procedure for the third row.
9.
INSTALL CENTER PILLAR GARNISH LOWER LH (for Semi-trim)
10.
CONNECT FRONT SEAT OUTER BELT ASSEMBLY LH
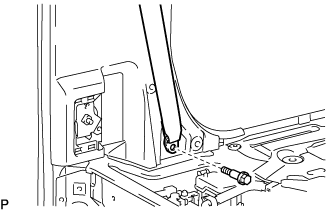
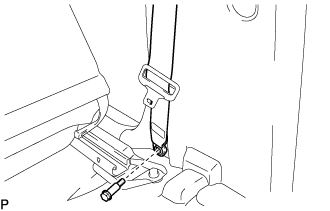
Connect the floor side of the front seat outer belt assembly LH with the bolt.
Torque:
42 N*m{
428 kgf*cm
, 31 ft.*lbf
}
Check if the ELR locks.
NOTICE:
This check should be performed with the outer belt assembly installed.
With the belt assembly installed, check that the belt locks when it is pulled out quickly.
11.
INSTALL SEAT BELT ANCHOR COVER (for LH Side)
12.
INSTALL SEAT ASSEMBLY LH
13.
INSTALL CENTER PILLAR GARNISH COVER LOWER LH
14.
INSTALL SEPARATOR BAR BRACKET LOWER (for Semi-trim LH Side)
15.
INSTALL FRONT DOOR OPENING TRIM LH
16.
INSTALL FRONT DOOR SCUFF PLATE LH
17.
INSTALL FRONT SEAT OUTER BELT ASSEMBLY RH
Check the degree of tilt when the ELR begins to lock.
Check that the belt does not lock at less than 15 degrees of tilt in any direction but locks at over 45 degrees of tilt when gently moving the installed retractor.
NOTICE:
Do not disassemble the retractor.
w/o Pretensioner:
Install the front seat outer belt assembly RH with the bolt.
Torque:
42 N*m{
428 kgf*cm
, 31 ft.*lbf
}
w/ Pretensioner:
Temporarily install the front seat outer belt assembly RH with the 2 bolts.
Fully tighten the upper side bolt first, then the lower side bolt to install the front seat outer belt assembly RH.
Torque:
For upper bolt:
8.5 N*m{
87 kgf*cm
, 75 in.*lbf
}
For lower bolt:
42 N*m{
428 kgf*cm
, 31 ft.*lbf
}
Connect the pretensioner connector and lock the locking button.
NOTICE:
Securely lock the locking button.
Connect the shoulder side of the front seat outer belt assembly RH shoulder side with the bolt.
Torque:
42 N*m{
428 kgf*cm
, 31 ft.*lbf
}
Engage the 2 claws to install the shoulder side cover of the front seat outer belt assembly RH.
18.
INSTALL CENTER PILLAR GARNISH LOWER RH
19.
CONNECT FRONT SEAT OUTER BELT ASSEMBLY RH
Connect the floor side of the front seat outer belt assembly RH with the bolt.
Torque:
42 N*m{
428 kgf*cm
, 31 ft.*lbf
}
Check if the ELR locks.
NOTICE:
The check should be performed with the outer belt assembly installed.
With the belt assembly installed, check that the belt locks when it is pulled out quickly.