BM35X0E
_01
Vehicle Exterior
_080418
BODY PANEL
_0400316
REAR FLOOR LOWER REAR CROSSMEMBER(for Wagon)
F
BODY PANEL REAR FLOOR LOWER REAR CROSSMEMBER(for Wagon) ASSEMBLY REPLACEMENT
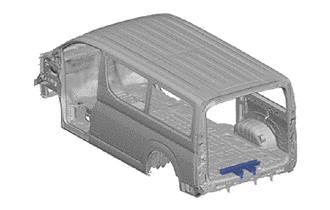
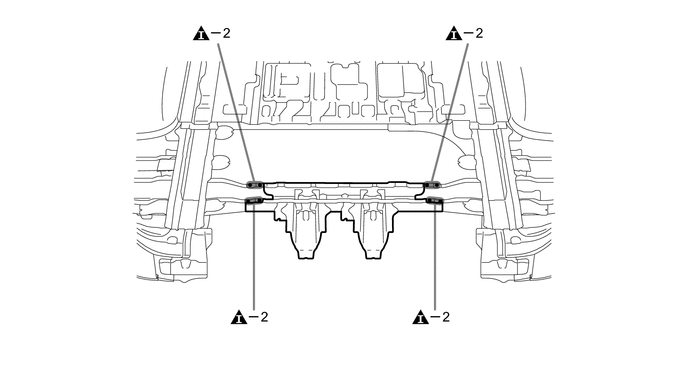
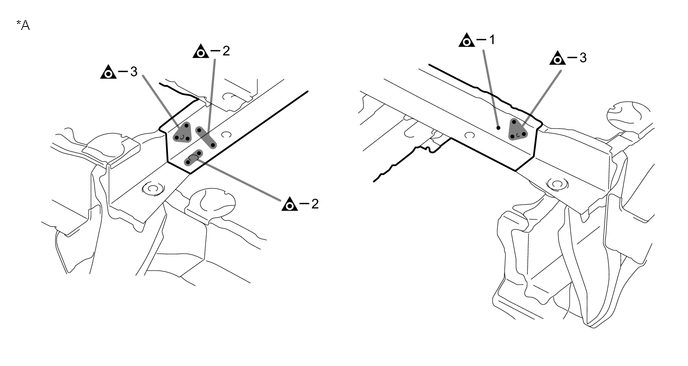
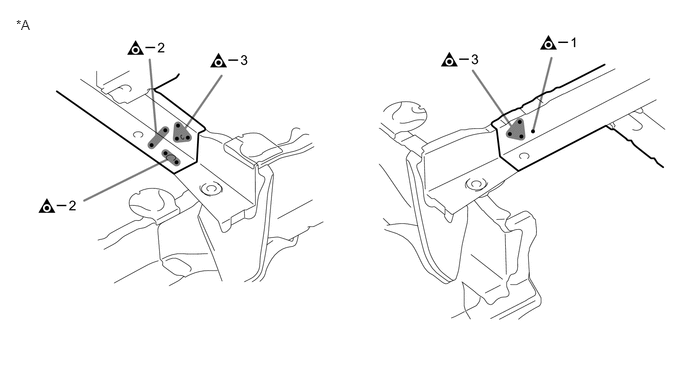
With the rear floor pan cut and join replacement sections removed.
REMOVAL
| Symbol Meaning | |
|---|---|

|
Remove Weld Points |

|
Remove Weld Points |
a.
After removing the A and B, remove the rear floor cross member No.7.
- HINT:
-
A and B are reused.
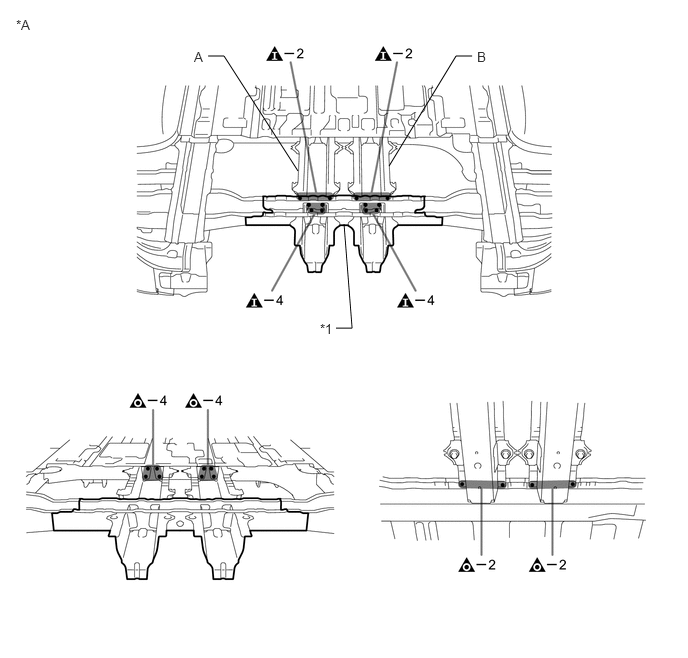
2.167,0.583 2.333,0.583
2.333,0.583 3.104,1.781
false
4.052,1.729 4.75,0.583
4.75,0.583 4.917,0.583
false
3.5,3.417 3.667,3.417
3.667,3.417 3.583,2.333
false
0.167,0.177 0.479,0.333
0.313,0.156
10
false
*A
3.333,3.344 3.646,3.5
0.313,0.156
10
false
*1
2.021,0.51 2.333,0.667
0.313,0.156
10
false
A
4.969,0.51 5.281,0.667
0.313,0.156
10
false
B
| *A | for Space Up Seat | - | - |
| *1 | REAR FLOOR CROSS MEMBER NO.7 | - | - |
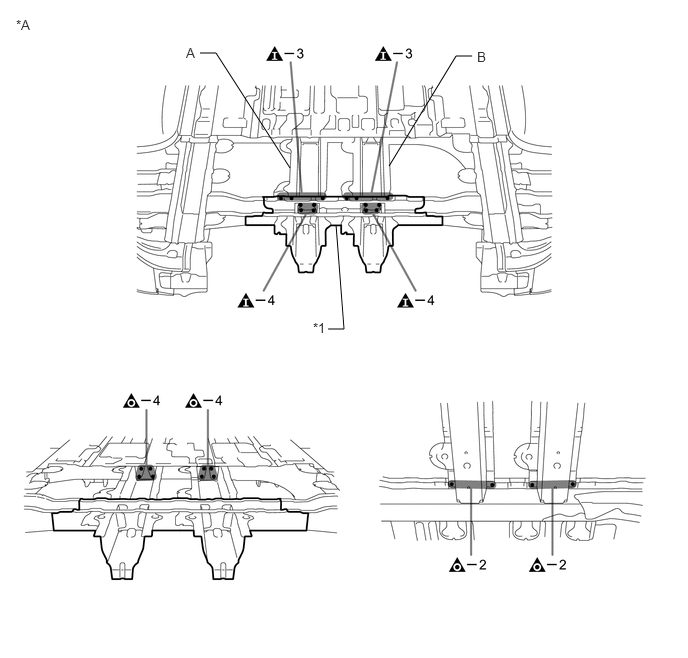
2.083,0.552 2.25,0.552
2.25,0.552 3.021,1.75
false
4.052,1.729 4.75,0.583
4.75,0.583 4.917,0.583
false
3.417,3.427 3.583,3.427
3.583,3.427 3.5,2.344
false
0.167,0.177 0.479,0.333
0.313,0.156
10
false
*A
3.26,3.333 3.573,3.49
0.313,0.156
10
false
*1
1.938,0.469 2.25,0.625
0.313,0.156
10
false
A
4.969,0.51 5.281,0.667
0.313,0.156
10
false
B
| *A | for Tip Up Seat | - | - |
| *1 | REAR FLOOR CROSS MEMBER NO.7 | - | - |
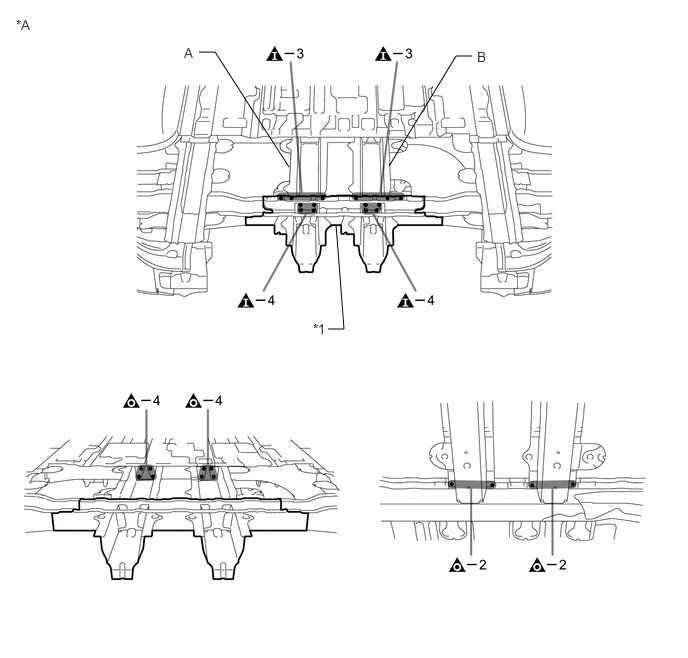
2.073,0.542 2.24,0.542
2.24,0.542 3.01,1.74
false
4.052,1.729 4.75,0.583
4.75,0.583 4.917,0.583
false
3.417,3.427 3.583,3.427
3.583,3.427 3.5,2.344
false
0.167,0.177 0.479,0.333
0.313,0.156
10
false
*A
3.26,3.344 3.573,3.5
0.313,0.156
10
false
*1
1.917,0.469 2.229,0.625
0.313,0.156
10
false
A
4.969,0.51 5.281,0.667
0.313,0.156
10
false
B
| *A | for 6-Passenger | - | - |
| *1 | REAR FLOOR CROSS MEMBER NO.7 | - | - |
0.167,0.177 0.479,0.333
0.313,0.156
10
false
*A
| *A | LH Side | - | - |
0.167,0.177 0.479,0.333
0.313,0.156
10
false
*A
| *A | RH Side | - | - |
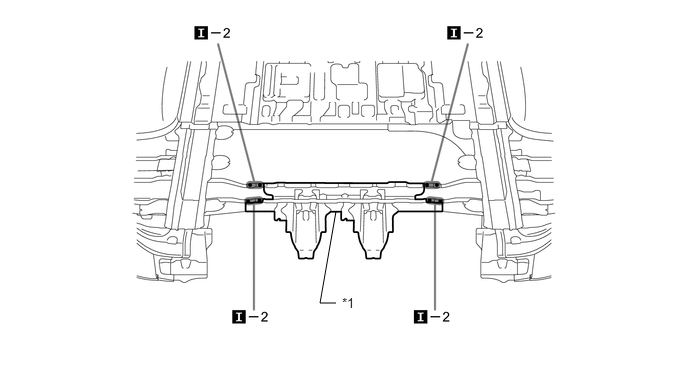
INSTALLATION
| Symbol Meaning | |
|---|---|

|
Plug Weld |

|
Plug Weld |
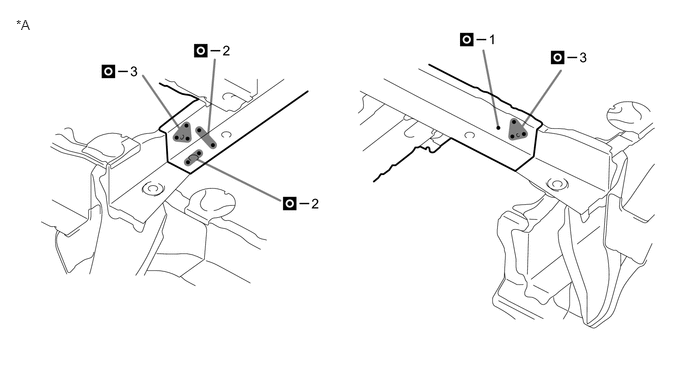
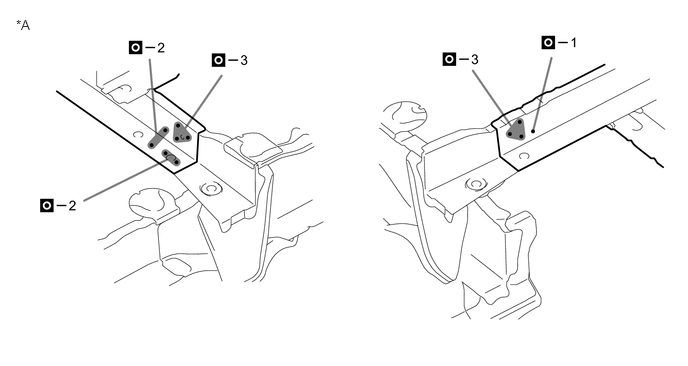
a.
Weld the rear floor cross member No.7 to the vehicle side.
3.5,3.156 3.333,3.156
3.333,3.156 3.5,2.198
false
3.563,3.073 3.875,3.229
0.313,0.156
10
false
*1
| *1 | REAR FLOOR CROSS MEMBER NO.7 | - | - |
0.167,0.177 0.479,0.333
0.313,0.156
10
false
*A
| *A | LH Side | - | - |
0.167,0.177 0.479,0.333
0.313,0.156
10
false
*A
| *A | RH Side | - | - |
b.
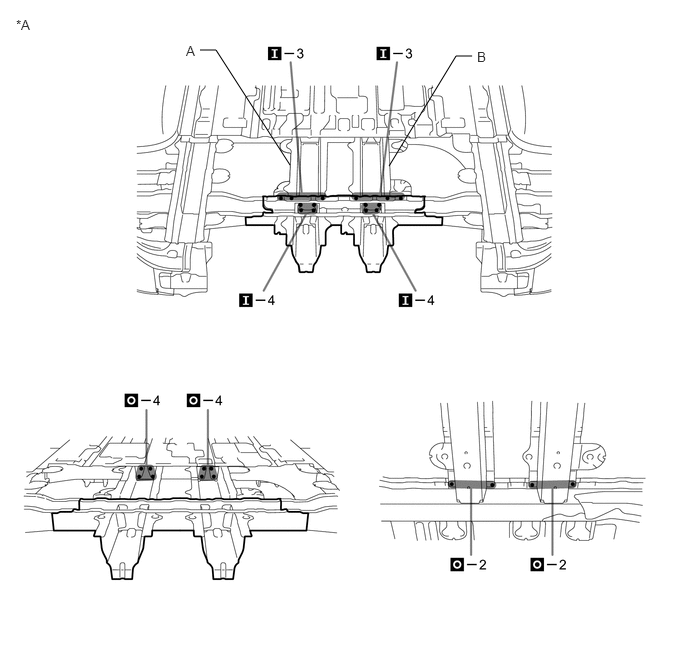
Weld the A and B to the vehicle side.
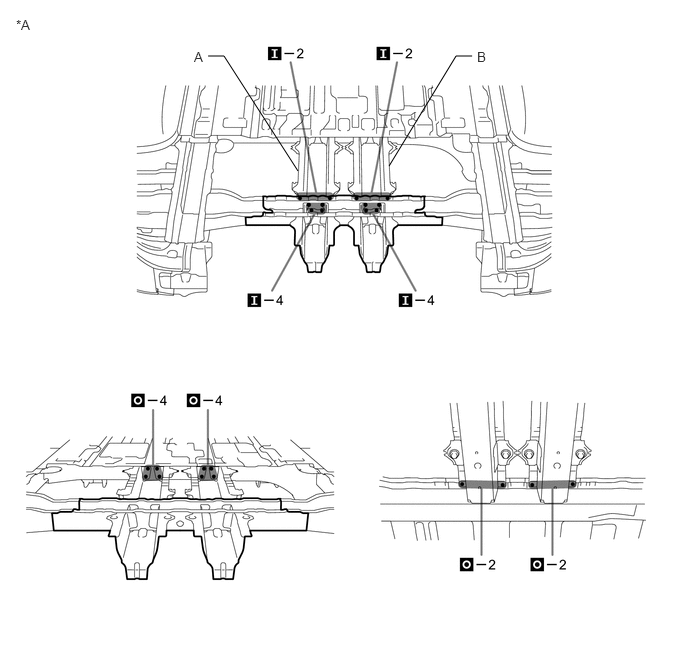
2.167,0.583 2.333,0.583
2.333,0.583 3.104,1.781
false
4.052,1.729 4.75,0.583
4.75,0.583 4.917,0.583
false
0.167,0.177 0.479,0.333
0.313,0.156
10
false
*A
2.021,0.51 2.333,0.667
0.313,0.156
10
false
A
4.969,0.51 5.281,0.667
0.313,0.156
10
false
B
| *A | for Space Up Seat | - | - |
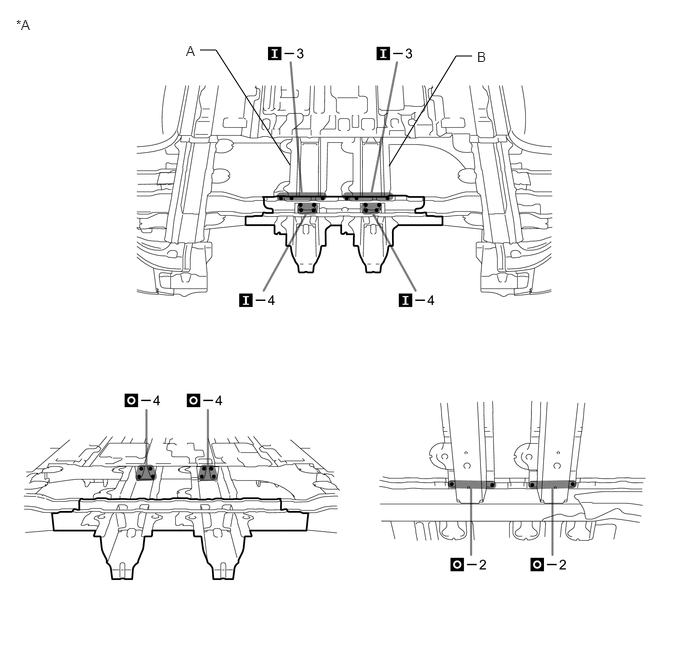
2.083,0.521 2.25,0.521
2.25,0.521 3.021,1.719
false
4.052,1.729 4.75,0.583
4.75,0.583 4.917,0.583
false
0.167,0.177 0.479,0.333
0.313,0.156
10
false
*A
1.938,0.448 2.25,0.604
0.313,0.156
10
false
A
4.969,0.51 5.281,0.667
0.313,0.156
10
false
B
| *A | for Tip Up Seat | - | - |
2.083,0.521 2.25,0.521
2.25,0.521 3.021,1.719
false
4.052,1.729 4.75,0.583
4.75,0.583 4.917,0.583
false
0.167,0.177 0.479,0.333
0.313,0.156
10
false
*A
1.938,0.448 2.25,0.604
0.313,0.156
10
false
A
4.969,0.51 5.281,0.667
0.313,0.156
10
false
B
| *A | for 6-Passenger | - | - |
c.
After welding, apply undercoating to the corresponding parts. (See the painting/coating)
d.
After applying the top coat, apply anti-rust agent to the internal panel portion of the closed section structural weld points.