INTERIOR PANELS / TRIM INSTRUMENT PANEL SAFETY PAD REASSEMBLY
CAUTION / NOTICE / HINT
- HINT:
- ·
Use the same procedure for RHD and LHD vehicles.
·The procedure listed below is for LHD vehicles.
PROCEDURE

 55548A
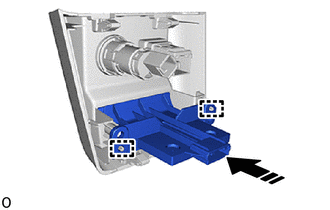
1.INSTALL INSTRUMENT PANEL HOLE COVER (for RHD, w/Console Tray)

|
Install in this Direction |
Attach the guide to set the instrument panel hole cover.
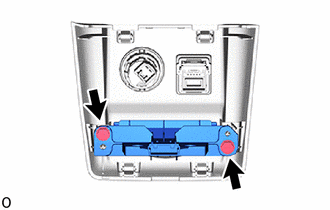
Install the instrument panel hole cover with the 2 screws.
55524H
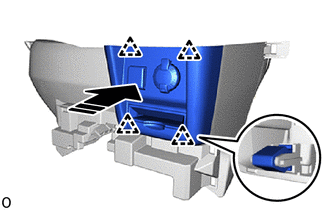
2.INSTALL SWITCH BASE HOLE COVER (for RHD, w/ Console Tray)
|
|
Install in this Direction |
Attach the clip to install the switch base hole cover.
55557A
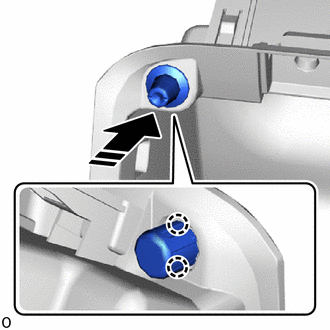
3.INSTALL GLOVE COMPARTMENT DOOR CHECK CUSHION
|
|
Install in this Direction |
Attach the claw to install the glove compartment door check cushion.
- HINT:
-
Use the same procedure to install the glove compartment door check cushion on the other side.
55550
4.INSTALL GLOVE COMPARTMENT DOOR ASSEMBLY
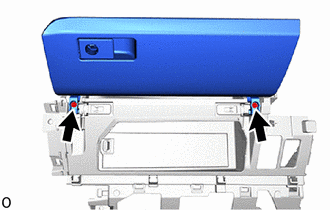
Install the glove compartment door assembly with the 2 screws.
5.INSTALL GLOVE COMPARTMENT DOOR LOCK CYLINDER ASSEMBLY
for LHD:
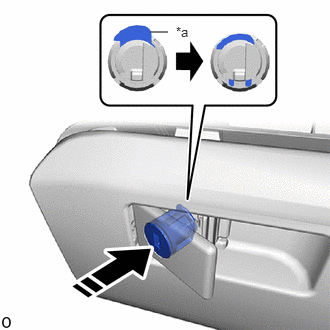
| *a | Stopper |
|
|
Install in this Direction |
Push the stopper and insert the glove compartment door lock cylinder assembly to the glove compartment door assembly to install it.
for RHD:
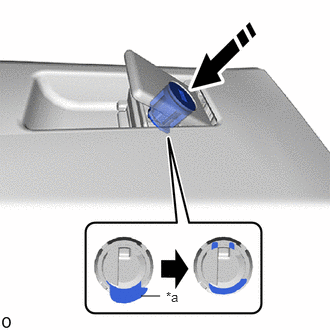
| *a | Stopper |
|
|
Install in this Direction |
Push the stopper and insert the glove compartment door lock cylinder assembly to the glove compartment door assembly to install it.
55414A
6.INSTALL INSTRUMENT CLUSTER FINISH PANEL END (w/ Radio Receiver Opening Cover)
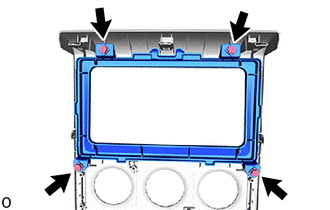

|
Screw <A> |
Install the instrument cluster finish panel end with the 4 screws <A>.
55308D
7.INSTALL CENTER INSTRUMENT PANEL BOX SUB-ASSEMBLY (for Full-trim)
55539
8.INSTALL SPARE SWITCH HOLE COVER (for Semi-trim)
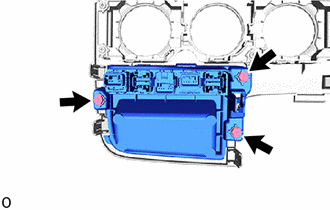
|
|
Screw <A> |
Install the spare switch hole cover with the 3 screws <A>.
55618B
9.INSTALL NO. 3 SWITCH HOLE BASE (for Full-trim)
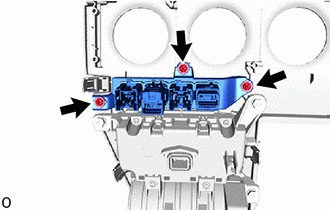
Install the No. 3 switch hole base with the 3 screws.
55473A
10.INSTALL INSTRUMENT PANEL FINISH PANEL RETAINER (for Full-trim)
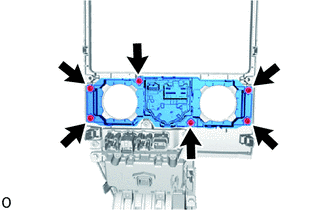
Install the instrument panel finish panel retainer with the 6 screws.
86212
11.INSTALL NO. 2 RADIO BRACKET (w/ Radio Receiver Opening Cover)
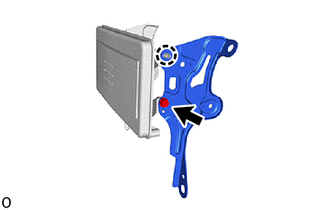
|
|
Screw <A> |
Attach the claw to install the No. 2 radio bracket with the screw <A>.
86211
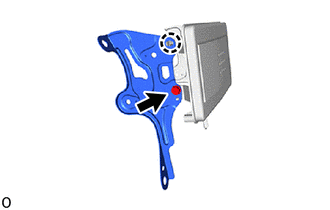
12.INSTALL NO. 1 RADIO BRACKET (w/ Radio Receiver Opening Cover)
|
|
Screw <A> |
Attach the claw to install the No. 1 radio bracket with the screw <A>.
55532B
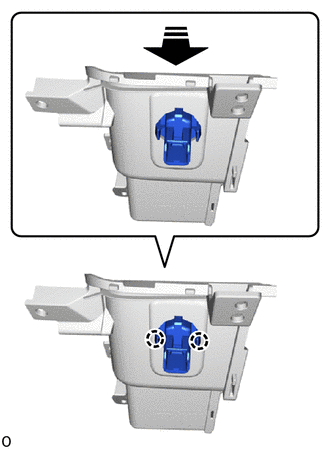
13.INSTALL CIGAR LIGHTER HOLE COVER (w/o Power Outlet Socket)
|
|
Install in this Direction |
Attach the claw to install the cigar lighter hole cover as shown in the illustration.
55349A
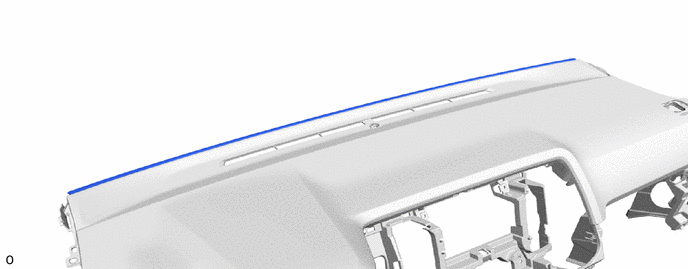
14.INSTALL INSTRUMENT PANEL CUSHION
Install the instrument panel cushion as shown in the illustration.
55328
15.INSTALL NO. 1 INSTRUMENT PANEL PIN
- HINT:
-
Use the same procedure for the opposite side.
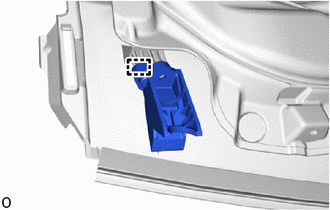
Attach the guide to set the No. 1 instrument panel pin.
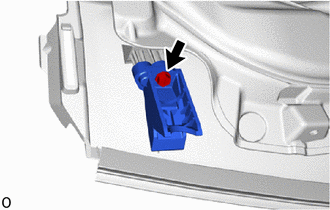
|
|
Screw <A> |
Install the No. 1 instrument panel pin with the screw <A>.
55962D
16.INSTALL NO. 2 SIDE DEFROSTER NOZZLE
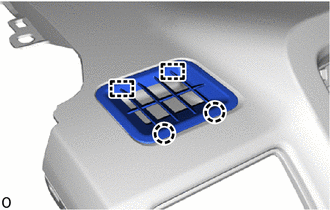
Attach the guide and claw to install the No. 2 side defroster nozzle.
55961B
17.INSTALL NO. 1 SIDE DEFROSTER NOZZLE
- HINT:
-
Use the same procedure for the No. 2 side defroster nozzle.
55471C
18.INSTALL INSTRUMENT PANEL NAME PLATE (w/o Front Passenger Airbag)
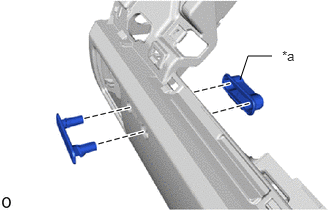
| *a | No. 4 Instrument Panel Safety Pad Retainer |
Install the No. 4 instrument panel safety pad retainer and instrument panel name plate.
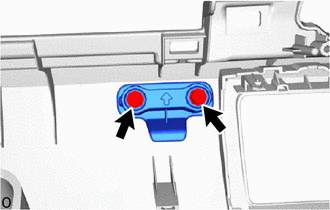
|
|
Screw <A> |
Install the 2 screws <A>.
55357B
19.INSTALL NO. 3 INSTRUMENT PANEL CUSHION (for Full-trim)
- NOTICE:
-
Installing the part with double-sided tape residue still remaining can cause poor adhesion. Therefore, using a cloth or other material, clean the part until the residue is completely removed (when reusing the instrument panel sub-assembly).
Remove the release paper from new No. 3 instrument panel cushion.
- HINT:
-
After removing the release paper, keep the exposed adhesive free from foreign matter.
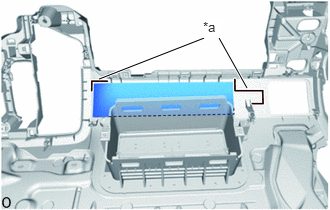
| *a | Marking |
Align the No. 3 instrument panel cushion with the markings on the instrument panel sub-assembly and install them as shown in the illustration.
55356C
20.INSTALL NO. 2 INSTRUMENT PANEL CUSHION (for Full-trim)
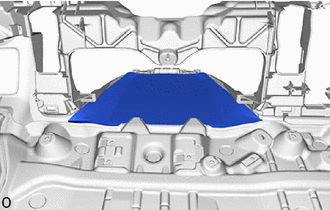
Install the No. 2 instrument panel cushion as shown in the illustration.
55355
21.INSTALL NO. 1 INSTRUMENT PANEL CUSHION (for Full-trim)
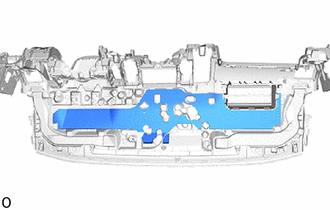
Install the No. 1 instrument panel cushion as shown in the illustration.
55650
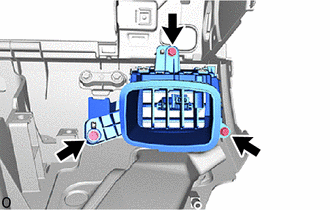
22.INSTALL NO. 1 INSTRUMENT PANEL REGISTER ASSEMBLY
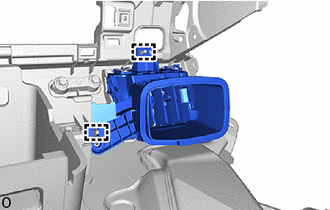
Attach the guide to set the No. 1 instrument panel register assembly.
|
|
Screw <A> |
Install the No. 1 instrument panel register assembly with the 3 screws <A>.
55315C
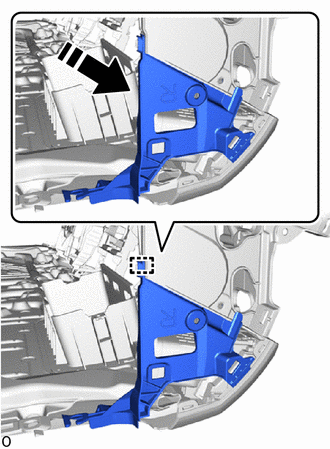
23.INSTALL UPPER INSTRUMENT SIDE PATCH RH
|
|
Install in this Direction |
Attach the guide to set the upper instrument side patch RH as shown in the illustration.
|
|
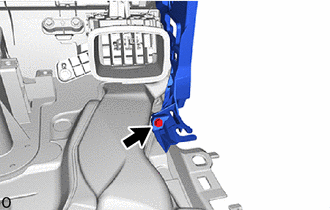
Screw <A> |
Install the upper instrument side patch RH with the screw <A>.
|
|
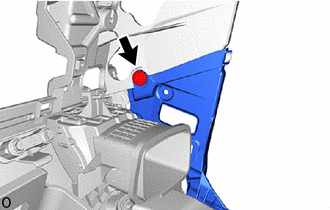
Clip <H> |
Install the clip <H>.
55971C
24.INSTALL NO. 1 SIDE DEFROSTER NOZZLE DUCT
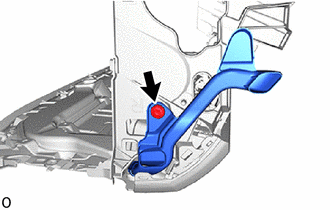
|
|
Clip <H> |
Install the No. 1 side defroster nozzle duct with the clip <H>.
55660
25.INSTALL NO. 2 INSTRUMENT PANEL REGISTER ASSEMBLY
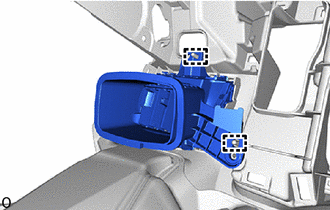
Attach the guide to set the No. 2 instrument panel register assembly.
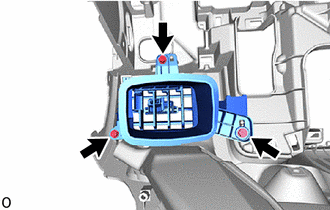
|
|
Screw <A> |
Install the No. 2 instrument panel register assembly with the 3 screws <A>.
55316A
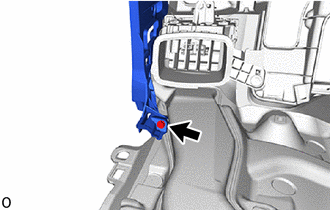
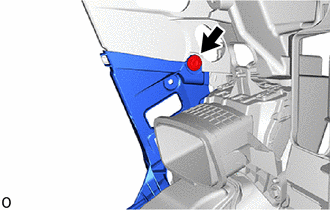
26.INSTALL UPPER INSTRUMENT SIDE PATCH LH
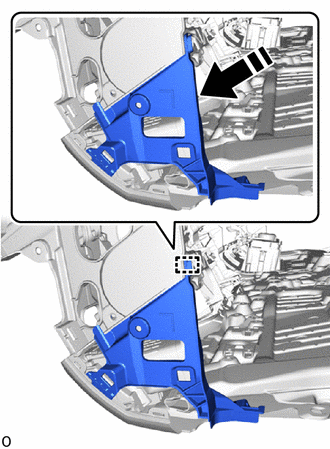
|
|
Install in this Direction |
Attach the guide to set the upper instrument side patch LH as shown in the illustration.
|
|
Screw <A> |
Install the upper instrument side patch LH with the screw <A>.
|
|
Clip <H> |
Install the clip <H>.
55972C
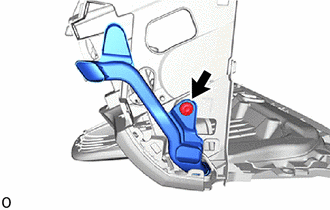
27.INSTALL NO. 2 SIDE DEFROSTER NOZZLE DUCT
|
|
Clip <H> |
Install the No. 2 side defroster nozzle duct with the clip <H>.
55620
28.INSTALL INSTRUMENT PANEL CUP HOLDER ASSEMBLY
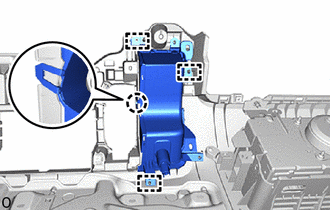
Attach the guide and claw to install the instrument panel cup holder assembly.
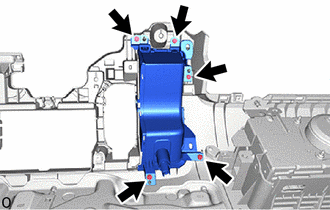
|
|
Screw <A> |
Install the 5 screws <A>.
82142A
29.INSTALL NO. 2 INSTRUMENT PANEL WIRE
for LHD:
Attach the clamp to install the No. 2 instrument panel wire with the screw.
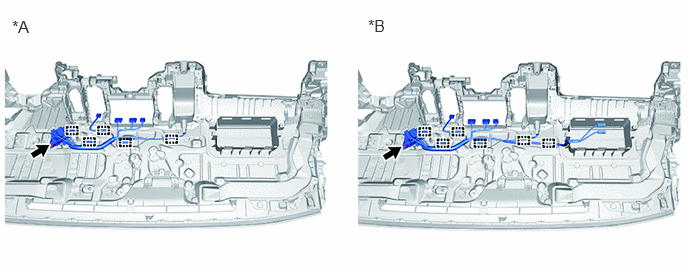
| *A | w/o Front Passenger Airbag | *B | w/ Front Passenger Airbag |
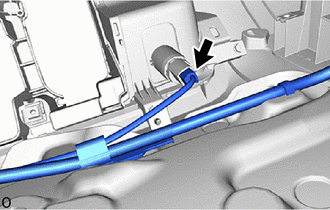
Connect the connector.
for RHD:
Attach the clamp to install the No. 2 instrument panel wire with the screw.
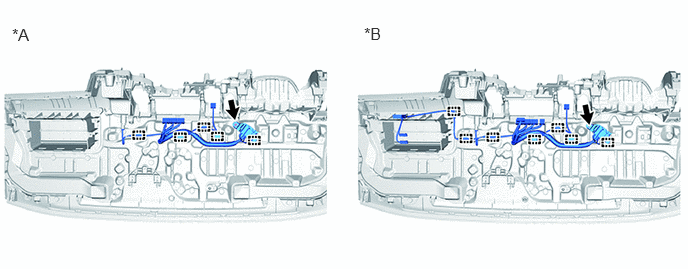
| *A | w/o Front Passenger Airbag | *B | w/ Front Passenger Airbag |
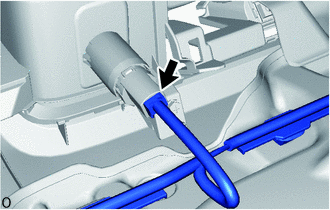
Connect the connector.
73908
30.INSTALL INSTRUMENT PANEL PASSENGER AIRBAG CASE SUB-ASSEMBLY (w/o Front Passenger Airbag)
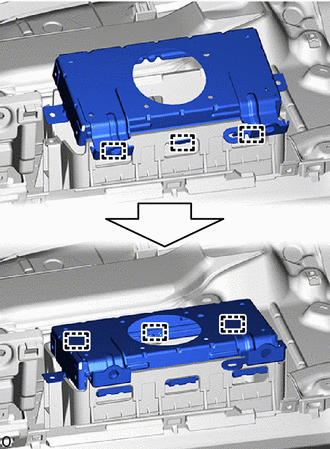
Attach the hook.
Push in the instrument panel passenger airbag case sub-assembly to attach the hook.
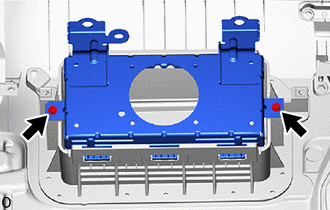
|
|
Screw <A> |
Install the instrument panel passenger airbag case sub-assembly with the 2 screws <A>.
73960A
31.INSTALL INSTRUMENT PANEL PASSENGER AIRBAG ASSEMBLY (w/ Front Passenger Airbag)
82144
32.INSTALL NO. 4 INSTRUMENT PANEL WIRE
for LHD:
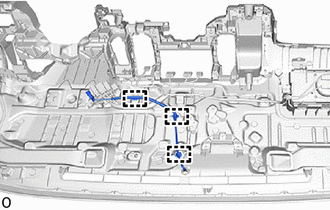
w/ Solar Sensor, w/ Automatic Light Control System:
Attach the clamp to install the No. 4 instrument panel wire.
w/ Solar Sensor, w/o Automatic Light Control System:
Attach the clamp to install the No. 4 instrument panel wire.
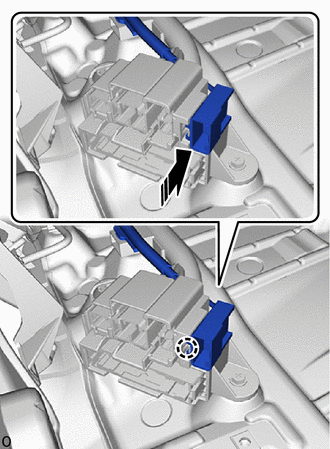
|
|
Install in this Direction |
Install in the direction indicated by the arrow shown in the illustration to attach the claw.
for RHD:
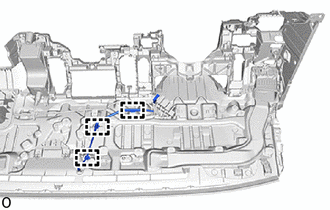
w/ Solar Sensor, w/ Automatic Light Control System:
Attach the clamp to install the No. 4 instrument panel wire.
w/ Solar Sensor, w/o Automatic Light Control System:
Attach the clamp to install the No. 4 instrument panel wire.
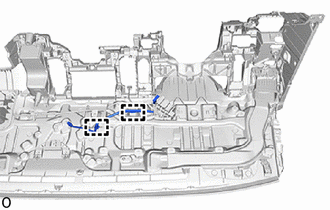
w/ Blind Spot Monitor System:
Attach the clamp to install the No. 4 instrument panel wire.
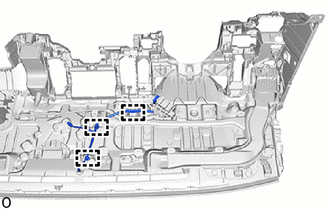
w/ Automatic Light Control System, Blind Spot Monitor System:
Attach the clamp to install the No. 4 instrument panel wire.
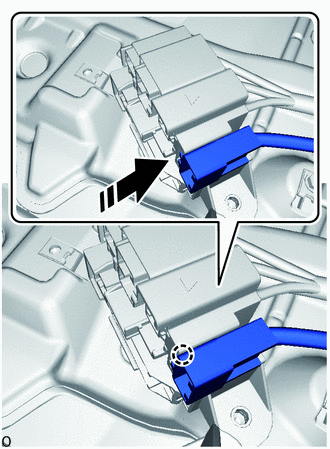
|
|
Install in this Direction |
Install in the direction indicated by the arrow shown in the illustration to attach the claw.
89747F
33.INSTALL BLIND SPOT MONITOR BUZZER (w/ Blind Spot Monitor System)
89120A
34.INSTALL AUTOMATIC LIGHT CONTROL SENSOR (w/ Automatic Light Control System)
88625H
35.INSTALL COOLER (SOLAR SENSOR) THERMISTOR (w/o Automatic Light Control System)
55538C
36.INSTALL COOLER SWITCH HOLE COVER (w/ Cover)
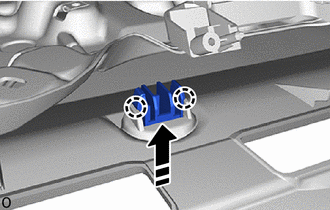
|
|
Install in this Direction |
Attach the claw to install the cooler switch hole cover.
37.INSTALL NAVIGATION ANTENNA ASSEMBLY WITH BRACKET (w/ Navigation System)
86101
38.INSTALL ANTENNA CORD SUB-ASSEMBLY
55844
39.INSTALL NO. 2 HEATER TO REGISTER DUCT
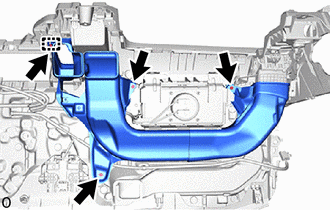
|
|
Screw <A> |
Attach the guide to install the No. 2 heater to register duct with the 4 screws <A>.
55845A
40.INSTALL NO. 3 HEATER TO REGISTER DUCT
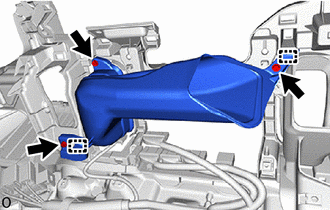
|
|
Screw <A> |
Attach the guide to install the No. 3 heater to register duct with the 3 screws <A>.
55843A
41.INSTALL NO. 1 HEATER TO REGISTER DUCT
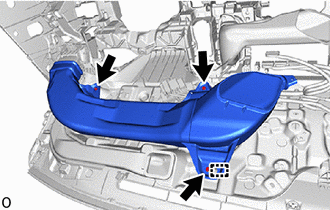
|
|
Screw <A> |
Attach the guide to install the No. 1 heater to register duct with the 3 screws <A>.
55990C
42.INSTALL CENTER DEFROSTER NOZZLE ASSEMBLY
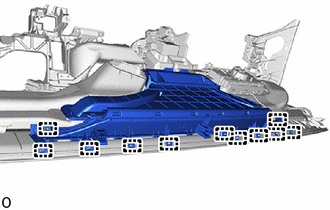
Attach the guide to set the center defroster nozzle assembly.
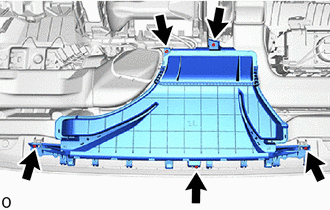
|
|
Screw <A> |
Install the center defroster nozzle assembly with the 5 screws <A>.