1GD-FTV BATTERY / CHARGING GENERATOR DISASSEMBLY
PROCEDURE

 27416
1.REMOVE GENERATOR PULLEY CAP
Using a screwdriver, puncture the center of the generator pulley cap and pry it off.
- NOTICE:
-
Do not reuse the generator pulley cap.
27415
2.REMOVE GENERATOR PULLEY WITH CLUTCH
Mount the generator assembly in the vise between aluminum plates.
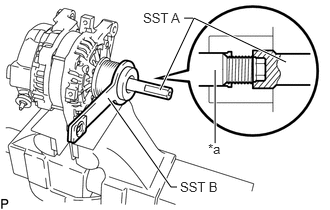
| *a | Generator Rotor Shaft |
Install SST A and SST B to the generator pulley with clutch as shown in the illustration.
- SST
- 09820-63021
- NOTICE:
-
Securely attach SST to the generator pulley with clutch and generator rotor shaft.
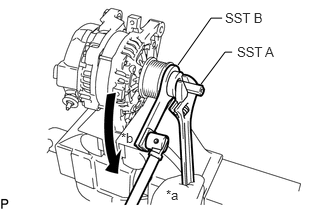
| *a | Hold |
| *b | Turn |
Use a wrench to hold SST A, turn SST B counterclockwise to loosen the generator pulley with clutch.
- NOTICE:
-
Be careful as the generator pulley with clutch or generator rotor shaft may be damaged if the position of SST is not securely maintained while performing this operation.
Remove SST from the generator assembly.
Remove the generator pulley with clutch from the generator rotor shaft.
Remove the generator assembly from the vise.
27039
3.REMOVE GENERATOR REAR END COVER
Place the generator assembly on the generator pulley with clutch.
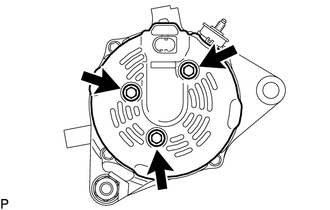
Remove the 3 bolts and generator rear end cover from generator coil assembly.
27387
4.REMOVE TERMINAL INSULATOR
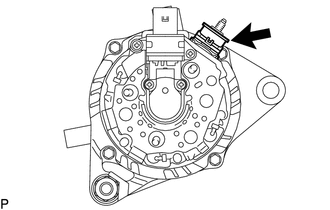
Remove the terminal insulator from the generator coil assembly.
27370
5.REMOVE GENERATOR BRUSH HOLDER ASSEMBLY
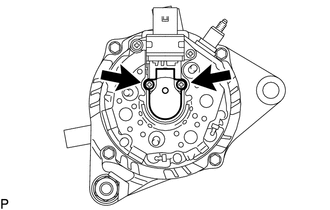
Remove the 2 screws and brush holder assembly from the generator coil assembly.
27360
6.REMOVE GENERATOR COIL ASSEMBLY
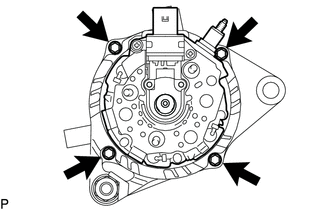
Remove the 4 through bolts.
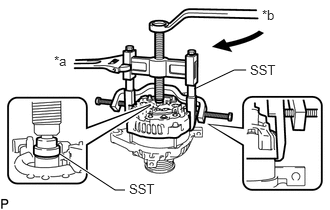
| *a | Hold |
| *b | Turn |
Using SST, remove the generator coil assembly.
- SST
- 09950-40011 (09951-04020, 09952-04010, 09953-04020, 09954-04010, 09955-04071, 09957-04010, 09958-04011)
27444
7.REMOVE GENERATOR BEARING COVER PACKING
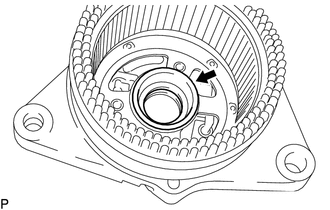
Remove the generator bearing cover packing.
- NOTICE:
-
If the generator bearing cover packing breaks, remove all broken pieces.
- HINT:
-
The generator bearing cover packing may be installed on the generator rotor assembly.
27330
8.REMOVE GENERATOR ROTOR ASSEMBLY
Remove the generator rotor assembly from the generator drive end frame.
27310
9.INSPECT GENERATOR DRIVE END FRAME BEARING
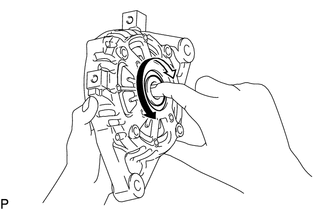
Check that the generator drive end frame bearing is not rough or worn and that it rotates smoothly.
If necessary, replace the generator drive end frame bearing.
27310
10.REMOVE GENERATOR DRIVE END FRAME BEARING
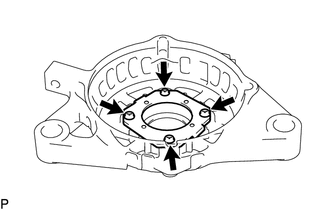
Remove the 4 screws and retainer plate from the generator drive end frame.
Using SST and a hammer, tap out the generator drive end frame bearing from the generator drive end frame.
- SST
- 09950-60011 (09951-00250)
09950-70010 (09951-07100)