REAR SUSPENSION REAR SHOCK ABSORBER(for Wagon) REMOVAL
CAUTION / NOTICE / HINT
The necessary procedures (adjustment, calibration, initialization, or registration) that must be performed after parts are removed, installed, or replaced during the rear shock absorber assembly removal/installation are shown below.
- Necessary Procedure After Parts Removed/Installed/Replaced:
Replacement Part or Procedure Necessary Procedures Effects/Inoperative when not Performed Link Suspension, tires, etc. Television camera assembly optical axis (Back camera position setting) Parking assist monitor system (  )
·
Parking assist ECU initialization
·Adjust steering angle
Panoramic view monitor system ( )
Perform headlight ECU sub-assembly LH initialization Lighting system (EXT)(w/ Headlight ECU) ( )
- HINT:
- ·
Use the same procedure for the RH side and LH side.
·The following procedure is for the LH side.
PROCEDURE

 1.REMOVE REAR WHEEL
65638A
2.DISCONNECT REAR WHEEL HOUSE LINER
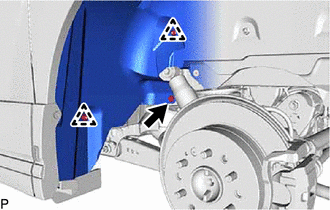
Remove the 2 clips, grommet and disconnect the rear wheel house liner.
48530
3.REMOVE REAR SHOCK ABSORBER ASSEMBLY
Using a jack and wooden block, support the rear axle housing assembly.
- NOTICE:
- ·
When jacking up the rear axle housing assembly, be sure to jack it up slowly.
·Make sure to perform this operation with the vehicle kept as low as possible.
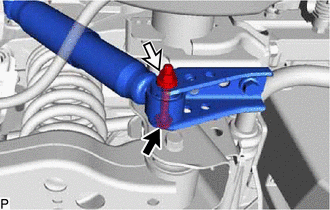
Loosen the nut.
- NOTICE:
-
When removing the nuts, keep the bolts from rotating.
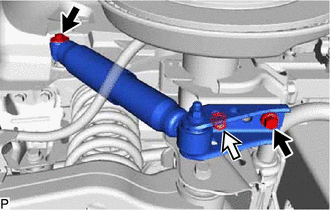
Remove the 2 bolts, nut and rear shock absorber assembly, rear lower shock absorber bracket and 2 rear shock absorber bushes from the rear axle housing assembly and vehicle body.
Remove the 2 rear shock absorber bushes from the rear shock absorber assembly.
Remove the rear shock absorber cushion washer.
48518A
4.REMOVE REAR LOWER SHOCK ABSORBER BRACKET
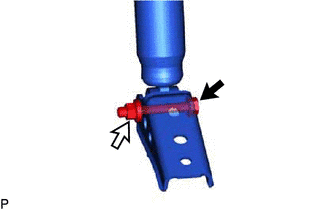
Remove the nut, washer, bolt and rear lower shock absorber bracket from the rear shock absorber assembly.
- NOTICE:
-
When removing the nuts, keep the bolts from rotating.