REMOVAL
Removal / installation · Vehicles built May 2007 – Jul 2008
Versions by build date: May 2007 – Jul 2008 Aug 2008 – Jun 2010 from Jul 2010
- HINT:
- Use the same procedures for the RH side and LH side.
- The procedures listed below are for the LH side.
| 2.
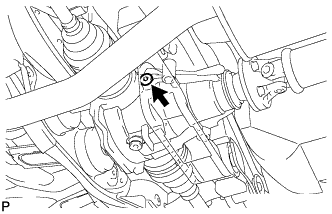
REMOVE REAR DIFFERENTIAL FILLER PLUG
|
 |
- Using a hexagon wrench (10 mm), remove the rear differential filler plug and rear differential filler plug gasket.
| 3.
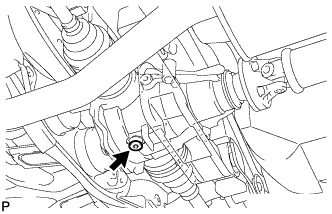
REMOVE REAR DIFFERENTIAL DRAIN PLUG
|
|
- Using a hexagon wrench (10 mm), remove the rear differential drain plug and rear differential drain plug gasket, and drain the oil.
| 4.
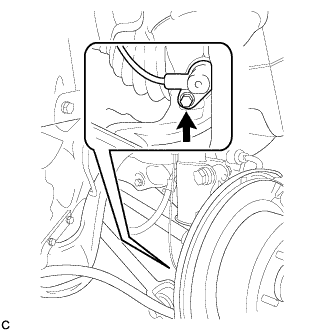
SEPARATE REAR SPEED SENSOR LH
|
|
- Remove the bolt and separate the rear speed sensor from the rear axle carrier sub-assembly.
- NOTICE:
- Keep the sensor tip and rear speed sensor installation hole free from foreign matter.
| 5.
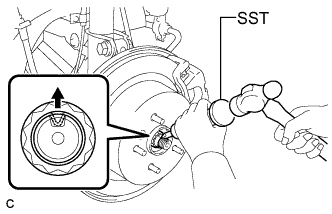
REMOVE REAR AXLE SHAFT NUT LH |
|
- Using SST and a hammer, release the staked part of the rear axle shaft nut.
- SST
- 09930-00010
- NOTICE:
- Loosen the staked part of the nut completely, otherwise the threads of the drive shaft may be damaged.
While applying the brakes, remove the rear axle shaft nut.
| 6.
SEPARATE REAR DISC BRAKE CALIPER ASSEMBLY LH
|
|
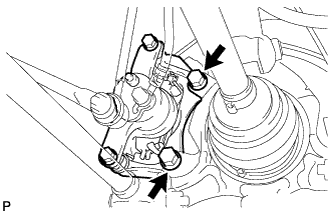
- Remove the 2 bolts and separate the rear disc brake caliper assembly.
- NOTICE:
- Use wire or an equivalent tool to keep the brake caliper from hanging down by the flexible hose.
| 7.
REMOVE REAR DISC
|
|
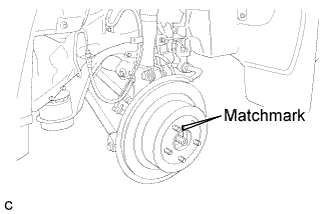
- Put matchmarks on the rear disc and the axle hub.
- Release the parking brake and remove the rear disc.
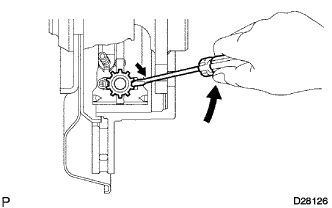
- HINT:
- If the disc cannot be removed easily, turn and press firmly the shoe adjuster until the wheel comes free.
| 8.
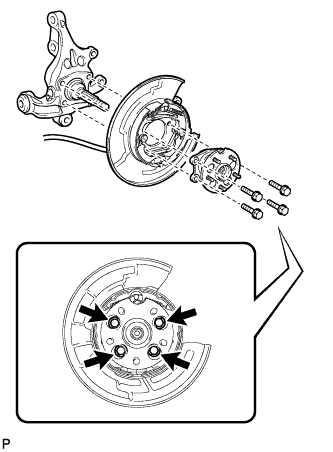
SEPARATE REAR AXLE HUB AND BEARING ASSEMBLY LH
|
|
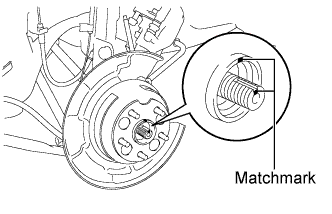
- Put matchmarks on the drive shaft and axle hub.
- NOTICE:
- Do not punch the marks.
- Remove the 4 bolts and the rear axle hub and bearing assembly.
- NOTICE:
- Do not rotate the drive shaft with the rear axle hub and bearing assembly removed.
- Use wire or an equivalent tool to keep the parking brake assembly from hanging down by the parking brake cable assembly.
| 9.
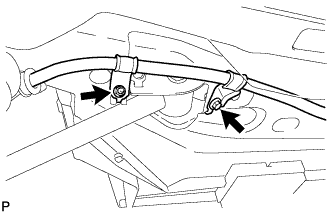
SEPARATE NO. 3 PARKING BRAKE CABLE ASSEMBLY
|
|
- Remove the bolt and the nut, and separate the No. 3 parking brake cable assembly.
| 10.
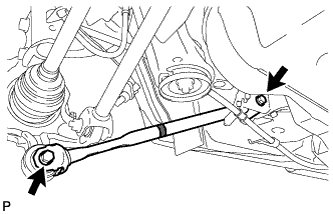
REMOVE REAR STRUT ROD ASSEMBLY
|
|
- Remove the 2 bolts, the 2 nuts, and the rear strut rod assembly.
- NOTICE:
- Since stopper nuts are used, loosen the bolts.
| 11.
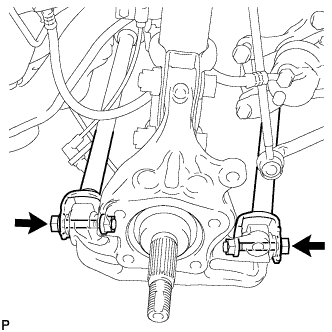
SEPARATE REAR AXLE CARRIER SUB-ASSEMBLY LH
|
|
- Loosen the 2 bolts.
- NOTICE:
- Since stopper nuts are used, loosen the bolts.
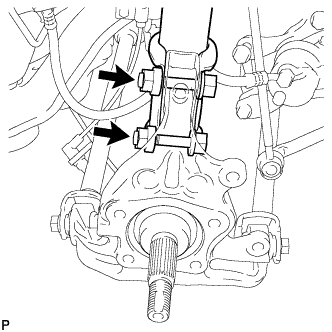
- Remove the 2 bolts and 2 nuts, and separate the rear shock absorber with coil spring (lower side) from the rear axle carrier sub-assembly.
- NOTICE:
- Be careful not to damage the outboard joint boot.
- Be careful not to damage the speed sensor rotor.
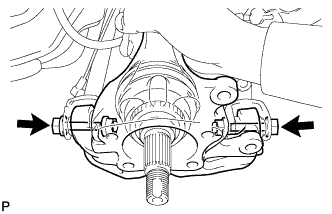
- Remove the 2 bolts, the 2 nuts, and the rear axle carrier sub-assembly.
- NOTICE:
- Be careful not to damage the outboard joint boot.
- Be careful not to damage the speed sensor rotor.
- HINT:
- Use wire or an equivalent tool to keep the rear drive shaft assembly from hanging down.
| 12.
REMOVE REAR DRIVE SHAFT ASSEMBLY |
|
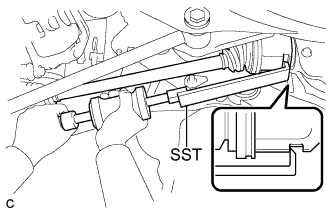
- Using SST, remove the rear drive shaft assembly as shown in the illustration.
- SST
- 09520-01010
09520-24010
(09520-32040)
- NOTICE:
- Remove the rear drive shaft assembly while keeping it level.