INSTALLATION
Removal / installation · Vehicles built from Jul 2010
Versions by build date: May 2007 – Jul 2008 Aug 2008 – Jun 2010 from Jul 2010
| 1.
INSTALL DRIVER SIDE KNEE AIRBAG ASSEMBLY |
 |
Check that the ignition switch is off.
Check that the battery negative (-) cable is disconnected.
- CAUTION:
- Wait for at least 90 seconds after disconnecting the cable to prevent airbag deployment.
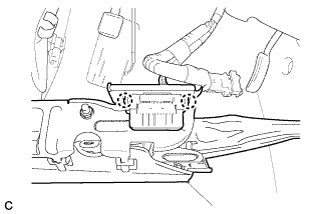
- Install the DLC3 to the driver side knee airbag assembly with the 2 claws.
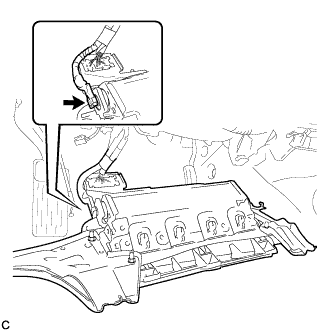
- Connect the connector to the driver side knee airbag assembly.
- NOTICE:
- When handling the airbag connector, take care not to damage the airbag wire harness.
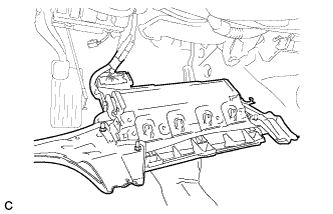
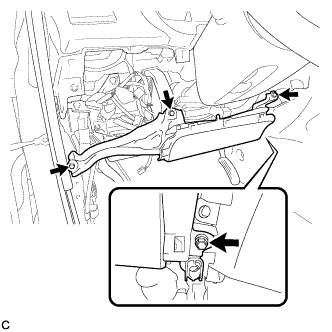
- Support the driver side knee airbag assembly with one hand as shown in the illustration.
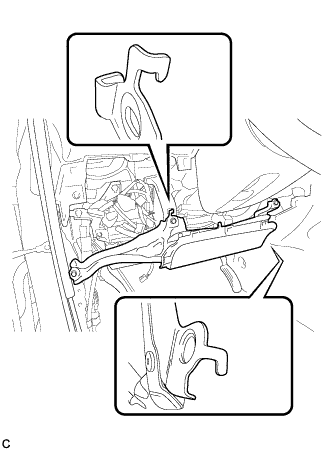
- Temporarily install the driver side knee airbag assembly with the 2 hooks.
- Install the driver side knee airbag assembly with the 4 bolts.
-
Torque:
- 10 N*m{
102 kgf*cm
, 7 ft.*lbf
}
| 2.
INSTALL LOWER INSTRUMENT PANEL FINISH PANEL SUB-ASSEMBLY (for Manual Air Conditioning System)
|
|
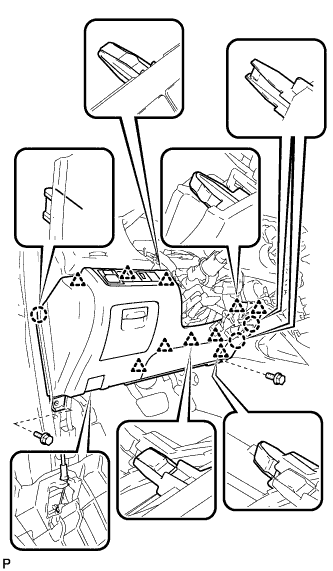
- Connect the hood lock control cable assembly.
Connect each connector.
Engage the 3 claws and 10 clips.
Install the lower instrument panel finish panel sub-assembly with the 2 bolts <B>.
| 3.
INSTALL LOWER INSTRUMENT PANEL FINISH PANEL SUB-ASSEMBLY (for Automatic Air Conditioning System)
|
|
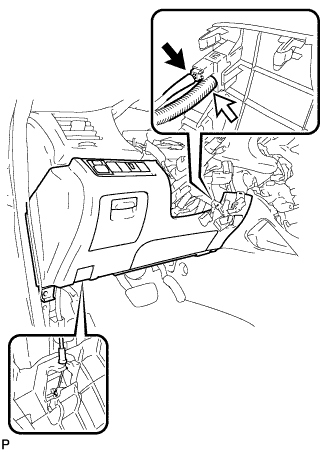
- Connect the hood lock control cable assembly.
Connect each connector and the aspirator duct.
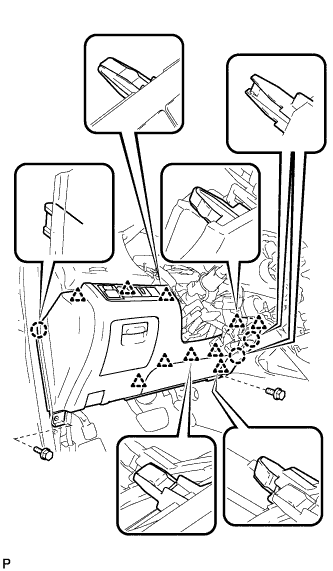
- Engage the 3 claws and 10 clips.
Install the lower instrument panel finish panel sub-assembly with the 2 bolts <B>.
| 4.
INSTALL COWL SIDE TRIM SUB-ASSEMBLY LH
|
|
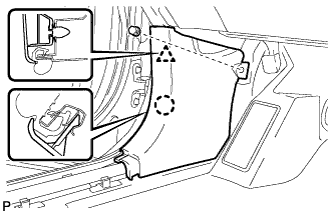
- Engage the claw and clip, install the cowl side trim sub-assembly LH.
Install the clip.
| 5.
INSTALL FRONT DOOR SCUFF PLATE LH
|
|
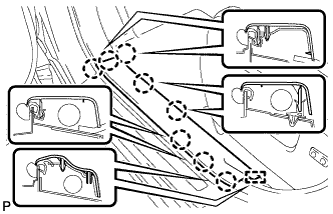
- Engage the guide and 8 claws, and install the front door scuff plate LH.
| 6.
CONNECT CABLE TO NEGATIVE BATTERY TERMINAL |
|
- NOTICE:
- When disconnecting the cable, some systems need to be initialized after the cable is reconnected (Click here).
| 7.
INSPECT SRS WARNING LIGHT |
|
Inspect the SRS warning light (Click here).