REMOVAL
Removal / installation · Vehicles built Aug 2008 – Jun 2010
Versions by build date: May 2007 – Jul 2008 Aug 2008 – Jun 2010 from Jul 2010
| 2.
REMOVE FRONT AXLE HUB NUT
|
 |
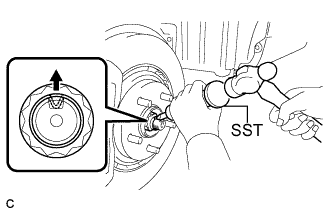
- Using SST and a hammer, release the staked part of the front axle hub nut.
- SST
- 09930-00010
- NOTICE:
- Loosen the staked part of the nut completely, otherwise the threads of the drive shaft may be damaged.
While applying the brakes, remove the front axle hub nut.
| 3.
SEPARATE FRONT SPEED SENSOR |
|
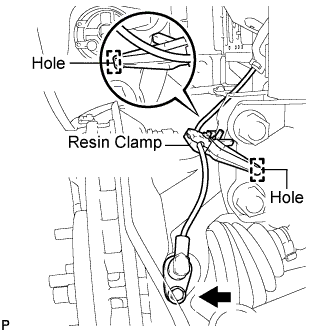
- Remove the bolt and resin clamp, and separate the front speed sensor.
- NOTICE:
- Be sure to completely separate the front speed sensor from the front shock absorber with coil spring.
- Be careful not to damage the front speed sensor.
- Clean the installation hole and the surface for the speed sensor every time the speed sensor is removed.
| 4.
SEPARATE FRONT DRIVE SHAFT ASSEMBLY |
|
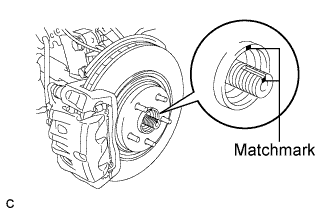
- Put matchmarks on the front drive shaft assembly and the front axle hub sub-assembly.
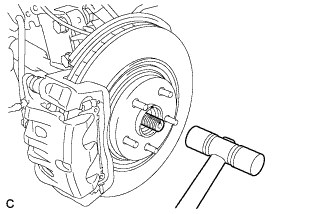
- Using a plastic hammer, separate the front drive shaft assembly from the front axle assembly.
- NOTICE:
- Loosen the staked part of the front axle hub nut completely, otherwise the threads of the drive shaft may be damaged.
| 5.
SEPARATE FRONT DISC BRAKE CALIPER ASSEMBLY |
|
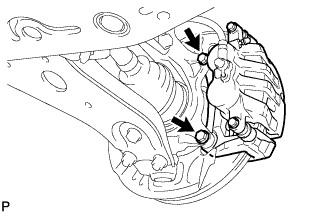
- Remove the 2 bolts and separate the front disc brake caliper assembly.
- NOTICE:
- Use wire or an equivalent tool to keep the brake caliper from hanging down by the flexible hose.
| 6.
REMOVE FRONT DISC
|
|
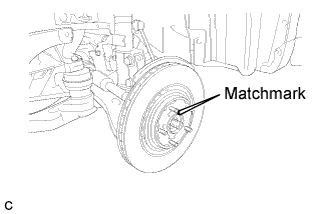
- Remove the front disc.
- HINT:
- Put matchmarks on the disc and the axle hub.
| 7.
SEPARATE TIE ROD ASSEMBLY
|
|
Remove the cotter pin and the nut.
- Install SST to the tie rod end.
- SST
- 09960-20010
(09961-02060)
- NOTICE:
- Make sure that the upper ends of the tie rod end and SST are aligned.
Using SST, separate the tie rod end from the steering knuckle.
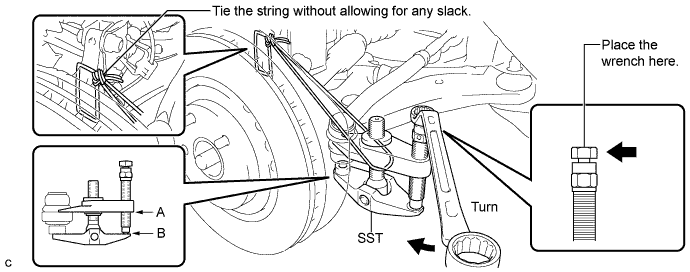

- SST
- 09960-20010
(09961-02010)
- NOTICE:
- When securing SST to the steering knuckle, be sure to tighten the string of SST to prevent it from falling.
- Install SST so that A and B are parallel.
- Be sure to place the wrench on the part indicated in the illustration.
- Do not damage the front disc brake dust cover.
- Do not damage the ball joint dust cover.
- Do not damage the steering knuckle.
| 8.
SEPARATE FRONT LOWER SUSPENSION ARM |
|
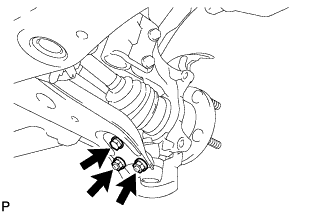
- Remove the bolt, 2 nuts, and separate the front lower suspension arm from the lower ball joint.
| 9.
REMOVE FRONT AXLE ASSEMBLY |
|
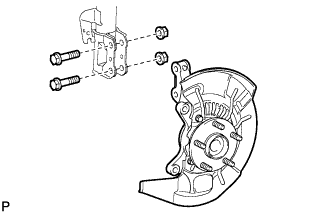
- Remove the 2 bolts, 2 nuts and front axle assembly.
- NOTICE:
- When removing the nuts, keep the bolts from rotating.
| 10.
REMOVE FRONT LOWER BALL JOINT |
|
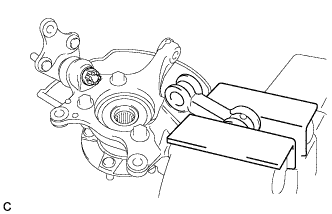
- Secure the front axle assembly in a vise using aluminum plates.
- NOTICE:
- When using a vise, do not overtighten it.
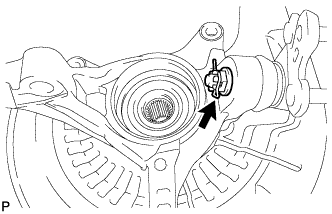
- Remove the cotter pin and nut.
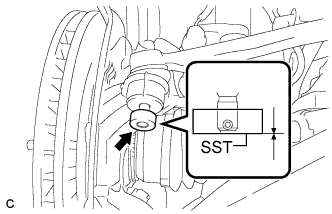
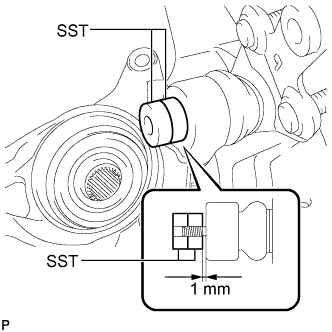
- Install SST to the front lower ball joint as shown in the illustration.
- SST
- 09960-20010
(09961-02050, 09961-02050)
- NOTICE:
- Check that the clearance measurement between SST and the front axle assembly is 1 mm (0.04 in.).
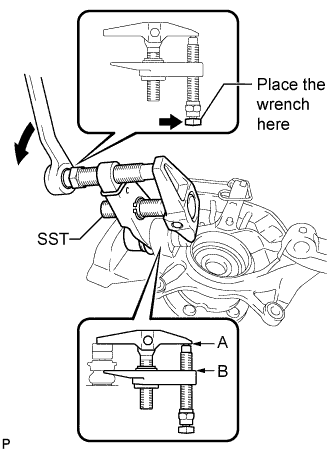
- Using SST, remove the front lower ball joint from the front axle assembly as shown in the illustration.
- SST
- 09960-20010
(09961-02010, 09961-02050, 09961-02050)
- NOTICE:
- Install SST so that A and B are parallel.
- Be sure to place a wrench on the part indicated in the illustration.
- Do not damage the front lower ball joint dust cover.