INSTALLATION
Removal / installation · Vehicles built from Jul 2010
Versions by build date: May 2007 – Jul 2008 Aug 2008 – Jun 2010 from Jul 2010
| 1. INSTALL FRONT AIR OUTLET CONTROL SERVO MOTOR SUB-ASSEMBLY |

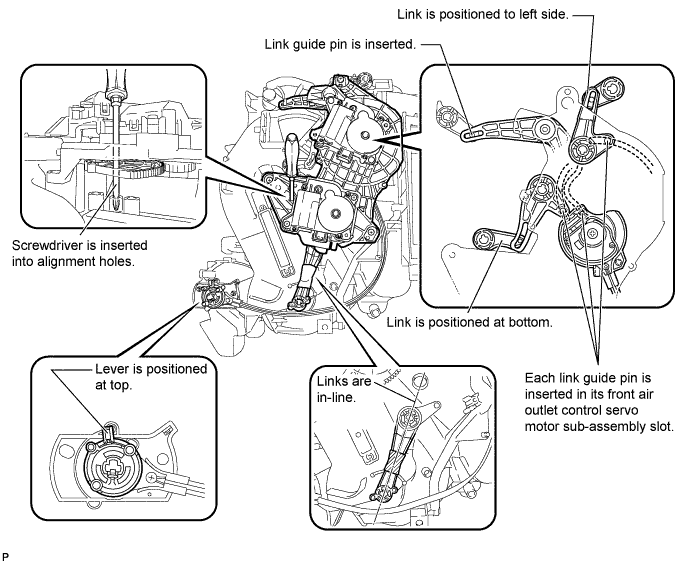
Check that the slots, links and gears of the front air outlet control servo motor sub-assembly are positioned in the correct orientation as shown in the illustration.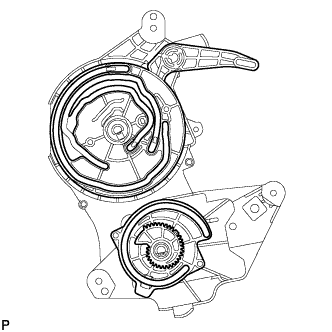

Face the contact surfaces of the front air outlet control servo motor sub-assembly and air conditioning radiator assembly for the front air outlet control servo motor sub-assembly upward.
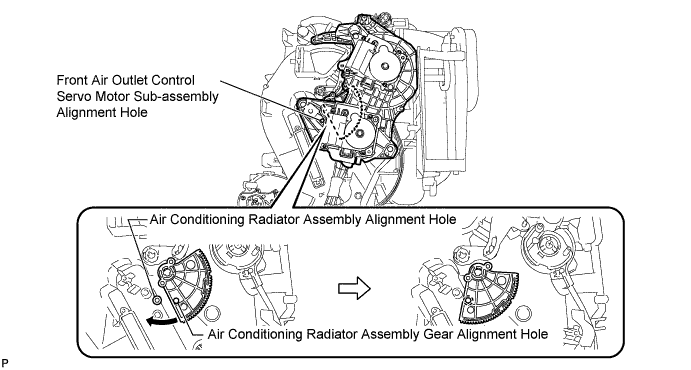
Rotate the link of the air conditioning radiator assembly all the way to the left as shown in the illustration.
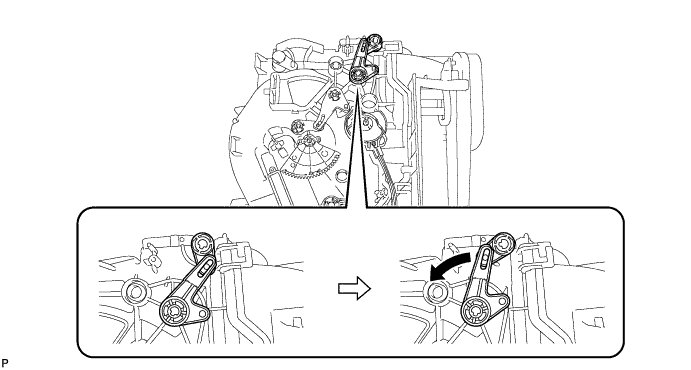
Rotate the link of the air conditioning radiator assembly to the bottom as shown in the illustration and confirm that the mode switching duct hole is fully closed.
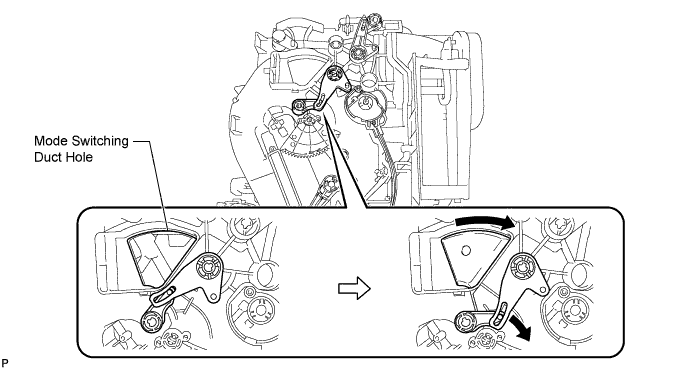
Rotate the lever of the air conditioning radiator assembly to the top as shown in the illustration.
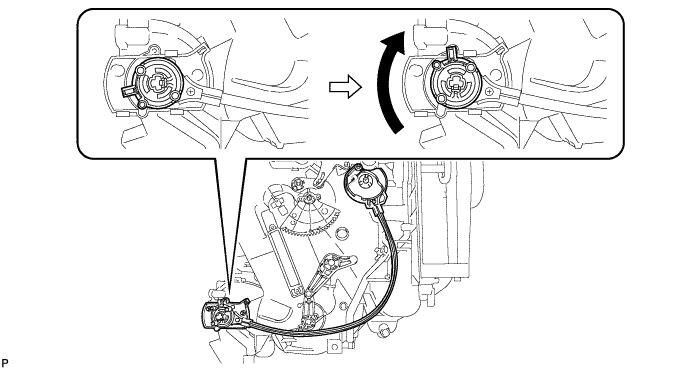
Rotate the link of the air conditioning radiator assembly to the in-line position as shown in the illustration.
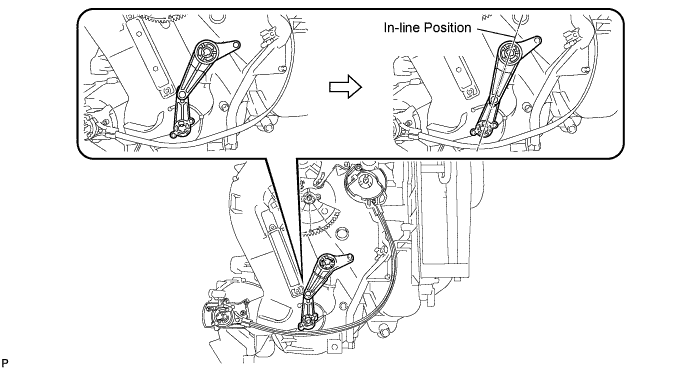
Wrap the upper and lower links with vinyl tape to hold them in the in-line position.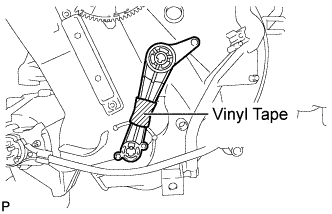
Install the link of the front air outlet control servo motor sub-assembly to the link guide pin (A) of the air conditioning radiator assembly as shown in the illustration.
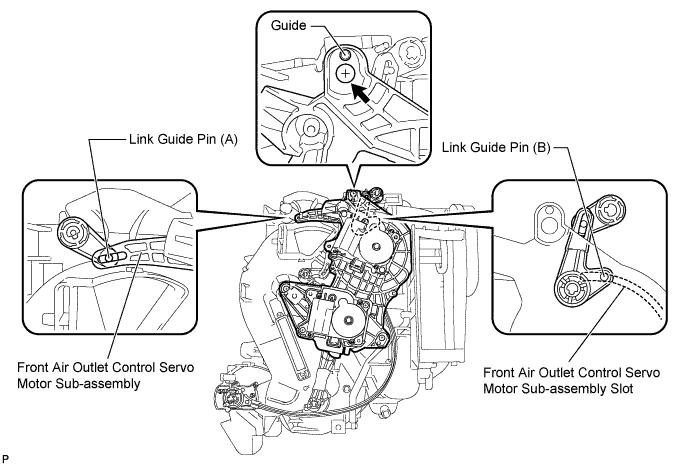
Install the guide hole of the front air outlet control servo motor sub-assembly to the guide pin of the air conditioning radiator assembly as shown in the illustration.
Temporarily install the screw (up to 4 or 5 threads).
- NOTICE:
- Make sure that the link guide pin (B) is inserted in the front air outlet control servo motor sub-assembly slot.
- Avoid tilting the front air outlet control servo motor sub-assembly during installation. This helps to prevent the guide pins from coming out of position.
- Make sure that the link guide pin (B) is inserted in the front air outlet control servo motor sub-assembly slot.
Lift the front air outlet control servo motor sub-assembly slightly to create clearance.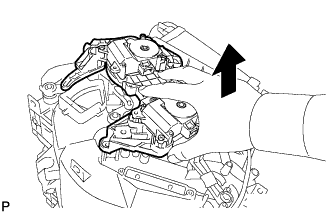
Move the air conditioning radiator assembly gear so that alignment holes of the front air outlet control servo motor sub-assembly and air conditioning radiator assembly are aligned.
Insert a screwdriver into the aligned holes as shown in the illustration.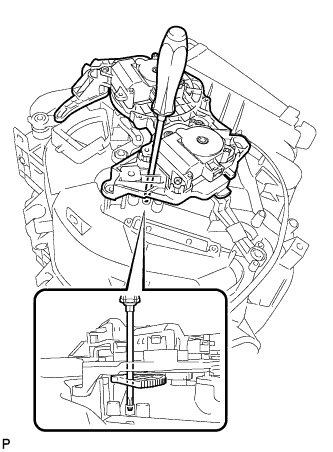
Make sure that all the links and gears are in the positions shown in the illustration.
Push the loose fitting front air outlet control servo motor sub-assembly into position.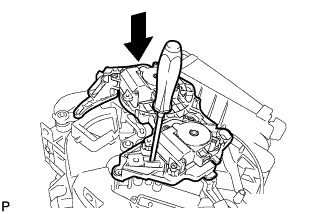
- NOTICE:
- Make sure that the front air outlet control servo motor sub-assembly is fully pushed into position.
- After pushing the servo into position, keep it in place by holding it until the screws are installed.
- Make sure that the front air outlet control servo motor sub-assembly is fully pushed into position.
- HINT:
- Push the front air outlet control servo motor sub-assembly until a click sound is heard.
Remove the screwdriver.
Fully install the top screw, and then install the front air outlet control servo motor sub-assembly with the 2 remaining screws.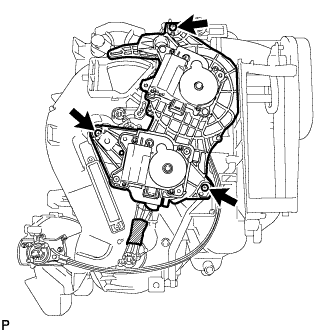
Remove the vinyl tape.
Connect the 2 connectors.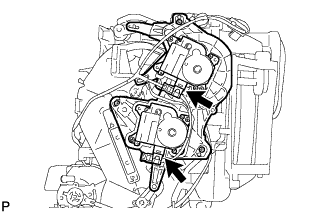
| 2. INSTALL BLOWER ASSEMBLY |
Engage the 2 claws.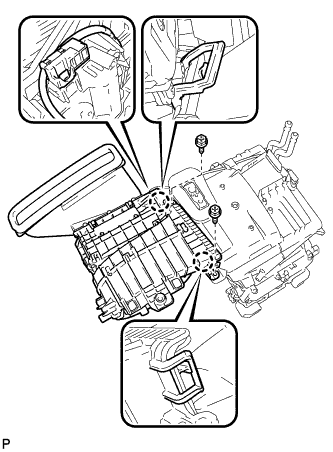
Install the blower assembly with the 2 screws.
Connect the connector.
| 3. INSTALL AIR CONDITIONING UNIT |
| 4. INITIALIZE SERVO MOTOR |
Turn the ignition switch off.
Connect the intelligent tester to the DLC3.
Turn the ignition switch to on.
Press the A/C OFF switch.
Turn the intelligent tester on.
Enter the following menus: Body / Air Conditioner / Utility / Servomotor Initialization.
According to the intelligent tester display, select the "Next" switch.
According to the intelligent tester display, select the "Next" switch.
- HINT:
- During initialization, the AUTO indicator illuminates. When initialization is complete, the indicator turns off.
According to the intelligent tester display, select the exit to finish the initialization.