DISASSEMBLY
Removal / installation · Vehicles built from May 2007
| 1. REMOVE FRONT DRIVE SHAFT HOLE SNAP RING |

Using a screwdriver, remove the front drive shaft hole snap ring.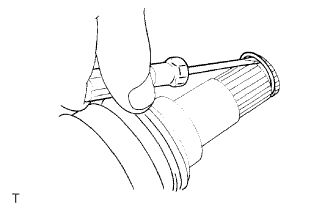

| 2. REMOVE NO. 2 FRONT AXLE INBOARD JOINT BOOT CLAMP |
Using pliers, remove the No. 2 front axle inboard joint boot clamp as shown in the illustration.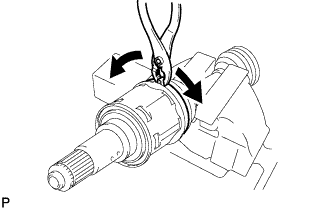
| 3. REMOVE FRONT AXLE INBOARD JOINT BOOT CLAMP |
Remove the front axle inboard joint boot clamp.
- HINT:
- Perform the same procedures as for the No. 2 front axle inboard joint boot clamp.
| 4. SEPARATE FRONT AXLE INBOARD JOINT BOOT |
Separate the front axle inboard joint boot from the inboard joint assembly.
| 5. REMOVE FRONT DRIVE INBOARD JOINT ASSEMBLY |
Remove the grease from the inboard joint assembly.
Put matchmarks on the inboard joint assembly and outboard joint shaft.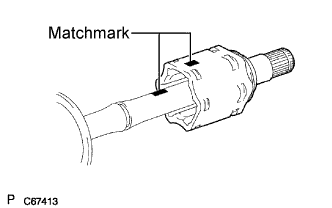
- NOTICE:
- Do not use a punch for the marks.
Remove the inboard joint assembly from the outboard joint shaft.
Using a snap ring expander, remove the shaft snap ring.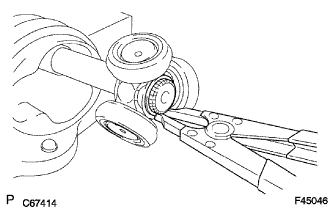
Put matchmarks on the outboard joint shaft and tripod joint.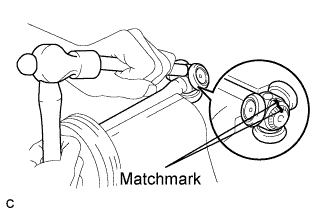
- NOTICE:
- Do not use a punch for the marks.
Using a brass bar and a hammer, remove the tripod joint from the outboard joint shaft.
- NOTICE:
- Do not tap the roller.
| 6. REMOVE FRONT AXLE INBOARD JOINT BOOT |
Remove the inboard joint boot from the outboard joint shaft.
| 7. REMOVE FRONT DRIVE SHAFT DAMPER |
Using pliers, remove the drive shaft damper clamp as shown in the illustration.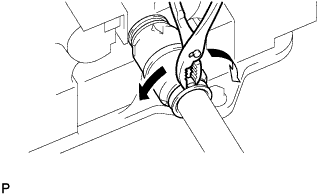
Remove the drive shaft damper.
| 8. REMOVE NO. 2 FRONT AXLE OUTBOARD JOINT BOOT CLAMP |
Using pliers, remove the No. 2 front axle outboard joint boot clamp as shown in the illustration.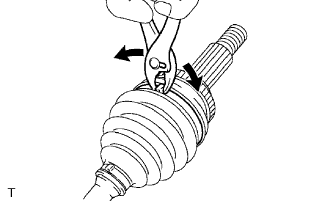
| 9. REMOVE FRONT AXLE OUTBOARD JOINT BOOT CLAMP |
Remove the front axle outboard joint boot clamp.
- HINT:
- Perform the same procedures as for the No. 2 front axle outboard joint boot clamp.
| 10. REMOVE FRONT AXLE OUTBOARD JOINT BOOT |
Remove the outboard joint boot from the outboard joint shaft.
Remove the grease from the outboard joint.
| 11. REMOVE FRONT DRIVE SHAFT DUST COVER LH |
Using SST and a press, remove the drive shaft dust cover LH.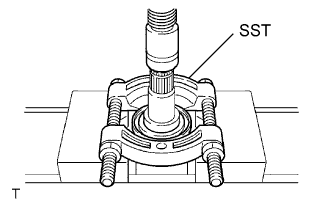
- SST
- 09950-00020
- NOTICE:
- Be careful not to drop the inboard joint assembly.
| 12. REMOVE FRONT DRIVE SHAFT DUST COVER RH (for 2WD RH Side) |
Using a press, remove the drive shaft dust cover RH.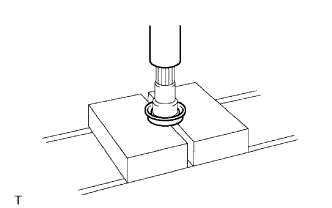
| 13. REMOVE FRONT DRIVE SHAFT DUST COVER RH (for 4WD RH Side) |
- HINT:
- Perform the same procedure as for the LH side.
| 14. REMOVE FRONT DRIVE SHAFT DUST COVER (for 2WD RH Side) |
Using SST and a press, remove the drive shaft dust cover.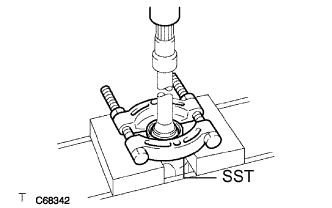
- SST
- 09950-00020
| 15. REMOVE SIDE GEAR SHAFT HOLDER BEARING (for 2WD RH Side) |
Using a snap ring expander, remove the drive shaft hole snap ring.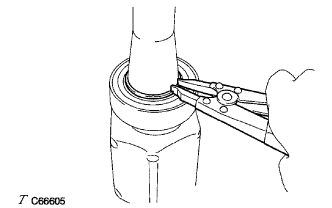
Using SST and a press, remove the bearing.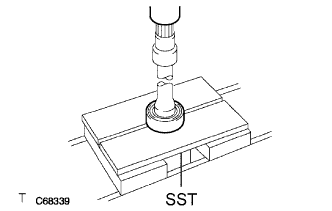
- SST
- 09527-10011
Remove the bearing bracket hole snap ring.
- NOTICE:
- Be careful not to drop the inboard joint assembly.