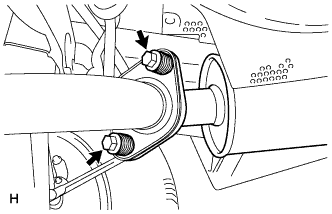
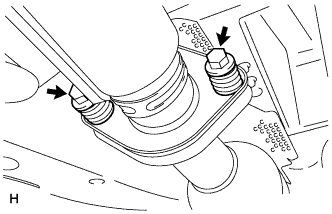
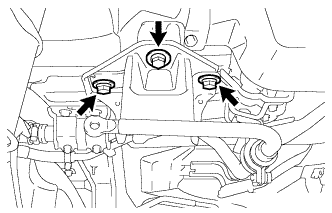
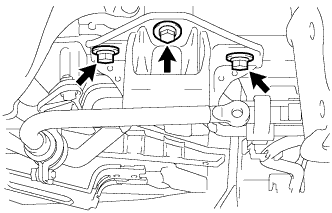
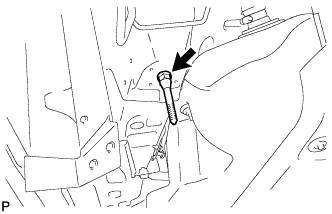
Disconnect the exhaust pipe support and remove the tail exhaust pipe assembly.
Remove the gasket from the center exhaust pipe assembly.
3.
REMOVE CENTER EXHAUST PIPE ASSEMBLY
Remove the 2 bolts and 2 compression springs.
Disconnect the 3 exhaust pipe supports and remove the center exhaust pipe assembly.
Remove the gasket from the No. 3 exhaust pipe sub-assembly.
4.
REMOVE PROPELLER WITH CENTER BEARING SHAFT ASSEMBLY
Depress the brake pedal and hold it.
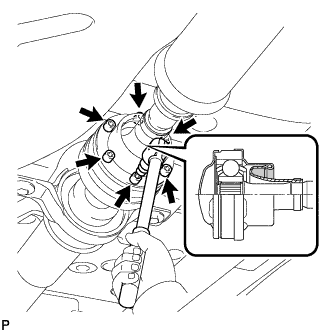
Using a hexagon wrench (6 mm), loosen the cross groove joint set bolts 1/2 turn.
HINT:
Put a piece of cloth or equivalent into the inside of the universal joint cover so that the boot does not touch the inside of the universal joint cover.
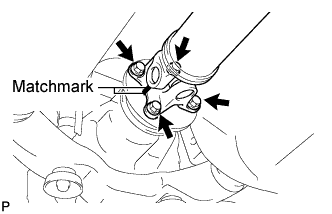
Place matchmarks on the rear propeller shaft and rear drive pinion flange sub-assembly.
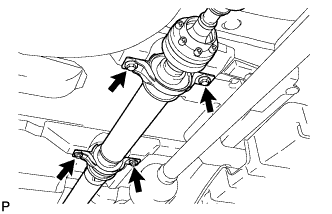
Remove the 4 nuts, 4 bolts and 4 washers.
Remove the 4 bolts and 4 adjusting shims.
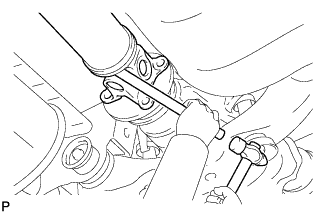
Using a brass bar and a hammer, remove the propeller shaft with center bearing shaft assembly.
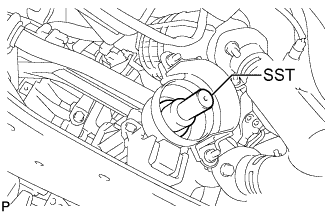
Insert SST into the transfer to prevent oil leakage.
SST
09325-20010
5.
SEPARATE REAR SPEED SENSOR LH
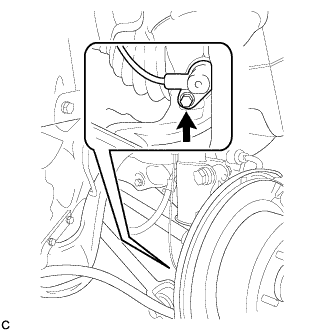
Remove the bolt and separate the rear speed sensor from the rear axle carrier sub-assembly.
NOTICE:
Keep the sensor tip and rear speed sensor installation hole free from foreign matter.
6.
SEPARATE REAR SPEED SENSOR RH
HINT:
Perform the same procedure as the LH side.
7.
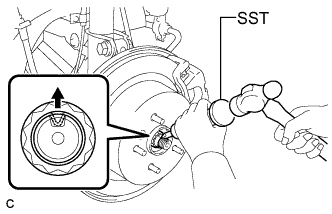
REMOVE REAR AXLE SHAFT NUT LH
Using SST and a hammer, release the staked part of the rear axle shaft nut.
SST
09930-00010
NOTICE:
Loosen the staked part of the nut completely, otherwise the threads of the drive shaft may be damaged.
While applying the brakes, remove the rear axle shaft nut.
8.
REMOVE REAR AXLE SHAFT NUT RH
HINT:
Perform the same procedure as the LH side.
9.
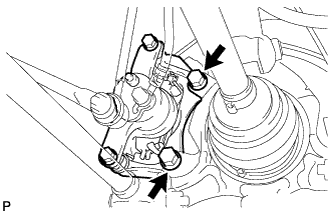
SEPARATE REAR DISC BRAKE CALIPER ASSEMBLY LH
Remove the 2 bolts and separate the rear disc brake caliper assembly.
NOTICE:
Use wire or an equivalent tool to keep the brake caliper from hanging down by the flexible hose.
10.
SEPARATE REAR DISC BRAKE CALIPER ASSEMBLY RH
HINT:
Perform the same procedure as the LH side.
11.
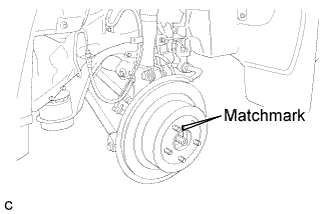
REMOVE REAR DISC (for LH Side)
Put matchmarks on the rear disc and the axle hub.
Release the parking brake and remove the rear disc.
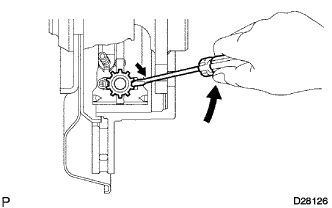
HINT:
If the disc cannot be removed easily, turn and press firmly the shoe adjuster until the wheel comes free.
12.
REMOVE REAR DISC (for RH Side)
HINT:
Perform the same procedure as the LH side.
13.
REMOVE REAR AXLE HUB AND BEARING ASSEMBLY LH
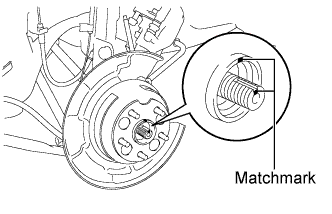
Put matchmarks on the drive shaft and axle hub.
NOTICE:
Do not punch the marks.
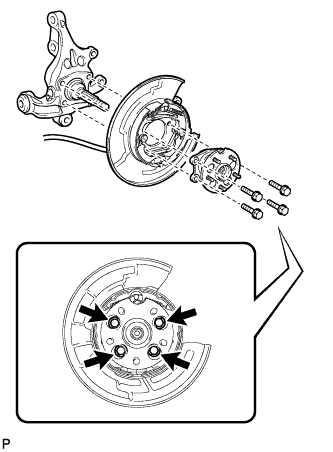
Remove the 4 bolts and the rear axle hub and bearing assembly.
NOTICE:
Do not rotate the drive shaft with the rear axle hub and bearing assembly removed.
Use wire or an equivalent tool to keep the parking brake assembly from hanging down by the parking brake cable assembly.
14.
REMOVE REAR AXLE HUB AND BEARING ASSEMBLY RH
HINT:
Perform the same procedure as the LH side.
15.
SEPARATE NO. 3 PARKING BRAKE CABLE ASSEMBLY
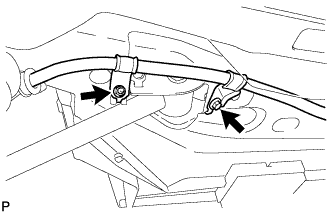
Remove the bolt and the nut, and separate the No. 3 parking brake cable assembly.
16.
SEPARATE NO. 2 PARKING BRAKE CABLE ASSEMBLY
HINT:
Perform the same procedure as the No. 3 parking brake cable assembly.
17.
REMOVE REAR STRUT ROD ASSEMBLY LH
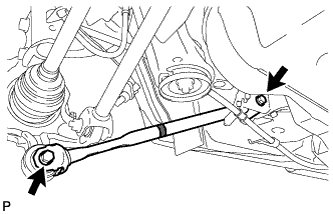
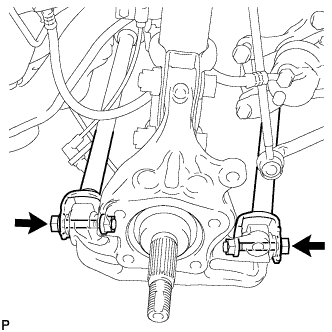
Remove the 2 bolts, the 2 nuts, and the rear strut rod assembly.
NOTICE:
Since stopper nuts are used, loosen the bolts.
18.
REMOVE REAR STRUT ROD ASSEMBLY RH
HINT:
Perform the same procedure as the LH side.
19.
REMOVE REAR AXLE CARRIER SUB-ASSEMBLY LH
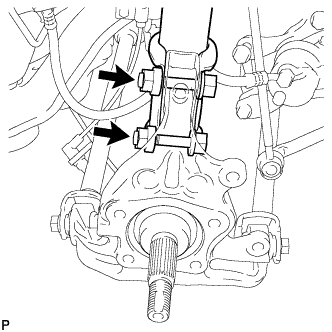
Loosen the 2 bolts.
NOTICE:
Since stopper nuts are used, loosen the bolts.
Remove the 2 bolts and 2 nuts, and separate the rear shock absorber with coil spring (lower side) from the rear axle carrier sub-assembly.
NOTICE:
Be careful not to damage the outboard joint boot.
Be careful not to damage the speed sensor rotor.
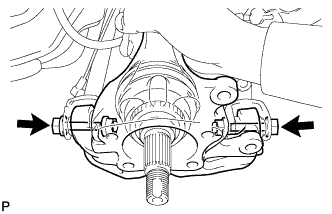
Remove the 2 bolts, the 2 nuts, and the rear axle carrier sub-assembly.
NOTICE:
Be careful not to damage the outboard joint boot.
Be careful not to damage the speed sensor rotor.
HINT:
Use wire or an equivalent tool to keep the rear drive shaft assembly from hanging down.
20.
REMOVE REAR AXLE CARRIER SUB-ASSEMBLY RH
HINT:
Perform the same procedure as the LH side.
21.
REMOVE REAR NO. 2 SUSPENSION ARM ASSEMBLY LH
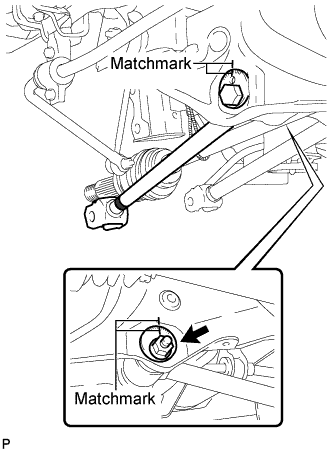
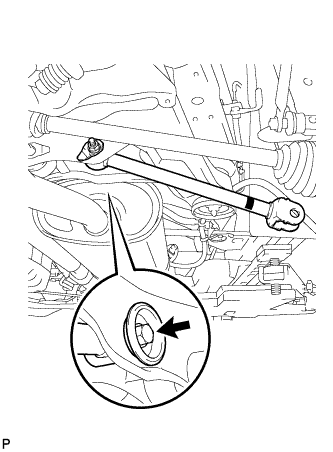
Put matchmarks on the adjust cams and the rear suspension member sub-assembly.
Remove the nut, the No. 2 camber adjust cam, the rear suspension toe adjust cam sub-assembly, and the rear No. 2 suspension arm assembly LH.
NOTICE:
Mark the removed parts to distinguish left from right and keep them in order for reinstallation.
HINT:
When removing the nut, keep the rear suspension toe adjust cam sub-assembly from rotating.
22.
REMOVE REAR NO. 2 SUSPENSION ARM ASSEMBLY RH
HINT:
Perform the same procedure as the LH side.
23.
REMOVE REAR NO. 1 SUSPENSION ARM ASSEMBLY RH
Remove the bolt, the nut, and the rear No. 1 suspension arm assembly RH from the rear suspension member sub-assembly.
NOTICE:
Since a stopper nut is used, loosen the bolt.
Mark the removed parts to distinguish left from right and keep them in order for reinstallation.
24.
REMOVE REAR DIFFERENTIAL FILLER PLUG
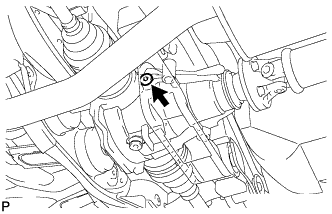
Using a hexagon wrench (10 mm), remove the rear differential filler plug and rear differential filler plug gasket.
25.
REMOVE REAR DIFFERENTIAL DRAIN PLUG
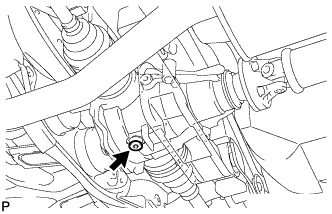
Using a hexagon wrench (10 mm), remove the rear differential drain plug and rear differential drain plug gasket, and drain the oil.
26.
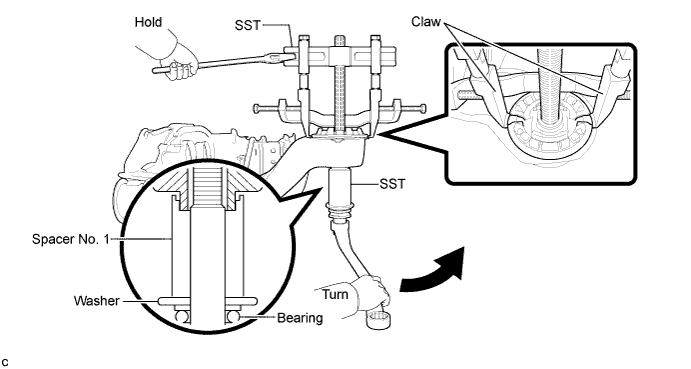
REMOVE REAR DRIVE SHAFT ASSEMBLY LH
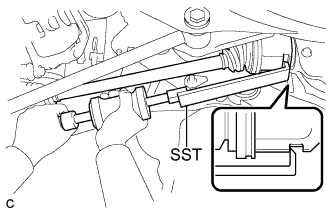
Using SST, remove the rear drive shaft assembly as shown in the illustration.
SST
09520-01010 09520-24010
(09520-32040)
NOTICE:
Remove the rear drive shaft assembly while keeping it level.
27.
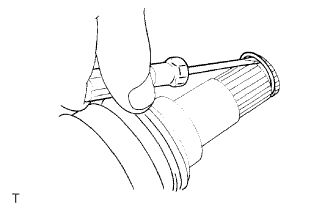
REMOVE REAR DRIVE SHAFT SNAP RING LH
Using a screwdriver, remove the rear drive shaft snap ring.
28.
REMOVE REAR DRIVE SHAFT ASSEMBLY RH
HINT:
Perform the same procedure as the LH side.
29.
REMOVE REAR DRIVE SHAFT SNAP RING RH
HINT:
Perform the same procedure as the LH side.
30.
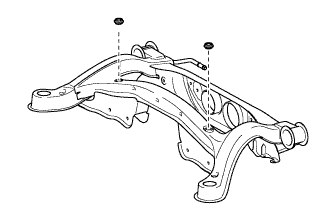
REMOVE REAR SUSPENSION MEMBER
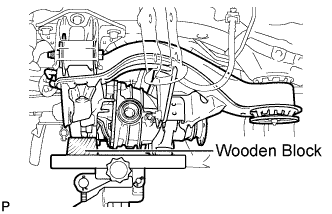
Support the rear suspension member with a jack using a wooden block.
HINT:
Use a properly sized wooden block to keep the jack and suspension member level.
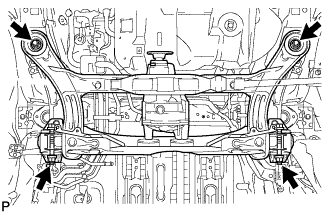
Remove the 4 nuts, 2 bolts and 2 rear lower suspension member stopper retainers.
Lower the rear suspension member.
Remove the 2 rear upper suspension member stoppers.
31.
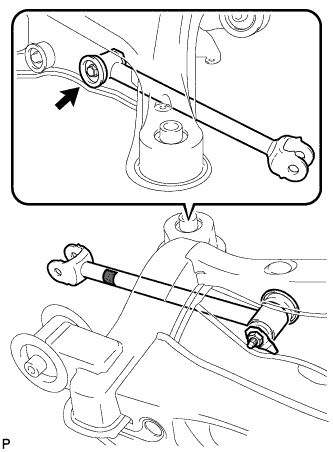
REMOVE REAR NO. 1 SUSPENSION ARM ASSEMBLY LH
Remove the bolt, the nut, and the rear No. 1 suspension arm assembly LH from the rear suspension member sub-assembly.
NOTICE:
Since a stopper nut is used, loosen the bolt.
32.
REMOVE REAR DIFFERENTIAL CARRIER ASSEMBLY
Support the rear differential carrier assembly with a jack.
Remove the 2 bolts and 2 lock nuts, and separate the No. 1 rear differential support from the rear suspension member sub-assembly.
Remove the 3 bolts and rear differential carrier assembly from the rear suspension member sub-assembly.
NOTICE:
Be careful not to drop the rear differential carrier assembly.
33.
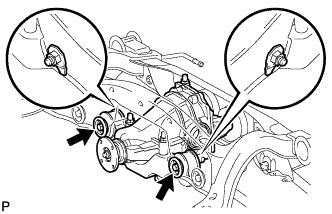
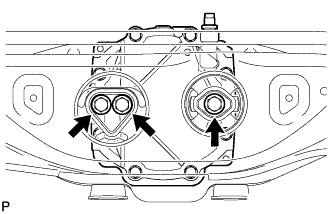
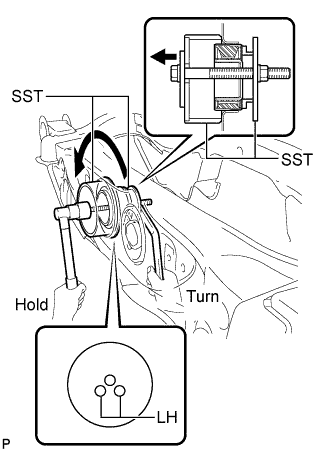
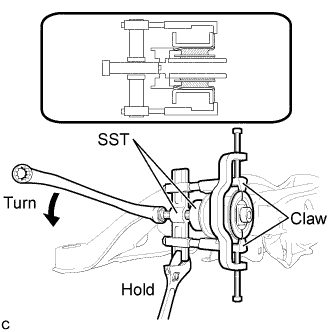
REMOVE REAR NO. 1 DIFFERENTIAL MOUNT CUSHION
Using SST, remove the rear No. 1 differential mount cushion.
SST
09570-24011 09316-12010
NOTICE:
Do not bring SST into contact with the sub-frame.
Do not slant the SST bolt.
Do not set SST in the wrong direction.
Tighten the SST bolt equally into the 2 No. 1 rear differential mount cushion hole.
HINT:
Perform this operation only if the No. 1 rear differential mount cushion is damaged.
34.
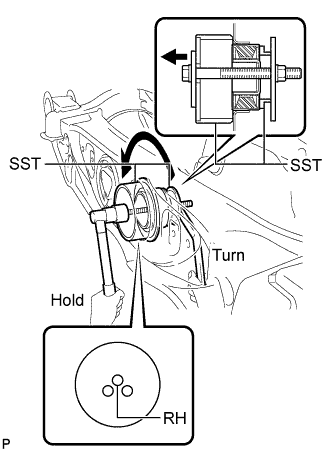
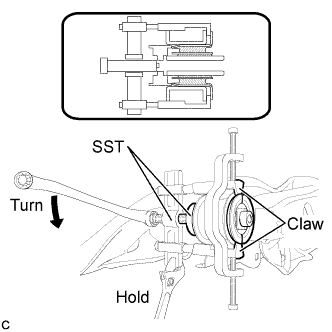
REMOVE REAR NO. 2 DIFFERENTIAL MOUNT CUSHION
Using SST, remove the rear No. 2 differential mount cushion.
SST
09570-24011 09316-12010
NOTICE:
Do not bring SST into contact with the sub-frame.
Do not slant the SST bolts.
Do not set SST in the wrong direction.
HINT:
Perform this operation only if the No. 2 rear differential mount cushion is damaged.
35.
REMOVE REAR SUSPENSION MEMBER BODY MOUNTING FRONT CUSHION (for LH Side)
Using SST, remove the rear suspension member body mounting front cushion.