2007-2013 Highlander Kluger · Service Manual BRAKE

REMOVAL

Removal / installation · Vehicles built May 2007 – Jul 2008

Versions by build date: May 2007 – Jul 2008 Aug 2008 – Jun 2010 from Jul 2010

CAUTION:
Some of these service operations affect the SRS airbag system. Read the precautionary notices concerning the SRS airbag system before servicing the parking brake pedal (Click here).


1. DISCONNECT CABLE FROM NEGATIVE BATTERY TERMINAL (for Manual Seat)

CAUTION:
Wait for 90 seconds after disconnecting the cable to prevent the airbag working.

NOTICE:
When disconnecting the cable, some systems need to be initialized after the cable is reconnected (Click here).


2. REMOVE FRONT SEAT HEADREST ASSEMBLY LH (for Manual Seat)

3. REMOVE FRONT OUTER SEAT TRACK COVER LH (for Manual Seat)
  1. Lift up the seat track adjusting handle and move the seat to the rearmost position.

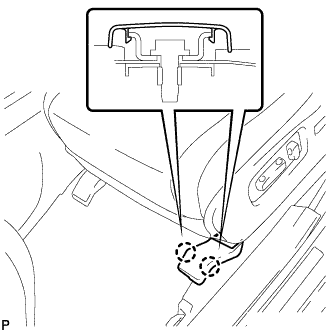
  1. B174583
    Disengage the 2 claws and remove the front outer seat track cover.


4. REMOVE FRONT INNER SEAT TRACK COVER LH (for Manual Seat)

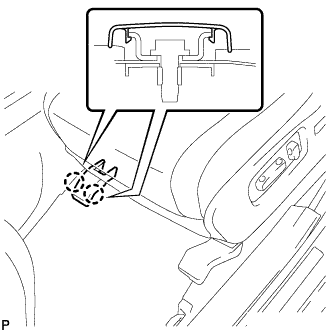
  1. B174584
    Disengage the 2 claws and remove the front inner seat track cover.


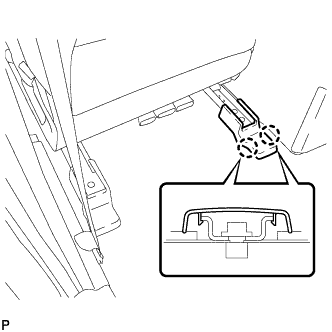
5. REMOVE REAR SEAT TRACK COVER LH (for Manual Seat)
  1. Lift up the seat track adjusting handle and move the seat to the foremost position.

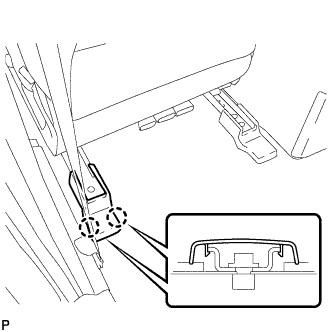
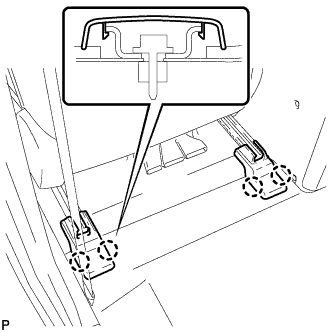
  1. B180417
    Disengage the 4 claws and remove the 2 rear seat track covers.


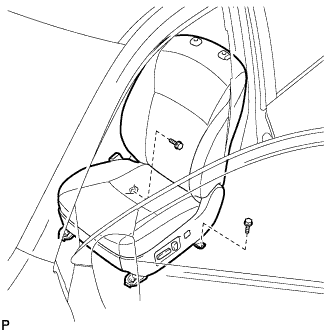
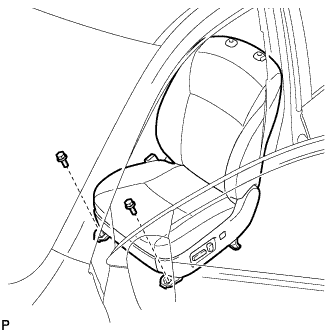
6. REMOVE FRONT SEAT ASSEMBLY LH (for Manual Seat)

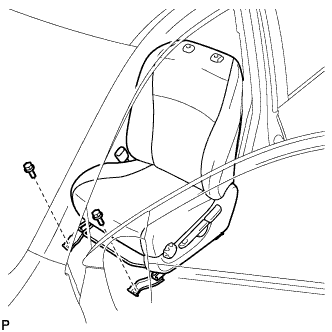
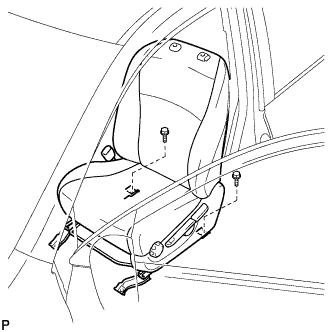
  1. B174587
    Remove the 2 bolts on the rear side of the seat.

  1. Lift up the seat track adjusting handle and move the seat to the rearmost position.

  1. B174588
    Remove the 2 bolts on the front side of the seat.

  1. Lift up the seat track adjusting handle and move the seat to the center position. Also, operate the reclining adjuster release handle and move the seatback to the upright position.

  1. Disconnect the connectors under the front seat assembly.

  1. Remove the front seat assembly.

    NOTICE:
    Be careful not to damage the vehicle body.


7. REMOVE FRONT SEAT HEADREST ASSEMBLY LH (for Power Seat)

8. REMOVE FRONT OUTER SEAT TRACK COVER LH (for Power Seat)
  1. Operate the power seat switch knob and move the seat to the rearmost position.

  1. B172841
    Disengage the 2 claws and remove the front outer seat track cover.


9. REMOVE FRONT INNER SEAT TRACK COVER LH (for Power Seat)

  1. B172842
    Disengage the 2 claws and remove the front inner seat track cover.


10. REMOVE REAR OUTER SEAT TRACK COVER LH (for Power Seat)
  1. Operate the power seat switch knob and move the seat to the foremost position.

  1. B172843
    Disengage the 2 claws and remove the rear outer seat track cover.


11. REMOVE REAR INNER SEAT TRACK COVER LH (for Power Seat)

  1. B172844
    Disengage the 2 claws and remove the rear inner seat track cover.


12. REMOVE FRONT SEAT ASSEMBLY LH (for Power Seat)

  1. B174581
    Remove the 2 bolts on the rear side of the seat.

  1. Operate the power seat switch knob and move the seat to the rearmost position.

  1. B174582
    Remove the 2 bolts on the front side of the seat.

  1. Operate the power seat switch knob and move the seat to the center position. Also, Operate the power seat switch knob and move the seatback to the upright position.

  1. Disconnect the cable from the negative (-) battery terminal.

    CAUTION:
    1. Wait at least 90 seconds after disconnecting the cable from the negative (-) battery terminal to prevent the airbag and seat belt pretensioner from deploying (Click here).
    2. If the side airbag was deployed, replace the front seat assembly with a new one.

    NOTICE:
    When disconnecting the cable, some systems need to be initialized after the cable is reconnected (Click here).

  1. Disconnect each connector under the front seat assembly.

  1. Remove the front seat assembly.

    NOTICE:
    Be careful not to damage the vehicle body.


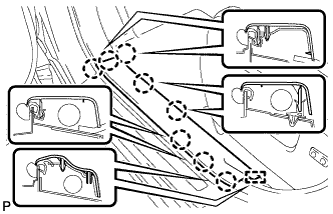
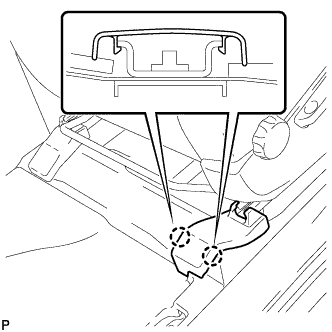
13. REMOVE FRONT DOOR SCUFF PLATE LH (for LHD)

  1. B173224
    Disengage the 8 claws and guide, and remove the front door scuff plate LH.


14. REMOVE COWL SIDE TRIM SUB-ASSEMBLY LH (for LHD)

  1. B173227
    Remove the clip.

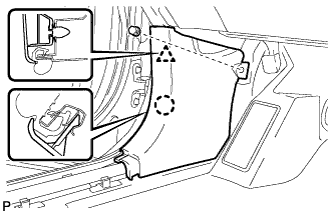
  1. Disengage the clip and claw, and remove the cowl side trim sub-assembly LH.


15. REMOVE LOWER INSTRUMENT PANEL FINISH PANEL SUB-ASSEMBLY (for LHD Manual Air Conditioning System)

  1. B168371
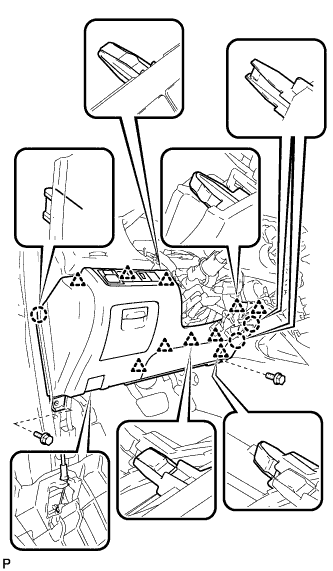
    Remove the 2 bolts <B>.

  1. Disengage the 3 claws and 10 clips.

  1. Disconnect each connector.

  1. Disconnect the hood lock control cable assembly and remove the lower instrument panel finish panel sub-assembly.


16. REMOVE LOWER INSTRUMENT PANEL FINISH PANEL SUB-ASSEMBLY (for LHD Automatic Air Conditioning System)

  1. B173021
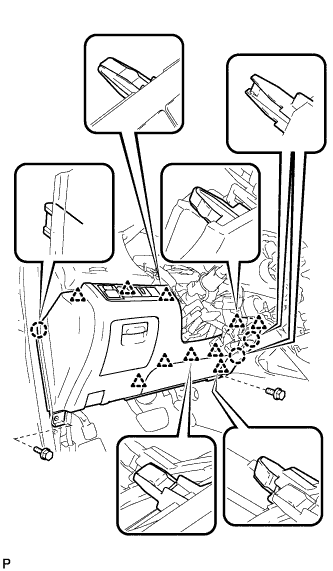
    Remove the 2 bolts <B>.

  1. Disengage the 3 claws and 10 clips.

  1. B173009
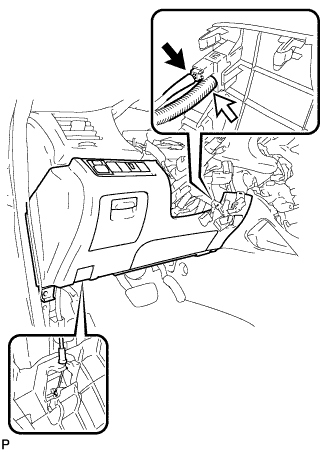
    Disconnect each connector and the aspirator duct.

  1. Disconnect the hood lock control cable assembly and remove the lower instrument panel finish panel sub-assembly.


17. REMOVE DRIVER SIDE KNEE AIRBAG ASSEMBLY (for LHD)

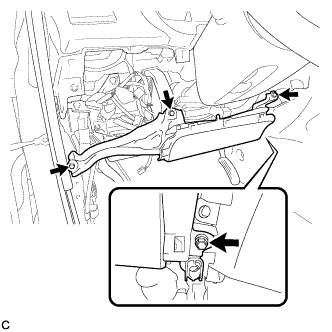
  1. C165098
    Remove the 4 bolts.

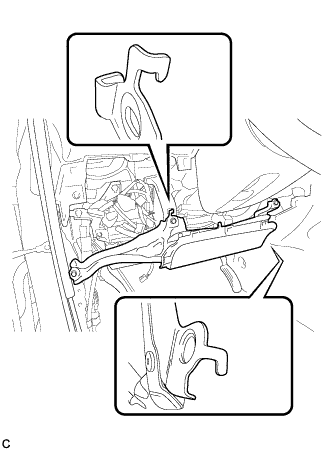
  1. C165099
    Disengage the 2 hooks.

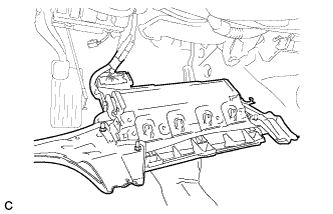
  1. C168059
    Pull out the driver side knee airbag assembly from the vehicle and support the driver side knee airbag assembly with one hand as shown in the illustration.

    NOTICE:
    When removing the driver side knee airbag assembly, do not pull the airbag wire harness.

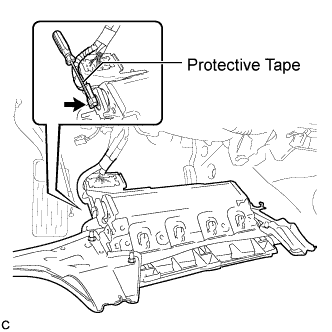
  1. C168060E01
    Using a screwdriver with the tip wrapped with protective tape, disconnect the driver side knee airbag connector.

    NOTICE:
    When handling the airbag connector, take care not to damage the airbag wire harness.

  1. C165102
    Disengage the 2 claws and separate the DLC3 from the driver side knee airbag assembly.


18. REMOVE FRONT DOOR SCUFF PLATE RH (for RHD)

HINT:
This is symmetrical to the LHD model (Click here).


19. REMOVE COWL SIDE TRIM SUB-ASSEMBLY RH (for RHD)

HINT:
This is symmetrical to the LHD model (Click here).


20. REMOVE LOWER INSTRUMENT PANEL FINISH PANEL SUB-ASSEMBLY (for RHD Manual Air Conditioning System)

HINT:
This is symmetrical to the LHD model (Click here).

21. REMOVE LOWER INSTRUMENT PANEL FINISH PANEL SUB-ASSEMBLY (for RHD Automatic Air Conditioning System)

HINT:
This is symmetrical to the LHD model (Click here).


22. REMOVE DRIVER SIDE KNEE AIRBAG ASSEMBLY (for RHD)

HINT:
This is symmetrical to the LHD model (Click here).
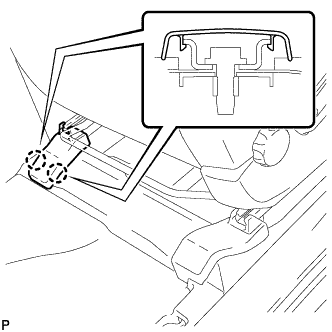

23. REMOVE FRONT DOOR SCUFF PLATE LH (for RHD)

HINT:
Use the same procedure for the LHD model (Click here).


24. REMOVE COWL SIDE TRIM SUB-ASSEMBLY LH (for RHD)

HINT:
Use the same procedure for the LHD model (Click here).


25. REMOVE NO. 2 INSTRUMENT PANEL UNDER COVER SUB-ASSEMBLY (for RHD)

HINT:
This is symmetrical to the LHD model (Click here).

26. REMOVE LOWER INSTRUMENT PANEL SUB-ASSEMBLY (for RHD)

HINT:
This is symmetrical to the LHD model (Click here).

27. REMOVE REAR DOOR SCUFF PLATE LH
  1. B173228
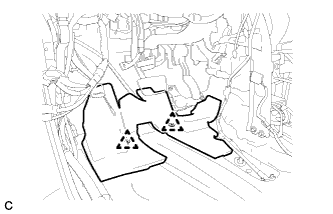
    Disengage the 5 claws, 3 clips and guide, and remove the rear door scuff plate LH.


28. REMOVE LOWER CENTER PILLAR GARNISH LH

  1. B173230
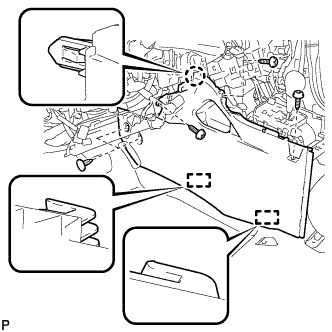
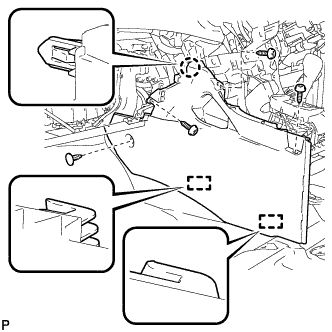
    Disengage the 2 claws and 2 clips, and remove the lower center pillar garnish LH.


29. REMOVE NO. 1 AIR DUCT SUB-ASSEMBLY (for RHD)

  1. C166134
    Disengage the 2 claws and remove the No. 1 air duct sub-assembly.


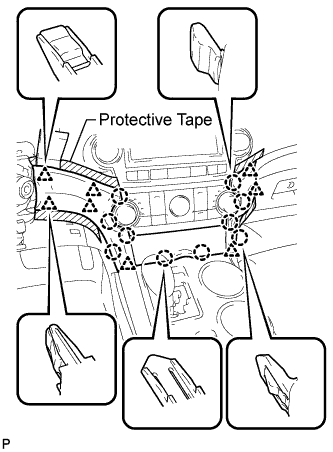
30. REMOVE CENTER INSTRUMENT CLUSTER FINISH PANEL ASSEMBLY (w/o Smart Entry and Start System)

  1. B184678E01
    Apply protective tape to the areas shown in the illustration.

  1. Using a moulding remover, disengage the 10 claws and 8 clips starting from the upper part of the center instrument cluster finish panel assembly.

    NOTICE:
    Do not pull on the small storage compartment lid. Doing so may cause damage.

  1. Disconnect each connector and remove the center instrument cluster finish panel assembly.


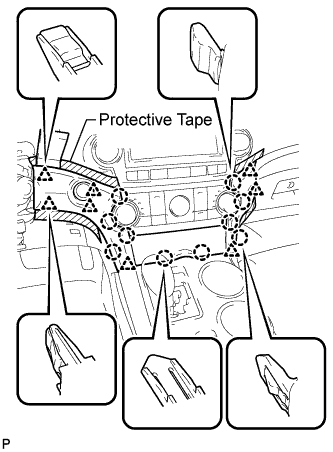
31. REMOVE CENTER INSTRUMENT CLUSTER FINISH PANEL ASSEMBLY (w/ Smart Entry and Start System)

  1. B184680E01
    Apply protective tape to the areas shown in the illustration.

  1. Using a moulding remover, disengage the 10 claws and 8 clips starting from the upper part of the center instrument cluster finish panel assembly.

    NOTICE:
    Do not pull on the small storage compartment lid. Doing so may cause damage.

  1. Disconnect each connector and remove the center instrument cluster finish panel assembly.


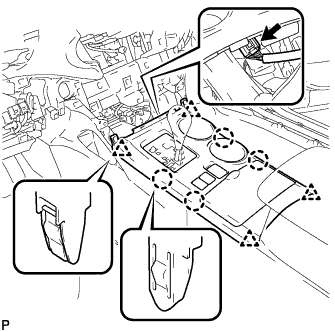
32. REMOVE UPPER CONSOLE PANEL SUB-ASSEMBLY

  1. B168372
    Disengage the 4 claws and 4 clips.

  1. Disconnect the connector and remove the upper console panel sub-assembly.


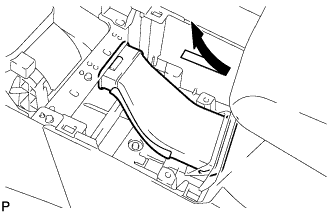
33. REMOVE NO. 2 CONSOLE BOX DUCT (w/o Rear Air Conditioning System)

  1. B173012
    Remove the No. 2 console box duct as shown in the illustration.


34. REMOVE LOWER REAR CONSOLE BOX
  1. Remove the lower rear console box.


35. REMOVE CONSOLE BOX ASSEMBLY (w/o Rear Air Conditioning System)

  1. B173628
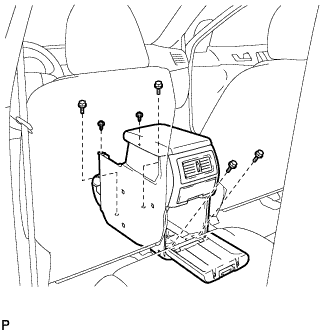
    Remove the 4 bolts and 2 screws.

  1. B173629
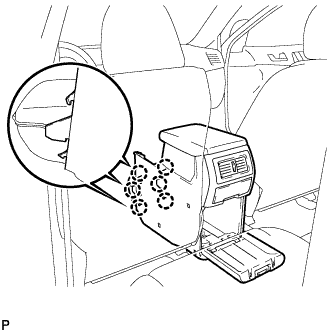
    Disengage the 6 claws and remove the console box assembly.


36. REMOVE CONSOLE BOX ASSEMBLY (w/ Rear Air Conditioning System)

  1. B181135
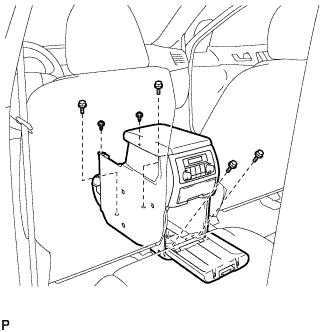
    Remove the 4 bolts and 2 screws.

  1. B175149
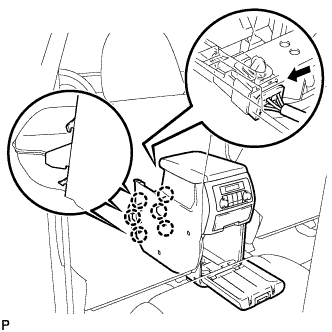
    Disconnect the connector.

  1. Disengage the 6 claws, and remove the console box assembly.


37. REMOVE FRONT NO. 1 CONSOLE BOX INSERT (for LHD)

  1. B168373
    Using a clip remover, remove the 2 clips.

  1. Remove the 3 screws <F>.

  1. Disengage the claw and 2 guides, and then remove the front No. 1 console box insert.


38. REMOVE FRONT NO. 1 CONSOLE BOX INSERT (for RHD)

  1. B173037
    Using a clip remover, remove the clip.

  1. Remove the 3 screws <F>.

  1. Disengage the claw and 2 guides, and then remove the front No. 1 console box insert.


39. REMOVE REAR NO. 2 AIR DUCT
  1. Turn back the front floor carpet assembly.

  1. C165676
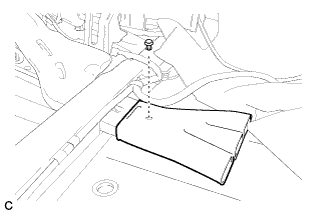
    Remove the clip and the rear No. 2 air duct.


40. REMOVE REAR NO. 1 AIR DUCT

  1. C165677
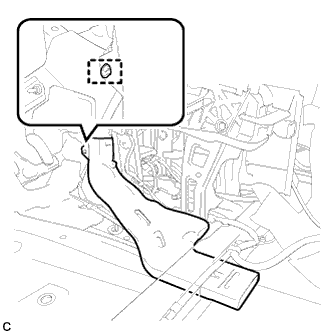
    Disengage the wire harness clamp.

  1. Remove the rear No. 1 air duct.


41. REMOVE FRONT FLOOR FOOTREST (for LHD)

  1. C165678
    Disengage the 2 clips to remove the front floor footrest.


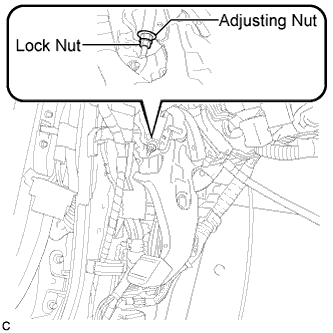
42. LOOSEN ADJUSTING NUT (for LHD)

  1. C166160E01
    Remove the lock nut and loosen the adjusting nut.


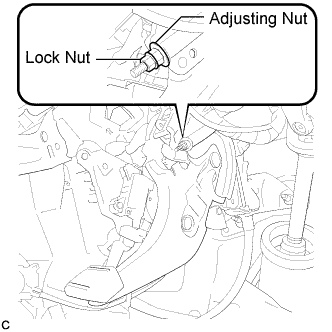
43. LOOSEN ADJUSTING NUT (for RHD)

  1. C165692E01
    Remove the lock nut and loosen the adjusting nut.


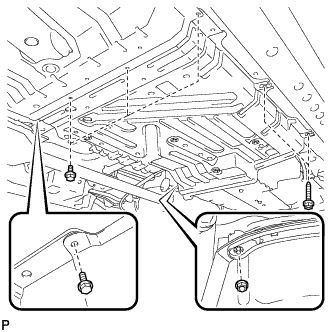
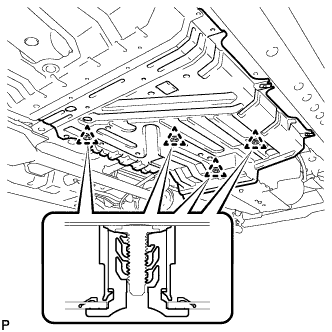
44. REMOVE CENTER FRONT FLOOR COVER

  1. C168088
    Remove the 4 bolts, 2 screws, and the nut.

  1. C168089
    Disengage the 4 clips and remove the center front floor cover.


45. REMOVE REAR ENGINE SERVICE COVER ASSEMBLY

  1. C165675
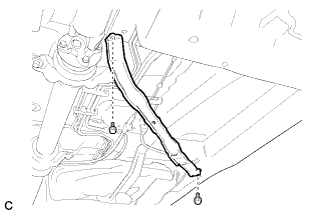
    Remove the 2 bolts and the rear engine service cover assembly.


46. SEPARATE NO. 3 PARKING BRAKE CABLE ASSEMBLY

  1. C165685
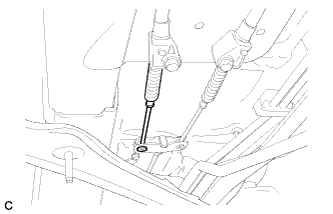
    Separate the No. 3 parking brake cable assembly from the parking brake equalizer.


47. SEPARATE NO. 2 PARKING BRAKE CABLE ASSEMBLY

HINT:
Perform the same procedure as for the No. 3 parking brake cable assembly.


48. REMOVE PARKING BRAKE EQUALIZER

  1. C165686
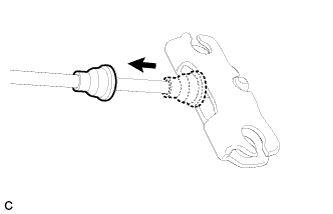
    Slide the rubber boot as shown in the illustration.

  1. C165688
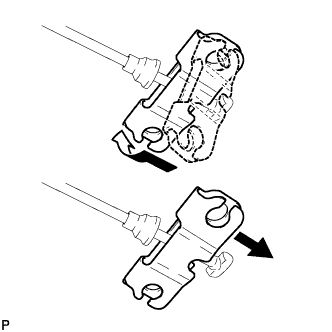
    Remove the parking brake equalizer from the No. 1 parking brake cable assembly as shown in the illustration.


49. REMOVE INSTRUMENT PANEL JUNCTION BLOCK ASSEMBLY (for LHD)

  1. C165546
    Separate the wire harness clamp from the instrument panel junction block assembly.

  1. Disconnect the connectors from the instrument panel junction block assembly.

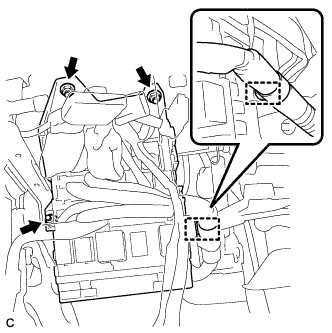
  1. Remove the 3 nuts.

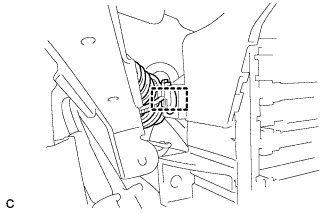
  1. C165547
    Move the instrument panel junction block assembly and disengage the wire harness clamp.

  1. Disconnect the connectors from the back of the instrument panel junction block assembly.

  1. Remove the instrument panel junction block assembly.


50. REMOVE PARKING BRAKE CONTROL PEDAL ASSEMBLY (for LHD)

  1. C165679
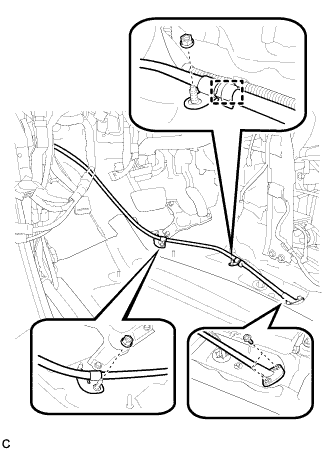
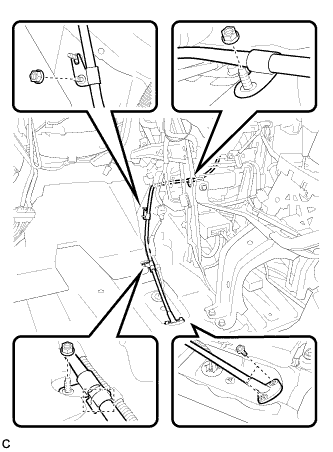
    Remove the 2 bolts and 2 nuts, and separate the No. 1 parking brake cable assembly.

  1. Remove the clamp.

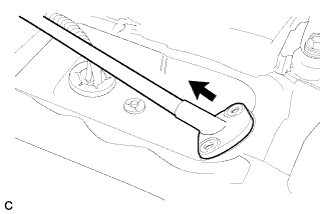
  1. C165680
    Pull out the No. 1 parking brake cable assembly toward the cabin.

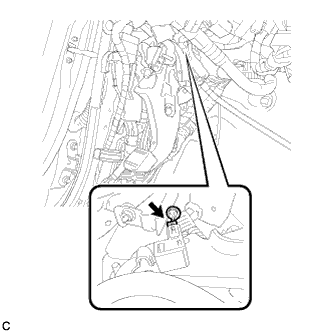
  1. C165682
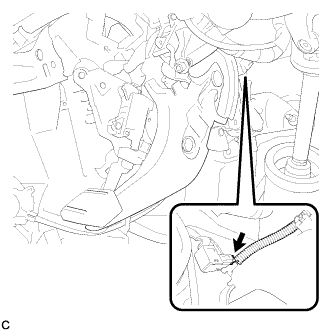
    Disconnect the parking brake switch connector.

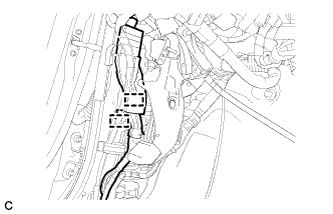
  1. C165683
    Disengage the 2 clamps to separate the wire harness clamp.

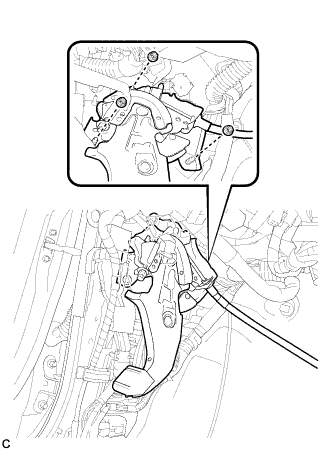
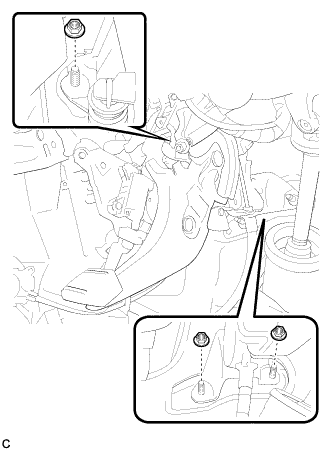
  1. C165684
    Remove the 3 nuts and the parking brake control pedal assembly.


51. REMOVE PARKING BRAKE CONTROL PEDAL ASSEMBLY (for RHD)

  1. C165693
    Remove the 2 bolts and 3 nuts, and separate the No. 1 parking brake cable assembly.

  1. Remove the clamp.

  1. C165680
    Pull out the No. 1 parking brake cable assembly toward the cabin.

  1. C165694
    Disconnect the parking brake switch connector.

  1. C165695
    Remove the 3 nuts and the parking brake control pedal assembly.

← COMPONENTS (from May 2007)REMOVAL (Aug 2008 – Jun 2010) →