REMOVAL
Removal / installation · Vehicles built from Jul 2010
Versions by build date: May 2007 – Jul 2008 Aug 2008 – Jun 2010 from Jul 2010
| 1.
REMOVE REAR DOOR SCUFF PLATE RH
|
 |
- HINT:
- Use the same procedure for the RH side and the LH side.
| 2.
REMOVE REAR DOOR OPENING TRIM WEATHERSTRIP RH
|
|
- HINT:
- Use the same procedure for the RH side and the LH side.
| 3.
REMOVE REAR NO. 2 SEAT ASSEMBLY |
|
(Click here)
| 4.
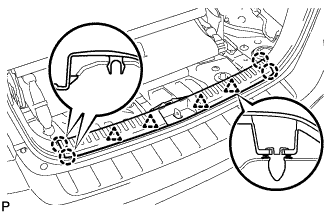
REMOVE REAR FLOOR FINISH PLATE
|
|
- Disengage the 4 clips and 4 claws, and remove the rear floor finish plate.
| 5.
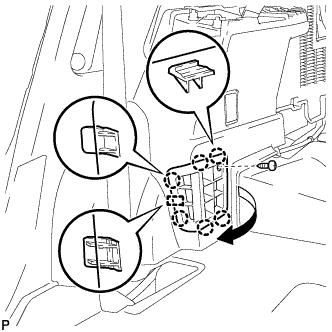
REMOVE REAR SEAT SIDE GARNISH CAP
|
|
- Remove the screw.
Disengage the 6 claws and the guide, and remove the rear seat side garnish cap.
| 6.
REMOVE DECK SIDE TRIM COVER NO.1
|
|
- HINT:
- Use the same procedure for the RH side and the LH side.
| 7.
REMOVE DECK SIDE TRIM RH
|
|
- HINT:
- Use the same procedure for the RH side and the LH side.
| 8.
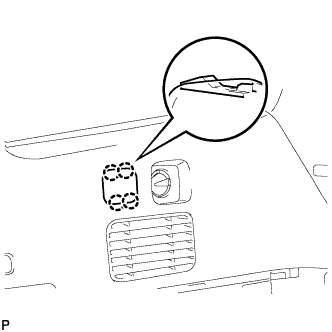
REMOVE SIDE TRIM COVER RH (for Manual Air Conditioning System)
|
|
- Disengage the 4 claws and remove the side trim cover RH.
| 9.
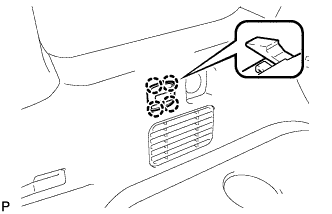
REMOVE REAR ROOM TEMPERATURE SENSOR (for Automatic Air Conditioning System)
|
|
- Disengage the 4 claws and remove the rear room temperature sensor.
Disconnect the connector.
| 10.
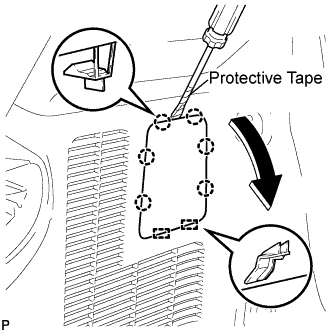
REMOVE REAR COMBINATION LIGHT SERVICE COVER RH
|
|
- Using a screwdriver, disengage the 6 claws and 2 guides, and remove the rear combination light service cover RH.
- HINT:
- Tape the screwdriver tip before use.
| 11.
REMOVE ROPE HOOK ASSEMBLY (for RH Side)
|
|
- HINT:
- Use the same procedure for the RH side and the LH side.
| 12.
REMOVE NO. 1 LUGGAGE COMPARTMENT TRIM HOOK
|
|
- HINT:
- Use the same procedure for the No. 1 luggage compartment trim hook and the No. 2 deck side trim hook.
| 13.
REMOVE FRONT DECK SIDE TRIM COVER RH
|
|
- HINT:
- Use the same procedure for the RH side and the LH side.
| 14.
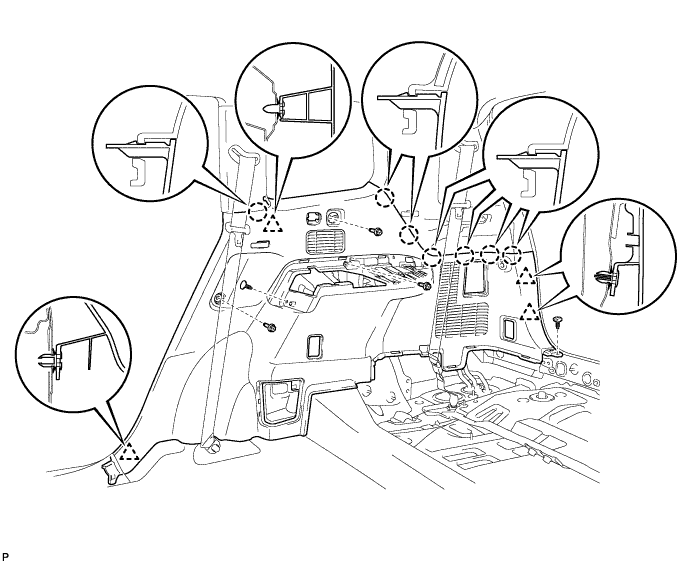
REMOVE DECK TRIM SIDE PANEL ASSEMBLY RH
|
|
Remove the 3 bolts.
Remove the 2 clips.
Disengage the 7 claws and 4 clips, and remove the deck trim side panel assembly RH.

| 15.
REMOVE ROOF SIDE INNER GARNISH ASSEMBLY RH
|
|
- HINT:
- Use the same procedure for the RH side and the LH side.
| 16.
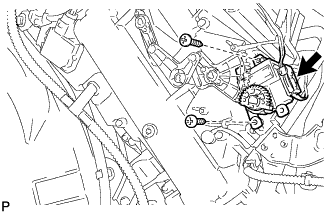
REMOVE REAR AIR MIX CONTROL SERVO MOTOR SUB-ASSEMBLY |
|
- Disconnect the connector.
Remove the 2 screws and rear air mix control servo motor sub-assembly.