Make sure to release vacuum from the brake booster before removing the master cylinder from the brake booster.
1.
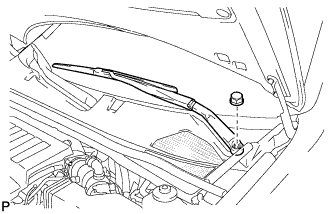
REMOVE FRONT WIPER ARM AND BLADE ASSEMBLY LH
Remove the nut, and the front wiper arm and blade assembly LH.
2.
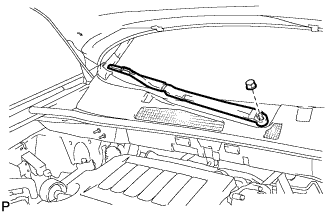
REMOVE FRONT WIPER ARM AND BLADE ASSEMBLY RH
Remove the nut, and the front wiper arm and blade assembly RH.
3.
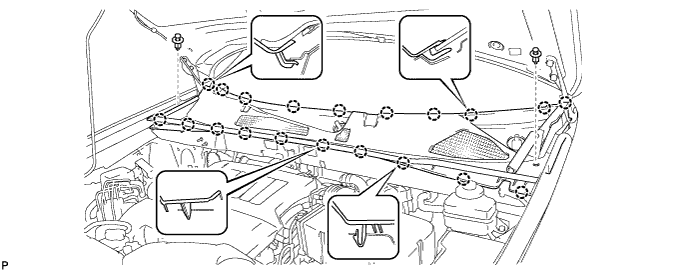
REMOVE COWL TOP VENTILATOR LOUVER SUB-ASSEMBLY
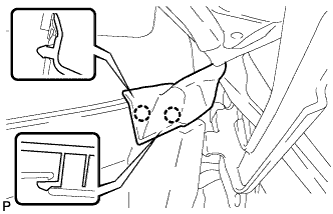
Disengage the 2 claws and disconnect the front fender to cowl side seal LH.
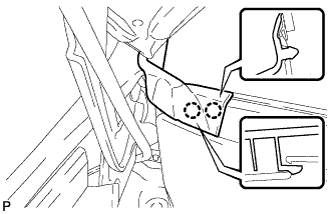
Disengage the 2 claws and disconnect the front fender to cowl side seal RH.
Remove the 2 clips.
Disengage the 20 claws and remove the cowl top ventilator louver sub-assembly.
4.
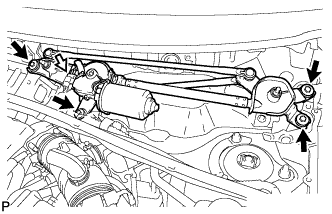
REMOVE WINDSHIELD WIPER MOTOR AND LINK
Disconnect the connector.
Remove the 4 bolts, and the windshield wiper motor and link assembly.
5.
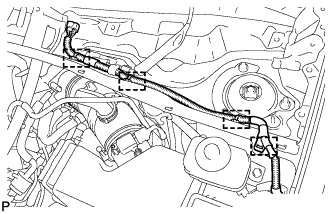
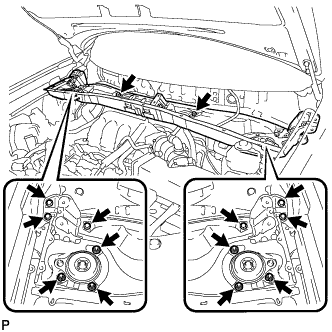
REMOVE OUTER COWL TOP PANEL SUB-ASSEMBLY
Disengage the 4 clamps and separate the wiper wire harness from the outer cowl top panel sub-assembly.
Remove the 8 bolts, 6 nuts, and the outer cowl top panel sub-assembly.
6.
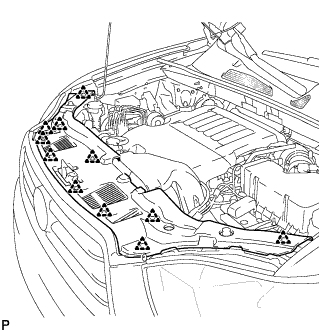
REMOVE COOL AIR INTAKE DUCT SEAL
Remove the 11 clips and cool air intake duct seal.
7.
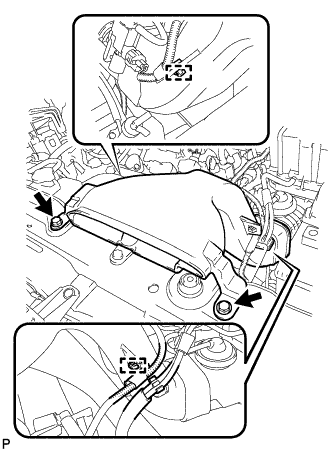
REMOVE NO. 2 AIR CLEANER INLET
Disconnect the 2 vacuum switching valve clamps.
Disconnect the 2 vacuum hoses.
Remove the 2 bolts and No. 2 air cleaner inlet.
8.
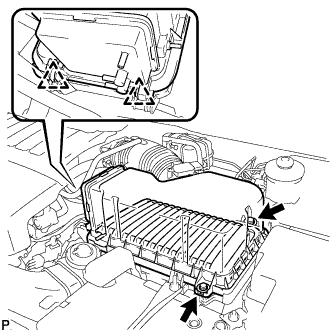
REMOVE AIR CLEANER CAP SUB-ASSEMBLY
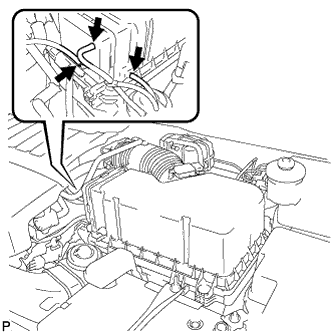
Disconnect the 3 vacuum hoses.
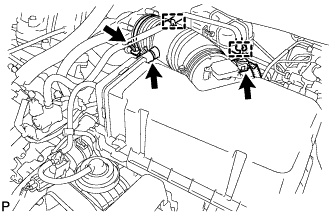
Loosen the No. 1 air cleaner hose clamp.
Disconnect the hose clamps and No. 2 ventilation hose.
Disconnect the mass air flow meter connector.
Release the 2 clips, and remove the 2 bolts.
Remove the air cleaner cap sub-assembly and air cleaner filter element.
9.
REMOVE AIR CLEANER FILTER ELEMENT SUB-ASSEMBLY
Remove the air cleaner filter element sub-assembly.
10.
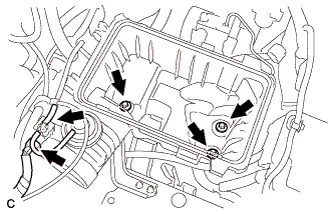
REMOVE AIR CLEANER CASE SUB-ASSEMBLY
Remove the 3 bolts, disconnect the hose and the connector, and remove the air cleaner case sub-assembly.
11.
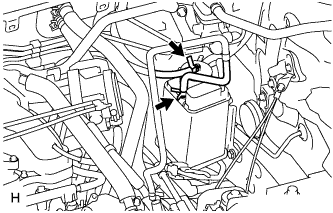
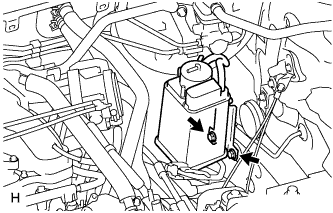
REMOVE CHARCOAL CANISTER ASSEMBLY
Disconnect the 2 hoses.
Remove the 2 bolts and canister.
12.
DRAIN BRAKE FLUID
13.
DISCONNECT NO. 1 RESERVOIR TUBE
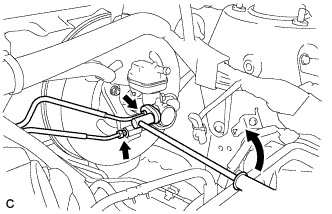
Slide the clip and disconnect the No. 1 reservoir tube from the brake master reservoir assembly.
14.
DISCONNECT BRAKE LINE
Using a union nut wrench (12 mm), disconnect the 2 brake lines from the brake master cylinder sub-assembly.
15.
REMOVE BRAKE MASTER CYLINDER SUB-ASSEMBLY
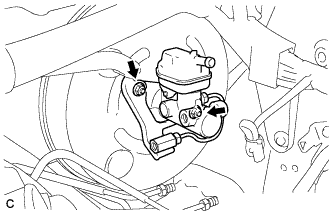
Remove the 2 nuts and brake master cylinder sub-assembly.
Remove the O-ring from the brake master cylinder sub-assembly.
NOTICE:
The master cylinder requires careful handling. Do not allow the master cylinder to receive any impact, such as from being dropped. Do not reuse a master cylinder that has been dropped.
Do not strike or pinch the master cylinder piston, and do not cause any damage to the master cylinder piston by any other means.
Make sure to release vacuum from the brake booster before removing the master cylinder from the brake booster.
When installing the master cylinder to the brake booster, or when removing the master cylinder from the brake booster, make sure that the master cylinder is kept horizontal or its tip faces downward (the piston faces upward) to prevent the master cylinder piston from falling out.
Do not allow any foreign objects to contaminate the master cylinder piston. If a foreign object gets on the piston, remove it by using a shop rag or a piece of cloth and then apply an even layer of lithium soap base glycol grease around the circumference (sliding part) of the piston.
Do not use any other type of grease or fluid.
16.
DISCONNECT VACUUM HOSE
Slide the clip and disconnect the vacuum hose.
17.
REMOVE BRAKE VACUUM CHECK VALVE ASSEMBLY
Remove the vacuum check valve assembly from the brake booster assembly.
18.
REMOVE CHECK VALVE GROMMET
Remove the check valve grommet from the brake booster assembly.
19.
REMOVE BRAKE PEDAL RETURN SPRING
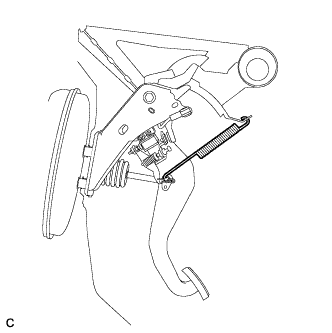
Remove the brake pedal return spring from the push rod pin and instrument panel reinforcement.
20.
SEPARATE BRAKE MASTER CYLINDER PUSH ROD CLEVIS
Remove the clip and push rod pin, and separate the brake master cylinder push rod clevis from the brake pedal sub-assembly.
21.
REMOVE BRAKE MASTER CYLINDER PUSH ROD CLEVIS
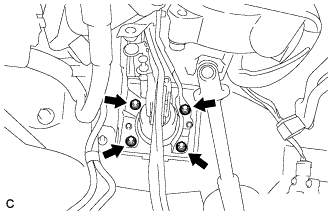
Remove the 4 nuts and push out the brake booster assembly.
NOTICE:
Do not damage the brake lines.
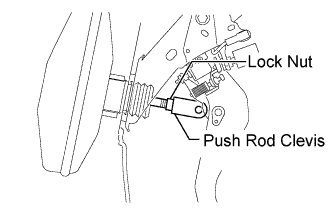
Loosen the lock nut, and remove the brake master cylinder push rod clevis and lock nut from the brake booster assembly.
22.
SEPARATE ENGINE WIRE
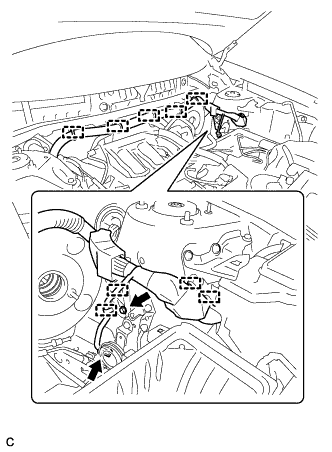
Disengage the 9 clamps, and disconnect the alarm horn connector.
Remove the bolt and separate the engine wire from the body.
23.
REMOVE BRAKE BOOSTER ASSEMBLY
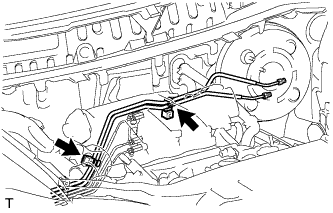
Disengage the 2 clamps and separate the 2 brake lines from the body.
NOTICE:
Be careful not to damage the brake lines or clamps. If any parts are damaged, replace them with new ones.
Remove the brake booster assembly from the body.
NOTICE:
Do not damage the brake lines.
24.
REMOVE BRAKE BOOSTER GASKET
Remove the brake booster gasket from the brake booster assembly.