If any work is performed on the brake system or if air in the brake lines is suspected, bleed the brake system.
NOTICE:
Move the shift lever to the P position and apply the parking brake before bleeding the brakes.
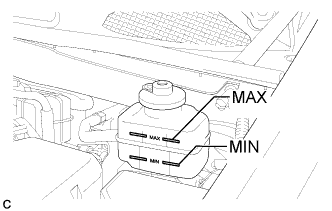
Add brake fluid to keep the level between the MIN and MAX lines of the reservoir while bleeding the brakes.
If brake fluid leaks onto any painted surface, immediately wash it off.
If bleeding is performed with the engine running or the ignition switch on (IG), DTC C1441 may be stored. Make sure to clear the DTCs when work is complete.
1.
FILL BRAKE FLUID RESERVOIR
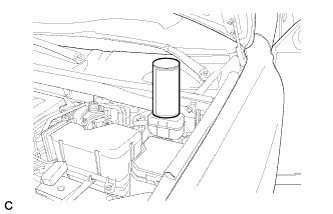
Fill the reservoir with brake fluid.
Brake Fluid:
SAE J1703 or FMVSS No. 116 DOT 3
NOTICE:
Make sure that there is sufficient brake fluid in the reservoir.
2.
BLEED BRAKE MASTER CYLINDER
NOTICE:
If the master cylinder is reinstalled or if the reservoir becomes empty, bleed the master cylinder.
To prevent brake fluid from adhering, cover the painted surfaces with a shop rag or a piece of cloth.
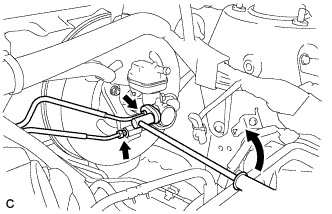
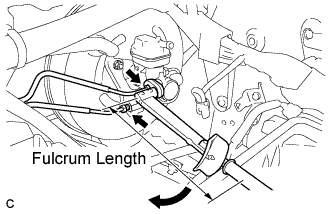
Using a union nut wrench (12 mm), disconnect the 2 brake lines from the master cylinder.
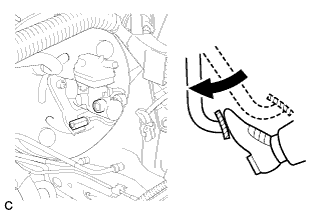
Slowly depress the brake pedal and hold it.*1
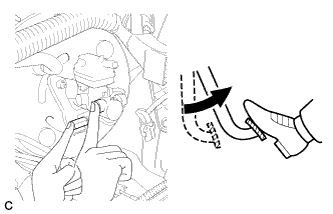
Cover the 2 outer holes with fingers, and release the brake pedal.*2
Repeat *1 and *2, 3 or 4 times.
Using a union nut wrench (12 mm), connect the 2 brake lines to the master cylinder.
Torque:
w/o union nut wrench:
20 N*m{
204 kgf*cm
, 15 ft.*lbf
}
w/ union nut wrench:
18 N*m{
184 kgf*cm
, 13 ft.*lbf
}
NOTICE:
Use a torque wrench with a fulcrum length of 250 mm (9.84 in.).
This torque value is effective when the union nut wrench is parallel to the torque wrench.
3.
BLEED BRAKE LINE
NOTICE:
Bleed the brake line of the wheel farthest from the master cylinder first.
Add brake fluid to keep the level between the MIN and MAX lines of the reservoir while bleeding the brakes.
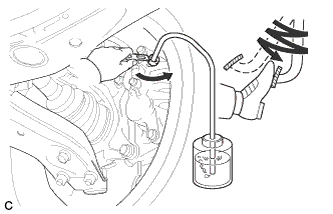
Connect a vinyl tube to the bleeder plug.
Depress the brake pedal several times, and then loosen the bleeder plug with the pedal depressed.*3
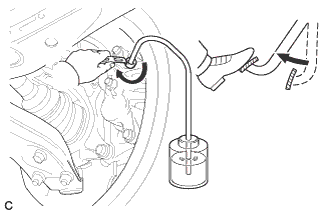
When fluid stops coming out, tighten the bleeder plug, and then release the brake pedal.*4
Repeat *3 and *4 until all the air in the fluid is completely bled out.
Tighten the bleeder plug completely.
Torque:
front bleeder plug:
8.3 N*m{
85 kgf*cm
, 73 in.*lbf
}
rear bleeder plug:
11 N*m{
110 kgf*cm
, 8 ft.*lbf
}
Repeat the above procedure for each wheel to bleed the brake line.
4.
BLEED BRAKE ACTUATOR
NOTICE:
After bleeding the brake system, if the specified height or feel of the brake pedal cannot be obtained, bleed the brake actuator assembly with the intelligent tester by following the procedure below.
Depress the brake pedal more than 20 times with the ignition switch off.
Connect the intelligent tester to the DLC3, and then turn the ignition switch to ON.
NOTICE:
Do not start the engine.
Turn the intelligent tester on and enter the following menus: Chassis / ABS/VSC/TRAC / Utility / Air Bleeding.
Bleed brake actuator following the instructions on the intelligent tester.
After air bleeding, tighten each bleeder plug.
Torque:
front bleeder plug:
8.3 N*m{
85 kgf*cm
, 73 in.*lbf
}
rear bleeder plug:
11 N*m{
110 kgf*cm
, 8 ft.*lbf
}
Turn the intelligent tester off and disconnect the intelligent tester from the DLC3.
Turn the ignition switch off.
5.
INSPECT FOR BRAKE FLUID LEAK
6.
INSPECT FLUID LEVEL
Check the fluid level. If brake fluid level is lower than the MIN line, check for leaks and inspect the disc brake pads. If necessary, refill the reservoir with brake fluid to the MAX line after repair or replacement.