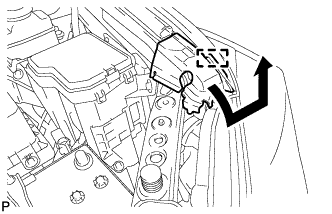
Engage the claw and install the headlight assembly with the bolt and 2 screws.
Torque:
3.6 N*m{
37 kgf*cm
, 32 in.*lbf
}
Engage the guide as shown in the illustration.
2.
INSTALL FRONT BUMPER ASSEMBLY
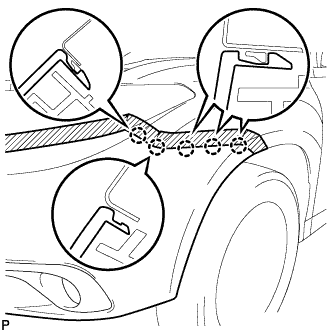
Connect each fog light connector, and then install the front bumper assembly.
Engage the 5 claws.
HINT:
Use the same procedure for the RH side and LH side.
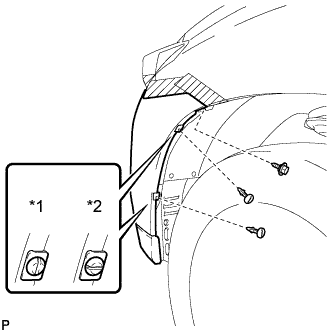
Install the 3 clips and 8 screws.
Install the screw and 2 pin hold clips.
Text in Illustration
*1
Correct
*2
Incorrect
NOTICE:
Insert the pin hold clip with the slot aligned vertically. Do not rotate the clip after inserting it. After installation, confirm that the slot is aligned vertically.
HINT:
Use the same procedure for the RH side and LH side.
3.
INSTALL RADIATOR GRILLE SUB-ASSEMBLY
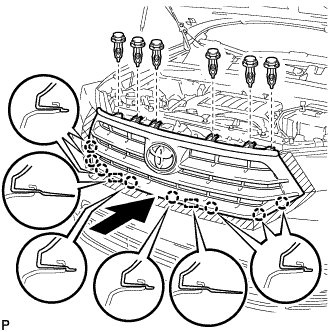
Engage the 2 guides and 8 claws, and install the radiator grille sub-assembly.
Install the 6 clips.
4.
INSTALL COOL AIR INTAKE DUCT SEAL
Install the cool air intake duct seal with the 11 clips.