1.
DISCONNECT CABLE FROM NEGATIVE BATTERY TERMINAL
NOTICE:
When disconnecting the cable, some systems need to be initialized after the cable is reconnected (Click here).
2.
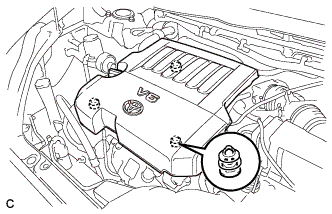
REMOVE V-BANK COVER SUB-ASSEMBLY
Hold the front of the V-bank cover sub-assembly and raise it to disengage the 2 clips on the front of the V-bank cover sub-assembly. Continue rising the V-bank cover sub-assembly to disengage the clip on the rear of the V-bank cover sub-assembly and remove the V-bank cover sub-assembly.
NOTICE:
Attempting to disengage both front and rear clips at the same time may cause the V-bank cover sub-assembly to break.
3.
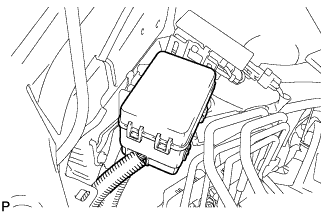
REMOVE BRAKE ACTUATOR WITH BRACKET (for LHD)
Separate the relay box.
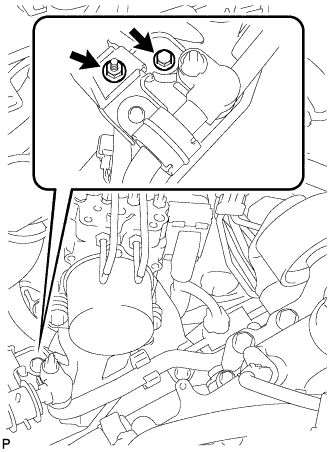
Remove the nut, bolt and separate the suction hose bracket from the brake actuator bracket assembly.
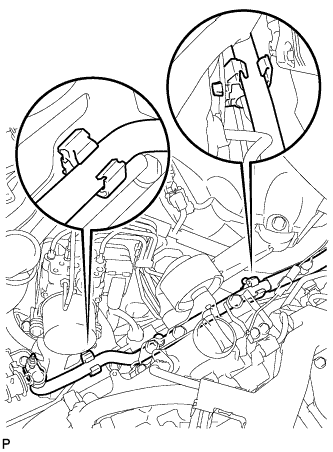
Separate the No. 1 cooler refrigerant suction tube from the 2 clamps, and then place the No. 1 cooler refrigerant suction tube next to the clamps.
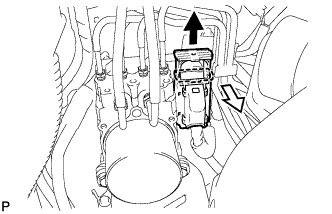
Release the lock lever and disconnect the brake actuator connector.
NOTICE:
Be careful not to allow brake fluid to enter the removed connector.
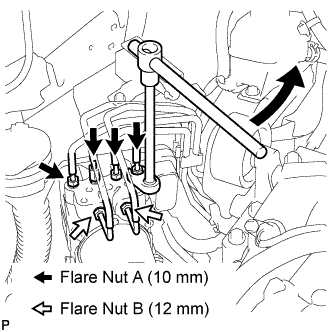
Using a union nut wrench (10 mm and 12 mm), disconnect the 6 brake lines from the brake actuator with bracket.
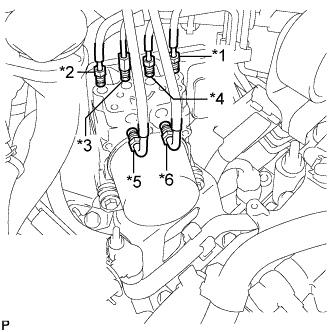
Use tags or make a memo to identify the places to reconnect.
HINT:
*1: To front wheel cylinder RH
*2: To front wheel cylinder LH
*3: To rear wheel cylinder RH
*4: To rear wheel cylinder LH
*5: From 1st of master cylinder
*6: From 2nd of master cylinder
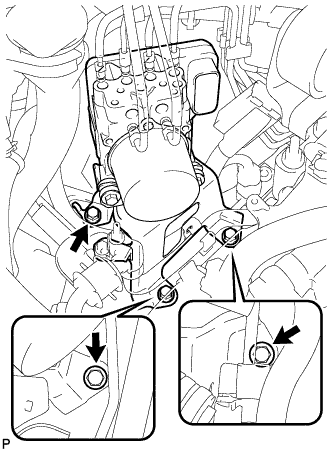
Remove the 3 bolts and brake actuator with bracket from the body.
NOTICE:
Do not damage the brake lines or wire harness.
4.
REMOVE BRAKE ACTUATOR WITH BRACKET (for RHD)
Remove the nut, bolt and separate the suction hose bracket from the brake actuator bracket assembly.
Separate the No. 1 cooler refrigerant suction tube from the 2 clamps, and then place the No. 1 cooler refrigerant suction tube next to the clamps.
Release the lock lever and disconnect the brake actuator connector.
NOTICE:
Be careful not to allow brake fluid to enter the removed connector.
Using a union nut wrench (10 mm and 12 mm), disconnect the 6 brake lines from the brake actuator with bracket.
Use tags or make a memo to identify the places to reconnect.
HINT:
*1: To front wheel cylinder RH
*2: To front wheel cylinder LH
*3: To rear wheel cylinder RH
*4: To rear wheel cylinder LH
*5: From 1st of master cylinder
*6: From 2nd of master cylinder
Remove the 3 bolts and brake actuator with bracket from the body.
NOTICE:
Do not damage the brake lines or wire harness.
5.
REMOVE BRAKE ACTUATOR
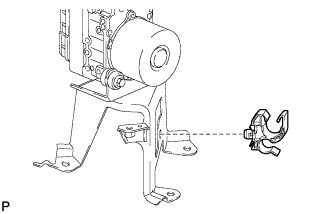
Remove the piping clamp.
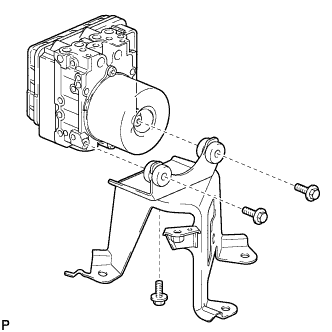
Remove the 3 bolts and the brake actuator from the brake actuator bracket assembly.