INSTALLATION
Removal / installation · Vehicles built from Jul 2010
Versions by build date: May 2007 – Jul 2008 Aug 2008 – Jun 2010 from Jul 2010
| 1.
INSTALL BACK DOOR OUTSIDE GARNISH PROTECTOR |
 |
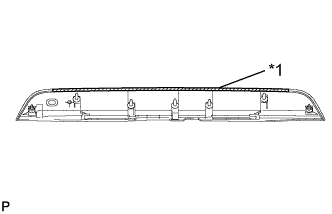
Wipe off any tape adhesive residue with cleaner.
- Install a new back door outside garnish protector to the back door outside garnish.
Text in Illustration
*1
|
Back Door Outside Garnish Protector
|
| 2.
INSTALL BACK DOOR OUTSIDE GARNISH SEAL LH |
|
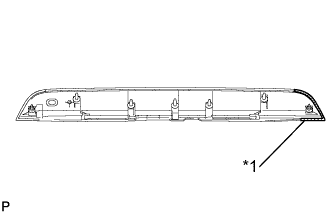
Wipe off any tape adhesive residue with cleaner.
- Install a new back door outside garnish seal LH to the back door outside garnish.
Text in Illustration
*1
|
Back Door Outside Garnish Seal LH
|
| 3.
INSTALL BACK DOOR OUTSIDE GARNISH SEAL RH |
|
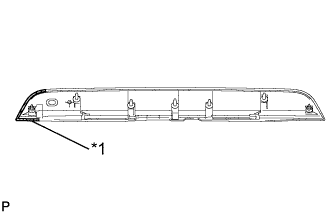
Wipe off any tape adhesive residue with cleaner.
- Install a new back door outside garnish seal RH to the back door outside garnish.
Text in Illustration
*1
|
Back Door Outside Garnish Seal RH
|
| 4.
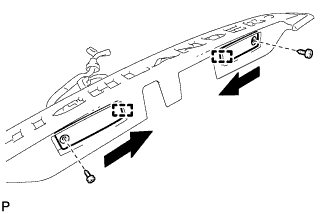
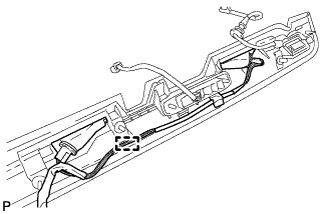
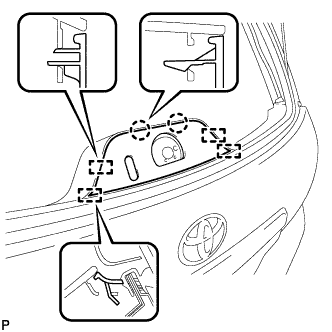
INSTALL LICENSE PLATE LIGHT ASSEMBLY
|
|
- Engage the 2 guides as shown in the illustration.
Install the license plate light assembly with the 2 screws.
- Engage the clamp.
| 5.
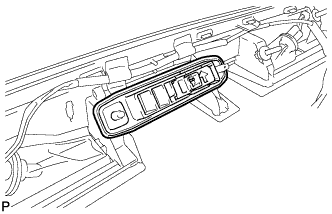
INSTALL BACK DOOR OPENER SWITCH ASSEMBLY
|
|
- Install the back door opener switch assembly.
| 6.
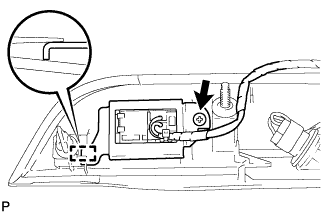
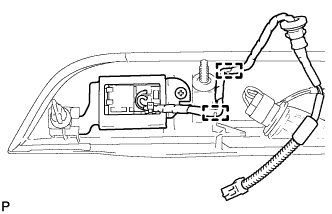
INSTALL GLASS HATCH OPENER SWITCH ASSEMBLY (for Glass Hatch Type)
|
|
- Engage the guide and install the glass hatch opener switch assembly and switch bracket.
Install the screw.
- Engage the 2 clamps.
| 7.
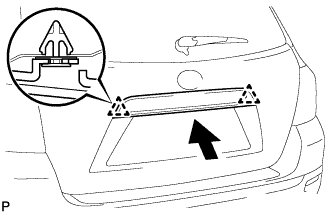
INSTALL BACK DOOR OUTSIDE GARNISH ASSEMBLY |
|
Install 2 new clips and 5 new gaskets on the back door outside garnish assembly.
- Engage the 2 clips and install the back door outside garnish assembly.
Install the 5 nuts.
Connect each connector.
| 8.
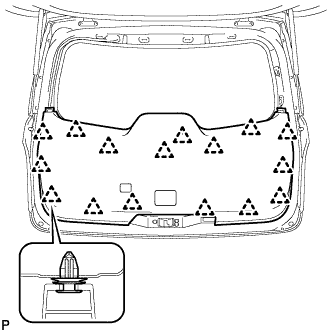
INSTALL BACK DOOR TRIM PANEL ASSEMBLY
|
|
- Engage the 16 clips and install the back door trim panel assembly.
| 9.
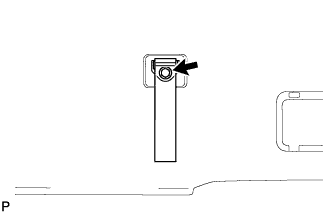
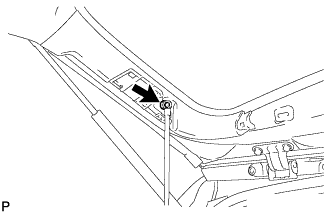
INSTALL ASSIST STRAP ASSEMBLY
|
|
- Install the assist strap assembly with the bolt.
| 10.
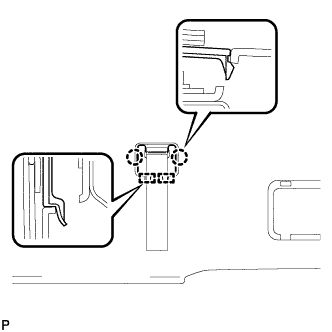
INSTALL ASSIST STRAP HOLE COVER
|
|
- Engage the 2 guides and 2 claws, and install the assist strap hole cover.
| 11.
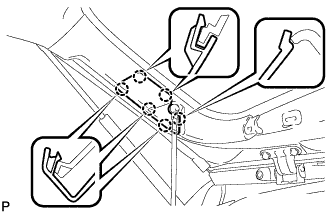
INSTALL BACK DOOR LOCK COVER (for Glass Hatch Type)
|
|
- Engage the 4 guides and 2 claws, and install the back door lock cover.
| 12.
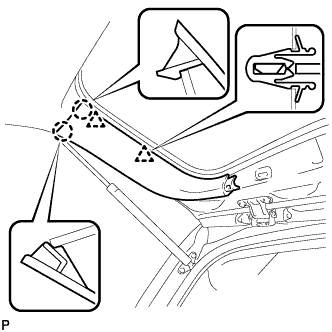
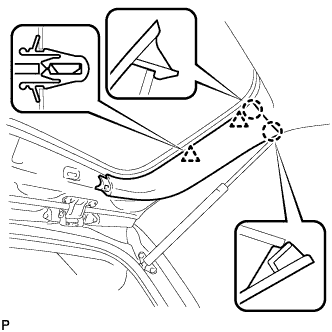
INSTALL BACK DOOR TRIM COVER LH (w/o Power Back Door)
|
|
- Engage the 2 clips and 2 claws, and install the back door trim cover LH.
| 13.
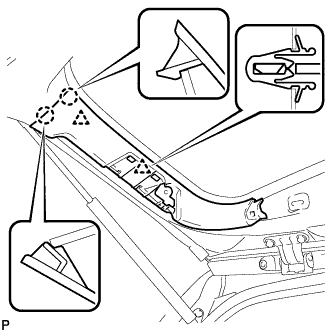
INSTALL BACK DOOR TRIM COVER LH (w/ Power Back Door)
|
|
- Engage the 2 clips and 2 claws, and install the back door trim cover LH.
| 14.
CONNECT POWER BACK DOOR ROD (w/ Power Back Door)
|
|
- Install the back door stay plate and connect the power back door rod.
-
Torque:
- 18 N*m{
184 kgf*cm
, 13 ft.*lbf
}
| 15.
INSTALL BACK DOOR SERVICE HOLE COVER LH (w/ Power Back Door)
|
|
- Engage the 6 claws and install the back door service hole cover LH.
| 16.
INSTALL BACK DOOR TRIM COVER RH
|
|
- Engage the 2 clips and 2 claws, and install the back door trim cover RH.
| 17.
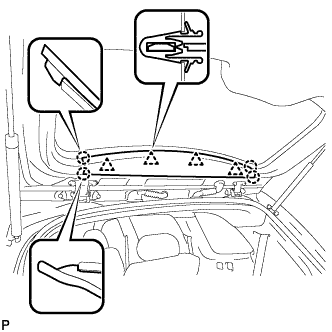
INSTALL BACK WINDOW UPPER TRIM PANEL ASSEMBLY
|
|
- Engage the 4 clips and 4 claws, and install the back window upper trim panel assembly.