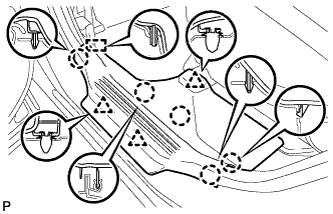
INSTALLATION
Removal / installation · Vehicles built Aug 2008 – Jun 2010
Versions by build date: May 2007 – Jul 2008 Aug 2008 – Jun 2010 from Jul 2010
| 1.
INSTALL REAR NO. 2 SEAT OUTER BELT ASSEMBLY |
 |
If a new rear No. 2 seat outer belt assembly is used:
Install a new rear seat lap type belt assembly to a new rear No. 2 seat outer belt assembly.
- NOTICE:
- After installing the belt, check that it is not twisted.
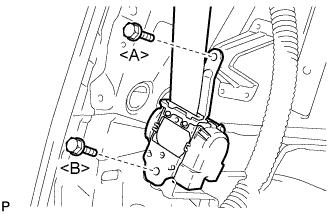
- Install the rear No. 2 seat outer belt assembly with the 2 bolts.
-
Torque:
- Bolt <A>:
- 7.5 N*m{
77 kgf*cm
, 66 in.*lbf
}
- Bolt <B>:
- 42 N*m{
428 kgf*cm
, 31 ft.*lbf
}
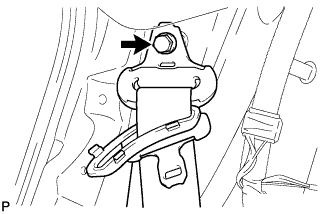
- Connect the shoulder anchor of the rear No. 2 seat outer belt assembly with the bolt.
-
Torque:
- 42 N*m{
428 kgf*cm
, 31 ft.*lbf
}
| 2.
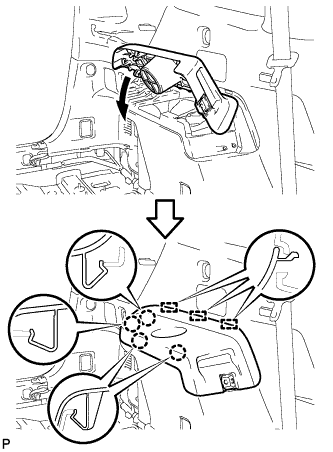
INSTALL ROOF SIDE INNER GARNISH ASSEMBLY (w/o Power Back Door)
|
|
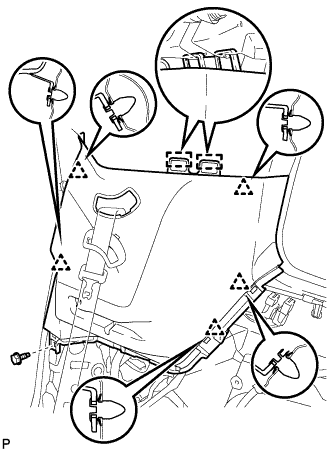
w/ Rear No. 2 Seat:
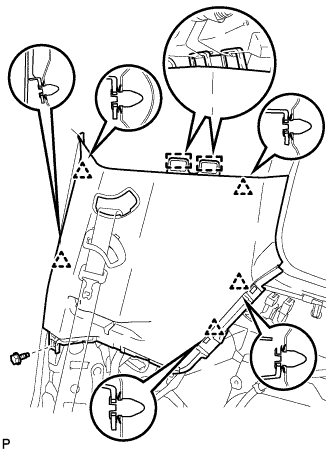
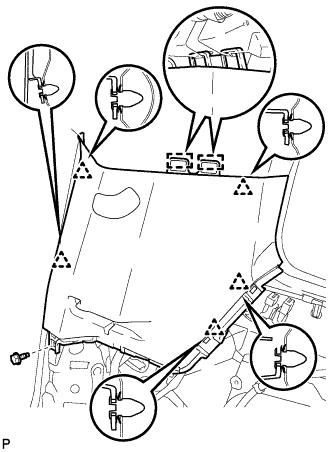
- Engage the 2 guides and 5 clips.
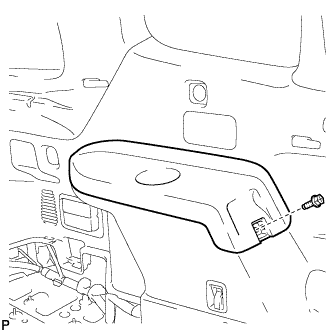
Install the roof side inner garnish assembly LH with the bolt.
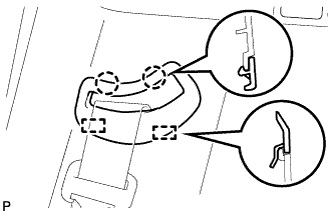
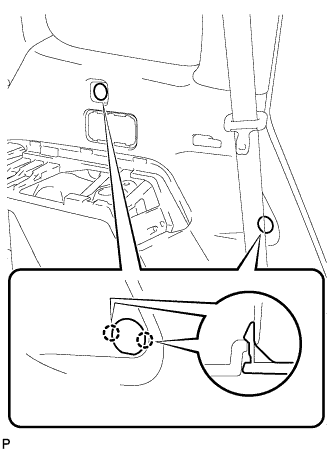
- Engage the 2 guides and the 2 claws, and install the No. 2 seat outer belt guide.
w/o Rear No. 2 Seat:
- Engage the 2 guides and 5 clips.
Install the roof side inner garnish assembly LH with the bolt.
| 3.
INSTALL ROOF SIDE INNER GARNISH ASSEMBLY (w/ Power Back Door)
|
|
w/ Rear No. 2 Seat:
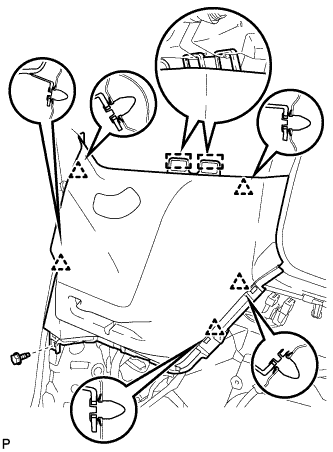
- Engage the 2 guides and 5 clips.
Install the roof side inner garnish assembly LH with the bolt.
- Engage the 2 guides and the 2 claws, and install the No. 2 seat outer belt guide.
w/o Rear No. 2 Seat:
- Engage the 2 guides and 5 clips.
Install the roof side inner garnish assembly LH with the bolt.
| 4.
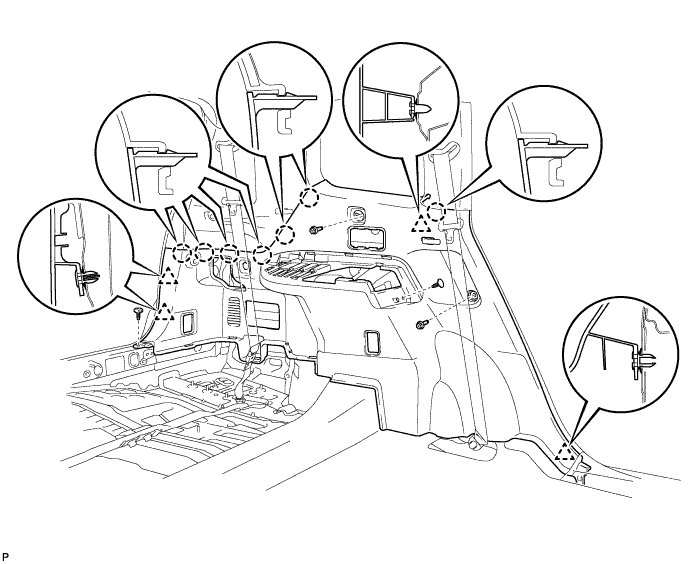
INSTALL DECK TRIM SIDE PANEL ASSEMBLY LH (for LH Side)
|
|
Engage the 4 clips and the 7 claws.
Install the 2 clips.
Install the deck trim side panel assembly LH with the 2 bolts.

| 5.
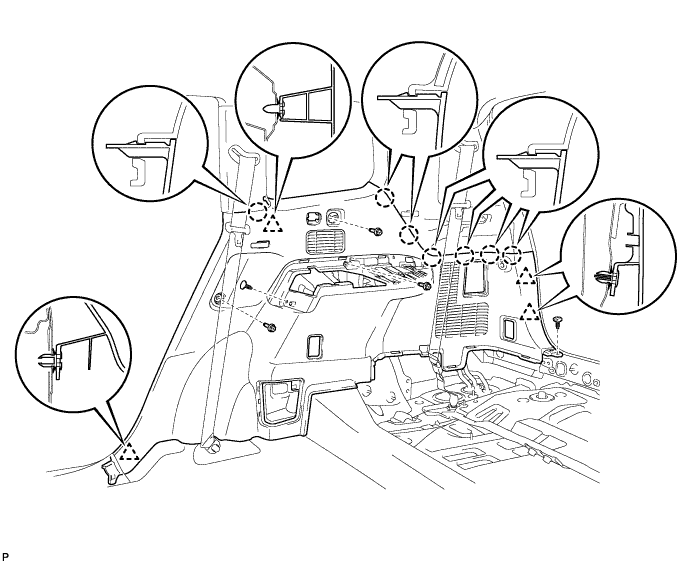
INSTALL DECK TRIM SIDE PANEL ASSEMBLY RH (for RH Side)
|
|
Engage the 4 clips and the 7 claws.
Install the 2 clips.
Install the deck trim side panel assembly RH with the 3 bolts.
| 6.
INSTALL FRONT DECK SIDE TRIM COVER
|
|
- Engage the 4 claws and install the 2 front deck side trim covers LH.
| 7.
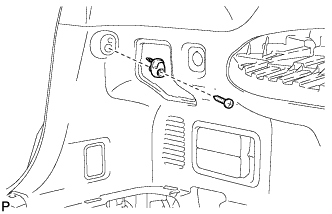
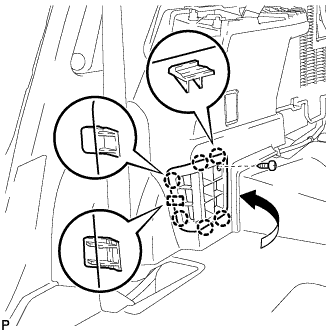
INSTALL NO. 2 DECK SIDE TRIM HOOK (for LH Side)
|
|
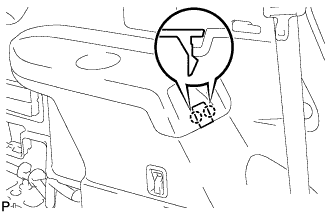
- Install the No. 2 deck side trim hook with the screw.
| 8.
INSTALL NO. 1 LUGGAGE COMPARTMENT TRIM HOOK (for RH Side)
|
|
- HINT:
- Use the same procedure for the No. 1 luggage compartment trim hook and the No. 2 deck side trim hook.
| 9.
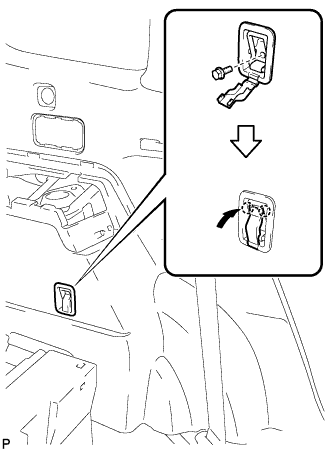
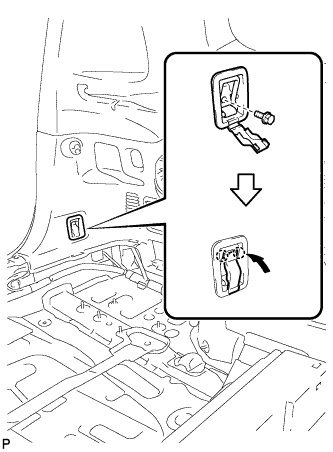
INSTALL ROPE HOOK ASSEMBLY
|
|
- for Front Side:
Install the rope hook assembly with the bolt.
-
Torque:
- 6.5 N*m{
66 kgf*cm
, 58 in.*lbf
}
Engage the 2 claws.
- for Rear Side:
Install the rope hook assembly with the bolt.
-
Torque:
- 6.5 N*m{
66 kgf*cm
, 58 in.*lbf
}
Engage the 2 claws.
| 10.
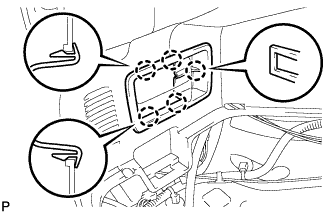
INSTALL REAR DECK TRIM COVER (for LH Side without Remote Folding Function)
|
|
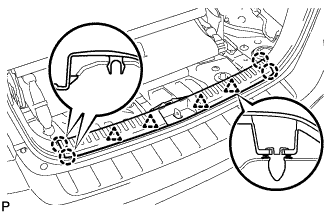
- Engage the 10 claws and install the rear deck trim cover.
| 11.
INSTALL RECLINING REMOTE CONTROL LEVER BEZEL LH (for LH Side with Remote Folding Function)
|
|
- Engage the 5 claws and install the reclining remote control bezel LH.
| 12.
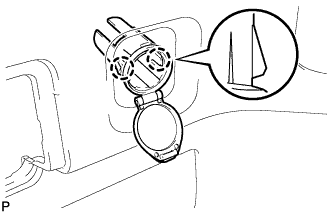
INSTALL REAR POWER OUTLET SOCKET COVER (for LH Side)
|
|
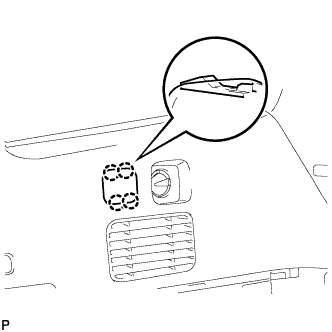
- Engage the 2 claws and install the rear power outlet socket cover.
| 13.
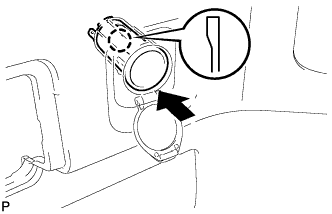
INSTALL REAR POWER POINT SOCKET ASSEMBLY (for LH Side)
|
|
- Engage the claw and install the rear power point socket assembly.
Connect the connector.
| 14.
INSTALL REAR COMBINATION LIGHT SERVICE COVER LH (for LH Side)
|
|
- Engage the 2 guides and 6 claws, and install the rear combination light service cover LH.
| 15.
INSTALL REAR COMBINATION LIGHT SERVICE COVER RH (for RH Side)
|
|
- Engage the 2 guides and 6 claws, and install the rear combination light service cover RH.
| 16.
INSTALL SIDE TRIM COVER RH (for RH Side without Rear Automatic Air Conditioning System)
|
|
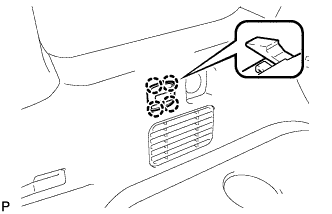
- Engage the 4 claws, and install the side trim cover RH.
| 17.
INSTALL REAR ROOM TEMPERATURE SENSOR (for RH Side with Rear Automatic Air Conditioning System)
|
|
Connect the connector.
- Engage the 4 claws and install the rear room temperature sensor.
| 18.
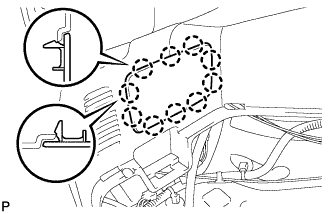
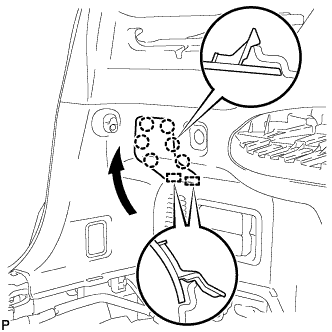
INSTALL SIDE TRIM COVER LH (for LH Side)
|
|
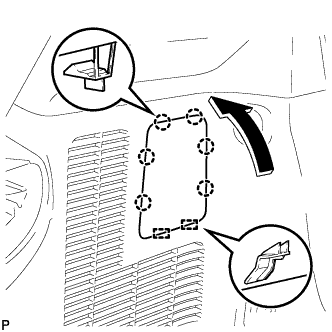
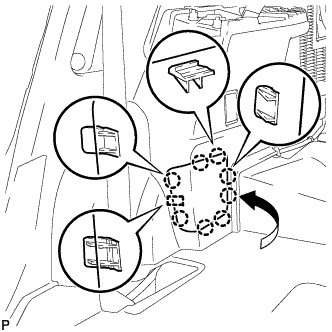
- Engage the 10 claws and install the side trim cover LH.
| 19.
INSTALL DECK SIDE TRIM
|
|
- Engage the 3 guides and 4 claws as shown in the illustration.
- Install the deck side trim LH with the bolt.
| 20.
INSTALL DECK SIDE TRIM COVER
|
|
- Engage the 2 claws and install the deck side trim cover LH.
| 21.
INSTALL REAR SEAT SIDE GARNISH CAP (for RH Side without Rear Air Conditioning System)
|
|
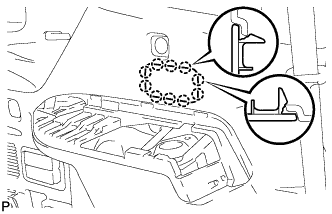
- Engage the guide and the 8 claws, and install the rear seat side garnish cap.
| 22.
INSTALL REAR SEAT SIDE GARNISH CAP (for RH Side with Rear Air Conditioning System)
|
|
- Engage the guide and the 6 claws.
Install the rear seat side garnish cap with the screw.
| 23.
INSTALL REAR FLOOR FINISH PLATE
|
|
- Engage the 4 clips and the 4 claws, and install the rear floor finish plate.
| 24.
INSTALL REAR NO. 2 SEAT ASSEMBLY
|
|
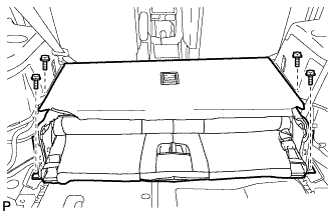
- Install the rear No. 2 seat assembly with the 4 bolts.
-
Torque:
- 37 N*m{
377 kgf*cm
, 27 ft.*lbf
}
| 25.
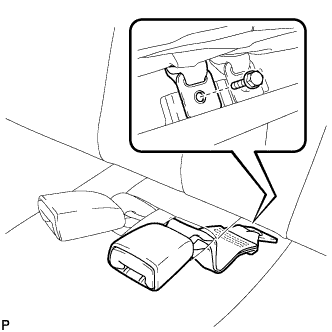
INSTALL REAR SEAT LAP TYPE BELT ASSEMBLY LH |
|
- Install the rear seat lap type belt assembly LH with the bolt.
-
Torque:
- 42 N*m{
428 kgf*cm
, 31 ft.*lbf
}
- NOTICE:
- After installing the belt, check that it is not twisted.
| 26.
INSTALL REAR SEAT LAP TYPE BELT ASSEMBLY RH |
|
Install the rear seat lap type belt assembly RH with the bolt.
-
Torque:
- 42 N*m{
428 kgf*cm
, 31 ft.*lbf
}
- NOTICE:
- After installing the belt, check that it is not twisted.
| 27.
INSTALL REAR NO. 2 SEAT INNER BELT ASSEMBLY
|
|
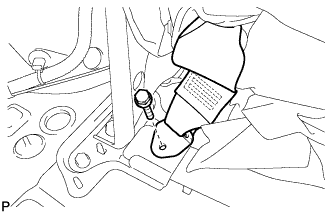
- Install the rear No. 2 seat inner belt assembly with the bolt.
-
Torque:
- 42 N*m{
428 kgf*cm
, 31 ft.*lbf
}
- NOTICE:
- Do not allow the anchor part of the rear No. 2 seat inner belt assembly to overlap the protruding part of the rear No. 2 seat bracket.
- HINT:
- Use the same procedure for the RH side and LH side.
| 28.
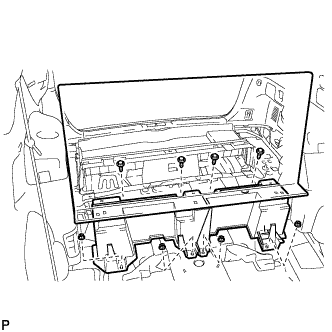
INSTALL DECK FLOOR BOARD ASSEMBLY
|
|
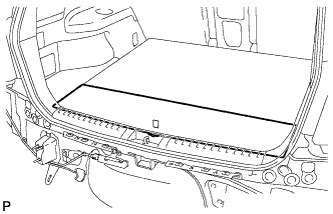
- Install the rear deck floor board assembly with the 4 nuts and 4 bolts.
| 29.
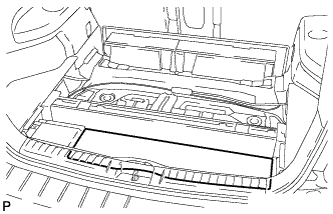
INSTALL REAR MAT
|
|
- Install the rear mat.
| 30.
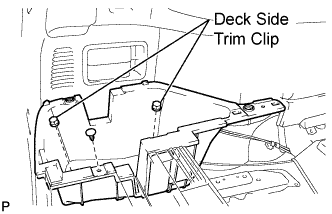
INSTALL DECK SIDE TRIM BOX LH
|
|
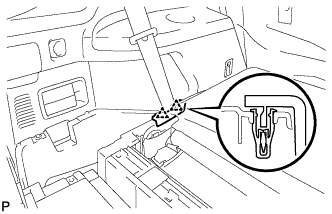
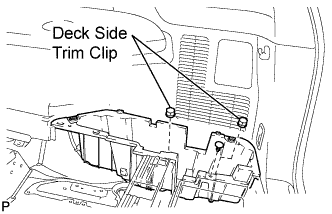
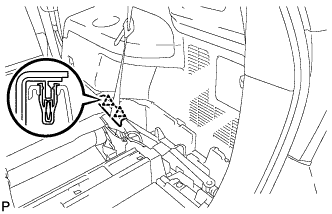
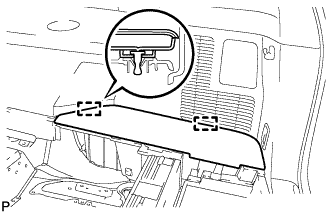
Install the deck side trim box LH as shown in the illustration.
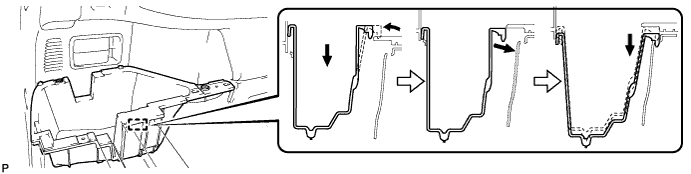
- Install the 2 deck side trim clips and the clip.
| 31.
INSTALL REAR SEAT SIDE COVER LH
|
|
- Engage the 2 clips and install the rear seat side cover LH.
| 32.
INSTALL DECK SIDE TRIM BOX RH
|
|
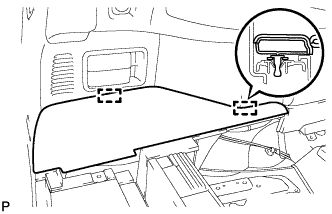
Install the deck side trim box RH as shown in the illustration.
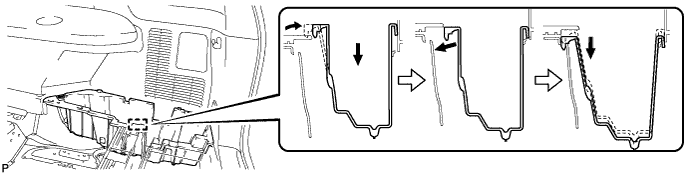
- Install the 2 deck side trim clips and the clip.
| 33.
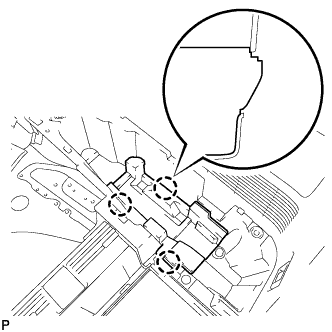
INSTALL JACK CARRIER ASSEMBLY (for LHD)
|
|
- Engage the 3 claws, and install the jack carrier assembly.
| 34.
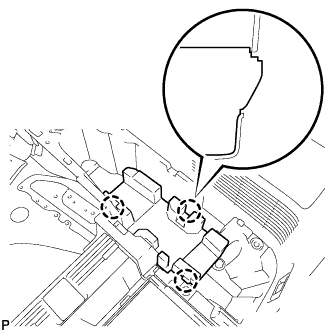
INSTALL JACK CARRIER ASSEMBLY (for RHD)
|
|
- Engage the 3 claws, and install the jack carrier assembly.
| 35.
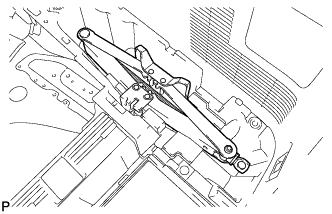
INSTALL JACK ASSEMBLY (for LHD)
|
|
- Install the jack assembly.
| 36.
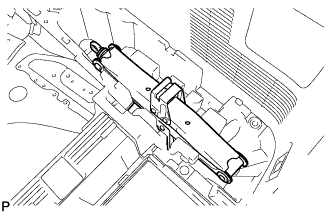
INSTALL JACK ASSEMBLY (for RHD)
|
|
- Install the jack assembly.
| 37.
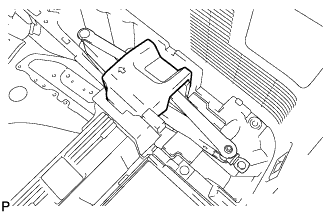
INSTALL JACK CARRIER CUSHION (for LHD)
|
|
- Install the jack carrier cushion.
| 38.
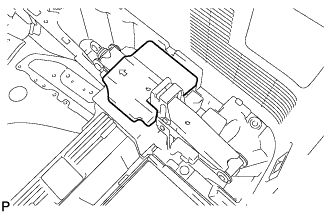
INSTALL JACK CARRIER CUSHION (for RHD)
|
|
- Install the jack carrier cushion.
| 39.
INSTALL JACK CARRIER SUPPORT |
|
| 40.
INSTALL REAR SEAT SIDE COVER RH
|
|
- Engage the 2 clips and install the rear seat side cover RH.
| 41.
INSTALL TONNEAU COVER ASSEMBLY (w/ Tonneau Cover) |
|
| 42.
INSTALL NO. 2 DECK BOARD SUB-ASSEMBLY
|
|
- Engage the 2 guides and install the No. 2 deck board sub-assembly.
| 43.
INSTALL NO. 3 DECK BOARD SUB-ASSEMBLY
|
|
- Engage the 2 guides and install the No. 3 deck board sub-assembly.
| 44.
INSTALL DECK BOARD ASSEMBLY
|
|
- Install the deck board sub-assembly.
| 45.
CONNECT REAR DOOR OPENING TRIM WEATHERSTRIP |
|
| 46.
INSTALL REAR DOOR SCUFF PLATE
|
|
- Engage the guide, 3 clips and 5 claws, and install the rear door scuff plate LH.