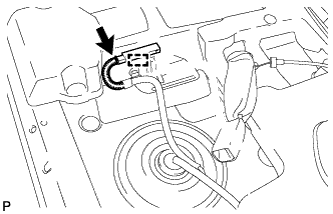
REMOVAL
Removal / installation · Vehicles built May 2007 – Jul 2008
Versions by build date: May 2007 – Jul 2008 Aug 2008 – Jun 2010 from Jul 2010
| 1.
REMOVE REAR CENTER SEAT ASSEMBLY |
|
| 2.
REMOVE REAR SEAT HEADREST ASSEMBLY (for LH Side) |
|
| 3.
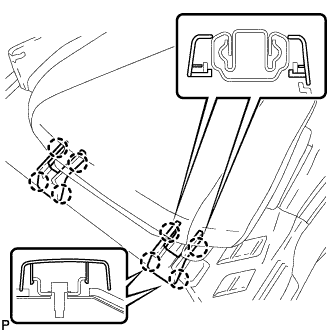
REMOVE SEAT TRACK BRACKET COVER LH
|
 |
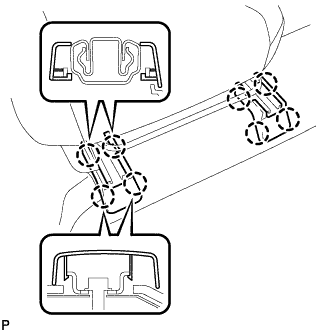
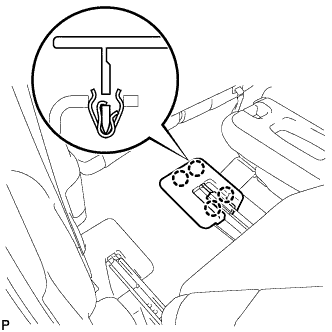
- Disengage the 8 claws and remove the 2 rear seat track bracket covers.
| 4.
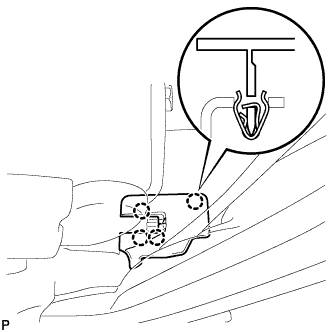
REMOVE REAR OUTER SEAT TRACK BRACKET COVER LH
|
|
- Disengage the 4 claws and remove the rear outer track bracket cover.
| 5.
REMOVE REAR INNER TRACK BRACKET COVER LH
|
|
- Disengage the 4 claws and remove the rear outer track bracket cover.
| 6.
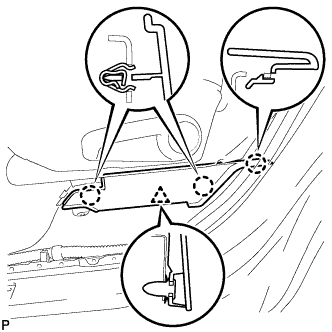
REMOVE REAR SEAT LEG SIDE COVER LH
|
|
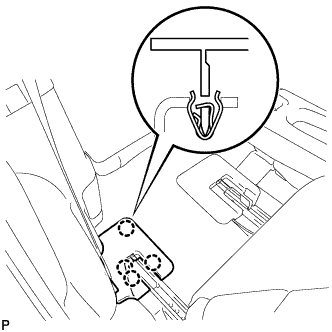
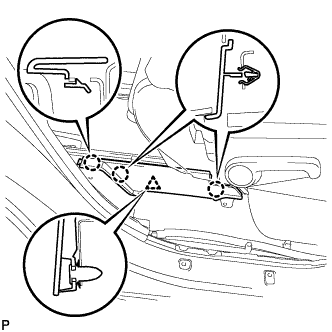
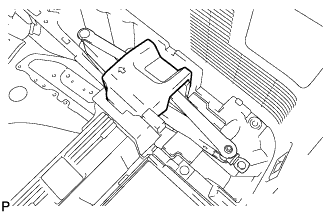
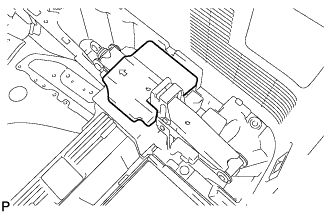
- Disengage the 3 claws.
Disengage the clip and remove the rear seat leg side cover.
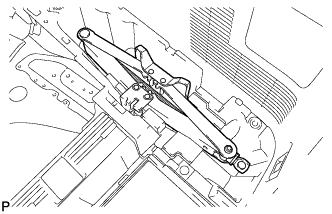
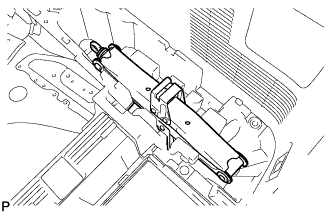
| 7.
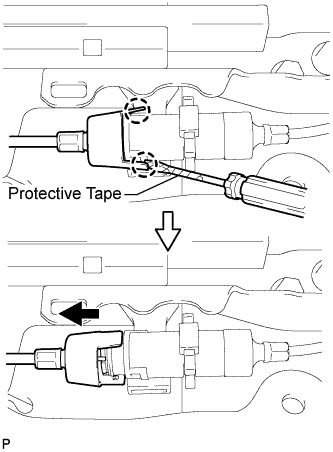
DISCONNECT REAR NO. 1 SEAT LOCK CABLE ASSEMBLY (w/ Remote Folding Function)
|
|
Pull down the adjuster's lock piece to release the lock as shown in the illustration.
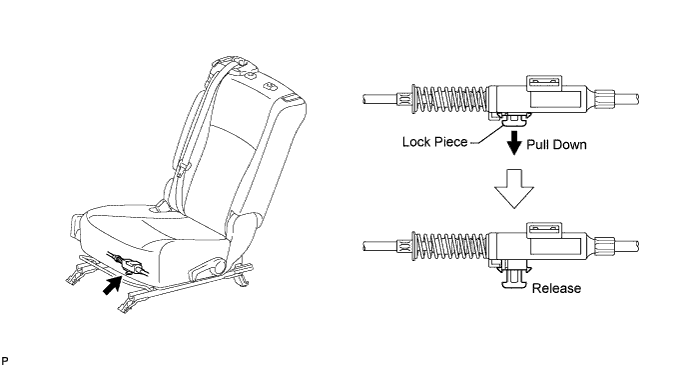

- Using a screwdriver wrapped with protective tape, disengage the 2 claws as shown in the illustration.
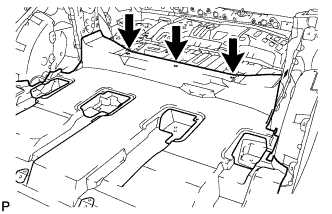
Lift up the seat track adjusting handle to the uppermost position and hold the handle in this position as shown in the illustration.
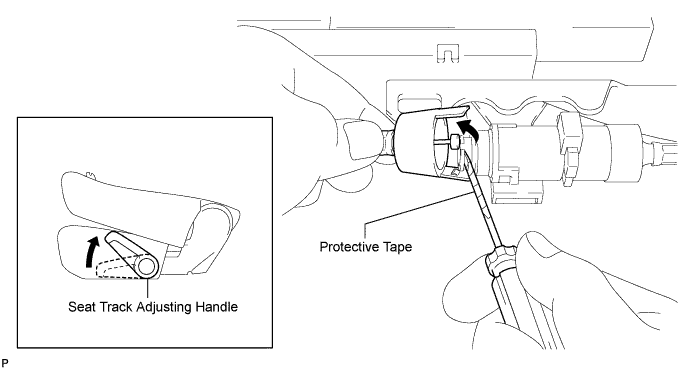
Using a screwdriver wrapped with protective tape, disconnect the rear No. 1 seat lock cable assembly as shown in the illustration.
Using a screwdriver wrapped with protective tape, disconnect the rear seat reclining control cable as shown in the illustration.
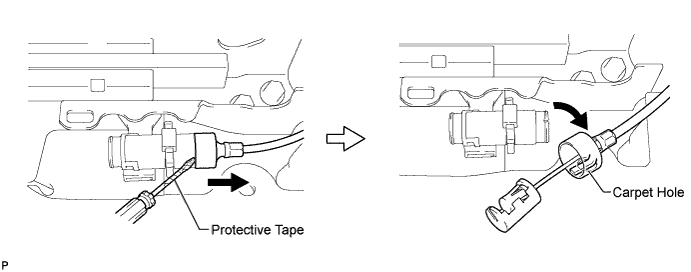
Secure the rear seat reclining control cable with the carpet hole as shown in the illustration.
| 8.
REMOVE REAR NO. 1 SEAT ASSEMBLY LH
|
|
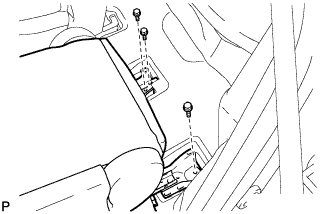
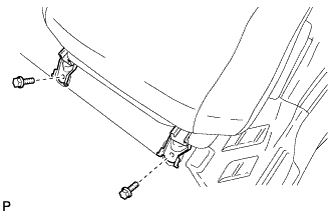
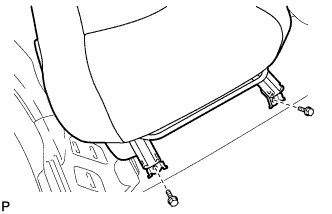
- Remove the 3 bolts on the rear side of the seat.
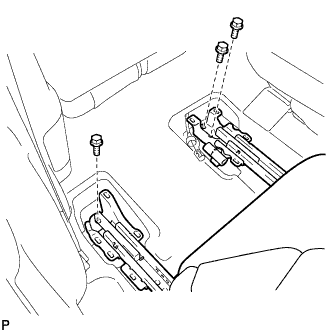
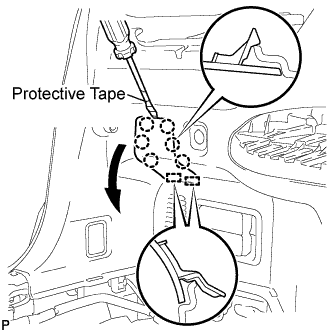
- Remove the 2 bolts on the front side of the seat and the rear No. 1 seat assembly.
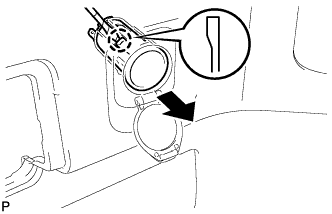
- NOTICE:
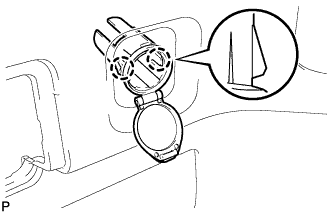
- Be careful not to damage the vehicle body.
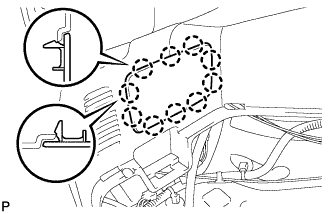
| 9.
REMOVE REAR SEAT HEADREST ASSEMBLY (for RH Side) |
|
| 10.
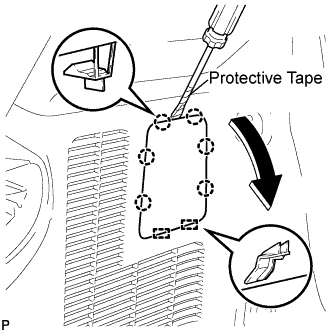
REMOVE SEAT TRACK BRACKET COVER RH
|
|
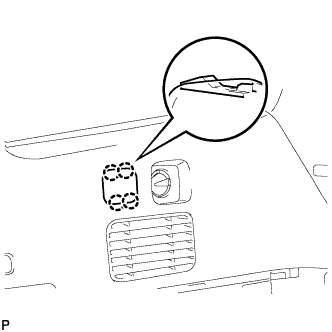
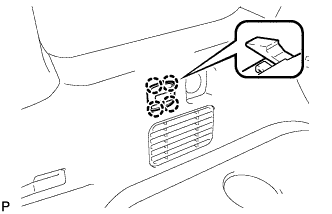
- Disengage the 8 claws and remove the 2 rear seat track bracket covers.
| 11.
REMOVE REAR OUTER TRACK BRACKET COVER RH
|
|
- Disengage the 4 claws and remove the rear outer track bracket cover.
| 12.
REMOVE REAR INNER TRACK BRACKET COVER RH
|
|
- Disengage the 4 claws and remove the rear inner track bracket cover.
| 13.
REMOVE REAR SEAT LEG SIDE COVER RH
|
|
- Disengage the 3 claws.
Disengage the clip and remove the rear seat leg side cover.
| 14.
DISCONNECT REAR NO. 1 SEAT LOCK CABLE ASSEMBLY (w/ Remote Folding Function) |
|
- HINT:
- Use the same procedure for the RH side and the LH side.
| 15.
REMOVE REAR NO. 1 SEAT ASSEMBLY RH
|
|
- Remove the 3 bolts on the rear side of the seat.
- Remove the 2 bolts on the front side of the seat and the rear No. 1 seat assembly.
- NOTICE:
- Be careful not to damage the vehicle body.
| 16.
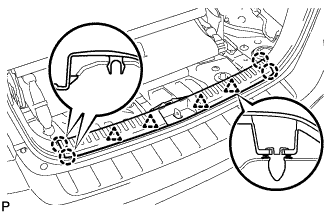
REMOVE REAR DOOR SCUFF PLATE LH
|
|
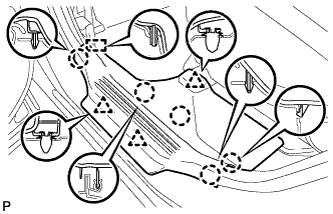
- Disengage the 5 claws, 3 clips and guide, and remove the rear door scuff plate LH.
| 17.
REMOVE REAR DOOR OPENING TRIM WEATHERSTRIP LH
|
|
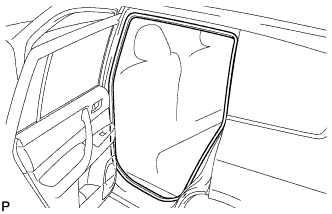
- Remove the rear door opening trim weatherstrip LH.
| 18.
REMOVE REAR DOOR SCUFF PLATE RH
|
|
- HINT:
- Use the same procedure for the RH side and the LH side.
| 19.
REMOVE REAR DOOR OPENING TRIM WEATHERSTRIP RH
|
|
- HINT:
- Use the same procedure for the RH side and the LH side.
| 20.
REMOVE DECK BOARD ASSEMBLY
|
|
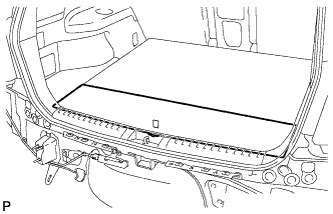
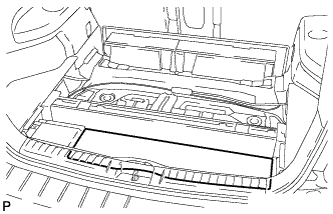
- Remove the deck board assembly.
| 21.
REMOVE NO. 3 DECK BOARD SUB-ASSEMBLY
|
|
- Disengage the 2 guides and remove the No. 3 deck board sub-assembly.
| 22.
REMOVE NO. 2 DECK BOARD SUB-ASSEMBLY
|
|
- Disengage the 2 guides and remove the No. 2 deck board sub-assembly.
| 23.
REMOVE TONNEAU COVER ASSEMBLY (w/ Tonneau Cover) |
|
| 24.
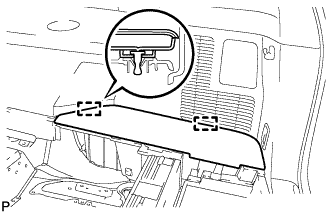
REMOVE REAR SEAT SIDE COVER LH
|
|
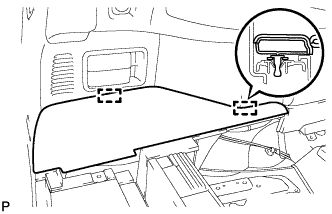
- Disengage the 2 clips and remove the rear seat side cover LH.
| 25.
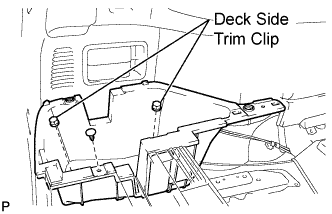
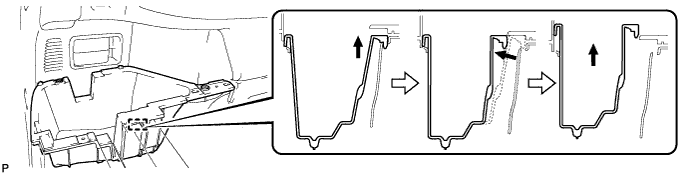
REMOVE DECK SIDE TRIM BOX LH
|
|
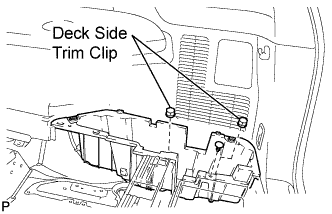
- Remove the 2 deck side trim clips and clip.
Remove the deck side trim box LH as shown in the illustration.
| 26.
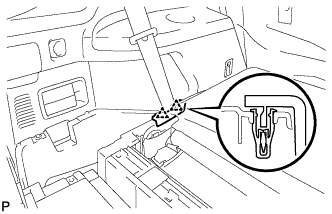
REMOVE REAR SEAT SIDE COVER RH
|
|
- Disengage the 2 clips and remove the rear seat side cover RH.
| 27.
REMOVE JACK CARRIER SUPPORT |
|
| 28.
REMOVE JACK CARRIER CUSHION (for LHD)
|
|
- Remove the jack carrier cushion.
| 29.
REMOVE JACK CARRIER CUSHION (for RHD)
|
|
- Remove the jack carrier cushion.
| 30.
REMOVE JACK ASSEMBLY (for LHD)
|
|
- Remove the jack assembly.
| 31.
REMOVE JACK ASSEMBLY (for RHD)
|
|
- Remove the jack assembly.
| 32.
REMOVE JACK CARRIER ASSEMBLY
|
|
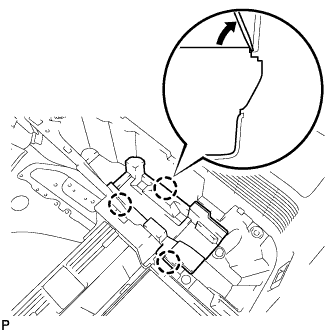
- Using a screwdriver, disengage the 3 claws and remove the jack carrier assembly.
| 33.
REMOVE JACK CARRIER ASSEMBLY (for RHD)
|
|
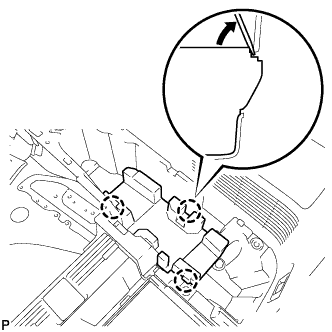
- Using a screwdriver, disengage the 3 claws and remove the jack carrier assembly.
| 34.
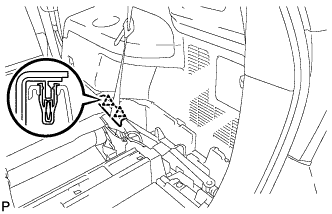
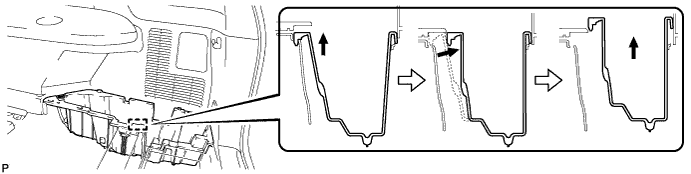
REMOVE DECK SIDE TRIM BOX RH
|
|
- Remove the 2 deck side trim clips and clip.
Remove the deck side trim box RH as shown in the illustration.
| 35.
REMOVE REAR MAT
|
|
- Remove the rear mat.
| 36.
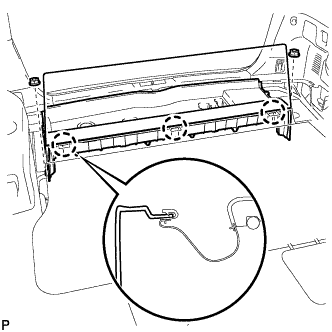
REMOVE DECK FLOOR BOARD ASSEMBLY
|
|
- Disengage the 3 claws.
Remove the 2 nuts and the deck floor board assembly.
| 37.
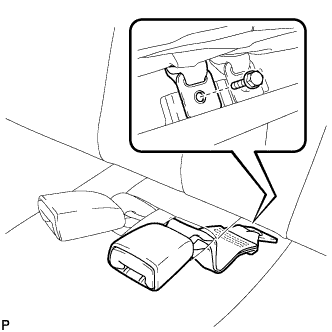
REMOVE REAR NO. 2 SEAT INNER BELT ASSEMBLY
|
|
- Remove the bolt and rear No. 2 seat inner belt assembly.
- HINT:
- Use the same procedure for the RH side and LH side.
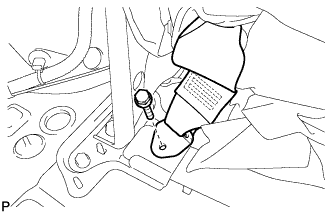
| 38.
DISCONNECT REAR SEAT LAP TYPE BELT ASSEMBLY LH
|
|
- Remove the bolt and disconnect the rear seat lap type belt assembly LH.
| 39.
DISCONNECT REAR SEAT LAP TYPE BELT ASSEMBLY RH
|
|
- HINT:
- Use the same procedure for the RH side and the LH side.
| 40.
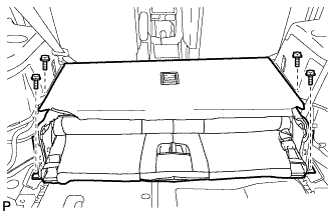
REMOVE REAR NO. 2 SEAT ASSEMBLY
|
|
- Remove the 4 bolts and the rear No. 2 seat assembly.
| 41.
REMOVE REAR FLOOR FINISH PLATE
|
|
- Disengage the 4 clips and the 4 claws, and remove the rear floor finish plate.
| 42.
REMOVE DECK SIDE TRIM COVER NO.2
|
|
- Remove the bolt.
- Disengage the 4 claws and the 3 guides, and remove the deck side trim LH as shown in the illustration.
| 43.
REMOVE DECK SIDE TRIM LH
|
|
- Remove the bolt.
- Disengage the 4 claws and the 3 guides, and remove the deck side trim LH as shown in the illustration.
| 44.
REMOVE SIDE TRIM COVER LH
|
|
- Disengage the 10 claws and remove the side trim cover LH.
| 45.
REMOVE REAR COMBINATION LIGHT SERVICE COVER LH
|
|
- Using a screwdriver, disengage the 6 claws and 2 guides, and remove the rear combination light service cover LH.
- HINT:
- Tape the screwdriver tip before use.
| 46.
REMOVE REAR POWER POINT SOCKET ASSEMBLY
|
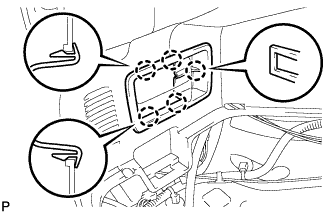
|
Disconnect the connector.
- Disengage the claw and remove the rear power point socket assembly.
| 47.
REMOVE REAR POWER OUTLET SOCKET COVER
|
|
- Disengage the 2 claws and remove the rear power outlet socket cover.
| 48.
REMOVE REAR DECK TRIM COVER (w/o Remote Folding Function)
|
|
- Disengage the 10 claws and remove the rear deck trim cover.
| 49.
REMOVE RECLINING REMOTE CONTROL LEVER BEZEL LH (w/ Remote Folding Function)
|
|
- Disengage the 5 claws and remove the reclining remote control bezel LH.
| 50.
REMOVE ROPE HOOK ASSEMBLY (for LH Side)
|
|
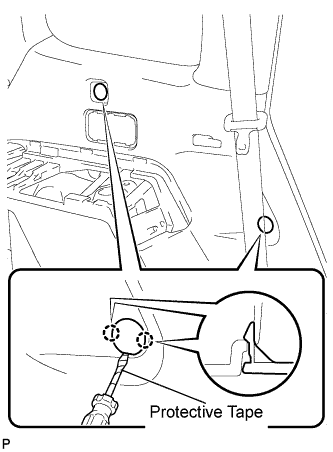
- for Front Side:
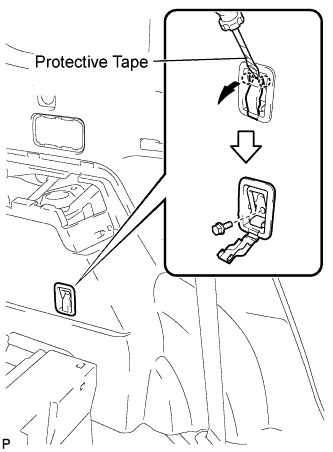
Using a screwdriver, disengage the 2 claws.
- HINT:
- Tape the screwdriver tip before use.
Remove the bolt and the rope hook assembly.
- for Rear Side:
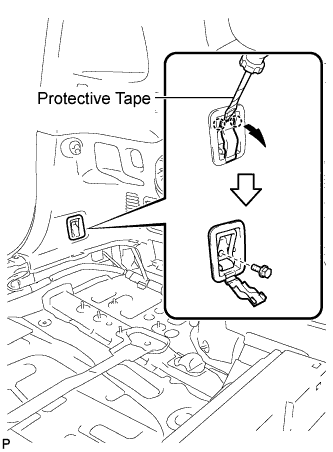
Using a screwdriver, disengage the 2 claws.
- HINT:
- Tape the screwdriver tip before use.
Remove the bolt and rope hook assembly.
| 51.
REMOVE NO. 2 DECK SIDE TRIM HOOK
|
|
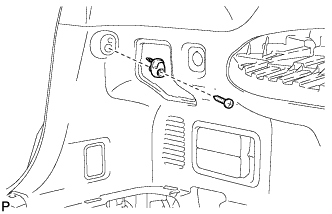
- Remove the screw and the No. 2 deck side trim hook.
| 52.
REMOVE FRONT DECK SIDE TRIM COVER LH
|
|
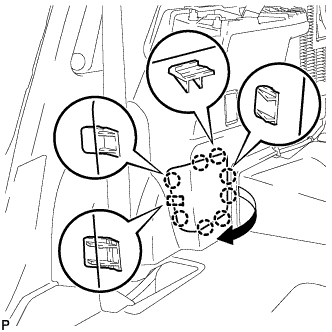
- Using a screwdriver, disengage the 4 claws and remove the 2 front deck side trim covers LH.
- HINT:
- Tape the screwdriver tip before use.
| 53.
DISCONNECT REAR NO. 1 SEAT OUTER BELT ASSEMBLY LH
|
|
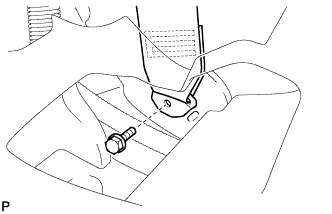
- Remove the bolt and disconnect the floor end of the rear No. 1 seat outer belt assembly.
| 54.
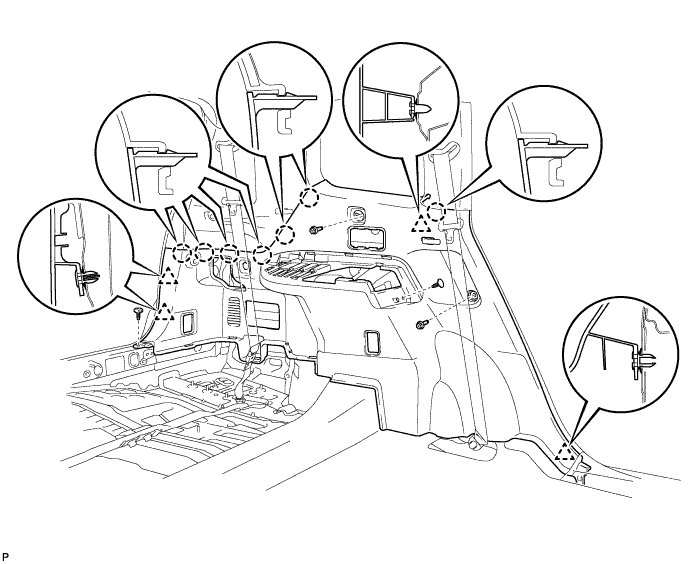
REMOVE DECK TRIM SIDE PANEL ASSEMBLY LH
|
|
Remove the 2 bolts.
Remove the 2 clips.
Disengage the 7 claws and 4 clips, and remove the deck trim side panel assembly LH.
| 55.
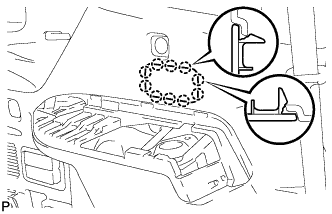
REMOVE REAR SEAT SIDE GARNISH CAP (w/o Rear Air Conditioning System)
|
|
- Disengage the 8 claws and guide, and remove the rear seat side garnish cap.
| 56.
REMOVE REAR SEAT SIDE GARNISH CAP (w/ Rear Air Conditioning System)
|
|
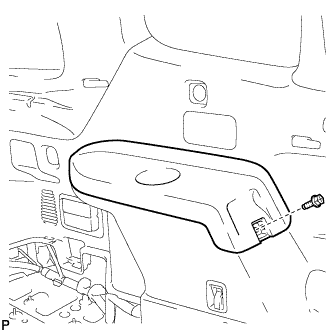
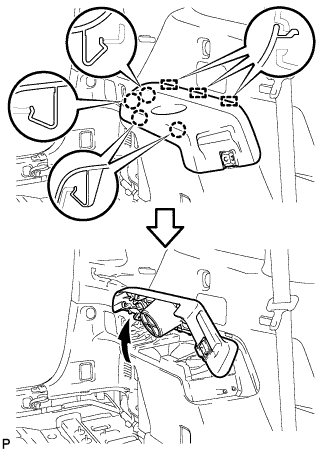
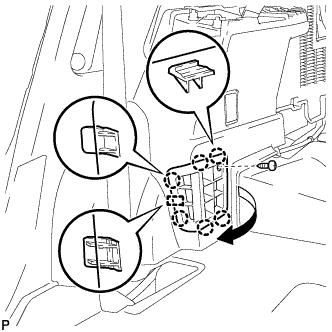
- Remove the screw.
Disengage the 6 claws and the guide, and remove the rear seat side garnish cap.
| 57.
REMOVE DECK SIDE TRIM COVER NO.1
|
|
- HINT:
- Use the same procedure for the RH side and the LH side.
| 58.
REMOVE DECK SIDE TRIM RH
|
|
- HINT:
- Use the same procedure for the RH side and the LH side.
| 59.
REMOVE SIDE TRIM COVER RH (w/o Rear Automatic Air Conditioning System)
|
|
- Disengage the 4 claws and remove the side trim cover RH.
| 60.
REMOVE REAR ROOM TEMPERATURE SENSOR (w/ Rear Automatic Air Conditioning System)
|
|
- Disengage the 4 claws and remove the rear room temperature sensor.
Disconnect the connector.
| 61.
REMOVE REAR COMBINATION LIGHT SERVICE COVER RH
|
|
- Using a screwdriver, disengage the 6 claws and the 2 guides, and remove the rear combination light service cover RH.
- HINT:
- Tape the screwdriver tip before use.
| 62.
REMOVE ROPE HOOK ASSEMBLY (for RH Side)
|
|
- HINT:
- Use the same procedure for the RH side and the LH side.
| 63.
REMOVE NO. 1 LUGGAGE COMPARTMENT TRIM HOOK
|
|
- HINT:
- Use the same procedure for the No. 1 luggage compartment trim hook and the No. 2 deck side trim hook.
| 64.
REMOVE FRONT DECK SIDE TRIM COVER RH
|
|
- HINT:
- Use the same procedure for the RH side and the LH side.
| 65.
DISCONNECT REAR NO. 1 SEAT OUTER BELT ASSEMBLY RH |
|
- HINT:
- Use the same procedure for the RH side and the LH side.
| 66.
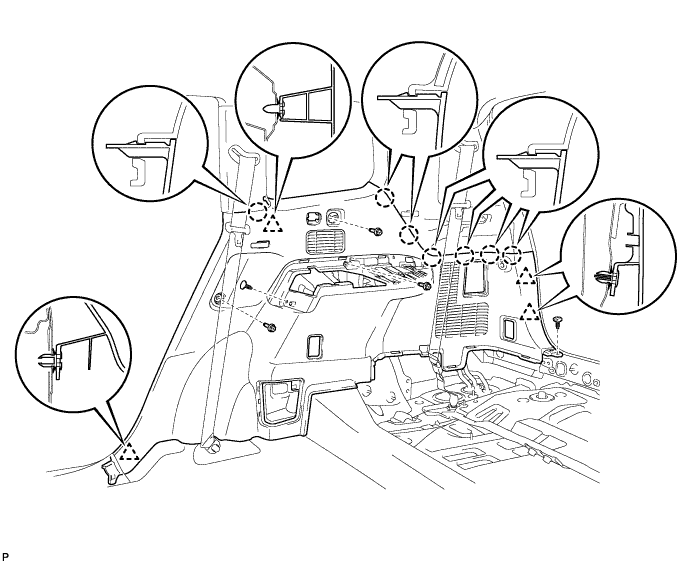
REMOVE DECK TRIM SIDE PANEL ASSEMBLY RH
|
|
Remove the 3 bolts.
Remove the 2 clips.
Disengage the 7 claws and 4 clips, and remove the deck trim side panel assembly RH.
| 67.
REMOVE INDOOR ELECTRICAL KEY OSCILLATOR |
|
- Using a clip remover, remove the 3 clips and tear off the front floor carpet.
- Disconnect the connector.
Remove the clamp and the indoor electrical key oscillator.