REMOVAL
Removal / installation · Vehicles built from Jul 2010
Versions by build date: May 2007 – Jul 2008 Aug 2008 – Jun 2010 from Jul 2010
| 1.
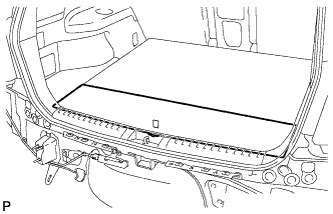
REMOVE DECK BOARD ASSEMBLY
|
 |
- Remove the deck board assembly.
| 2.
REMOVE NO. 3 DECK BOARD SUB-ASSEMBLY
|
|
- Disengage the 2 guides and remove the No. 3 deck board sub-assembly.
| 3.
REMOVE NO. 2 DECK BOARD SUB-ASSEMBLY
|
|
- Disengage the 2 guides and remove the No. 2 deck board sub-assembly.
| 4.
REMOVE TONNEAU COVER ASSEMBLY (w/ Tonneau Cover)
|
|
Remove the tonneau cover assembly.
| 5.
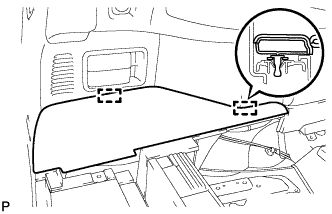
REMOVE REAR SEAT SIDE COVER LH
|
|
- Disengage the 2 clips and remove the rear seat side cover LH.
| 6.
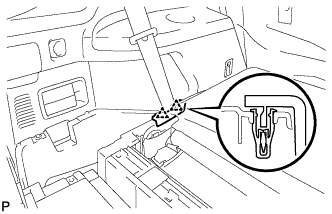
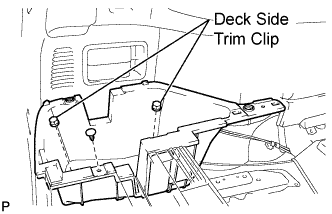
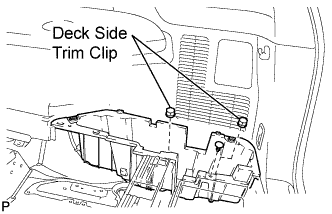
REMOVE DECK SIDE TRIM BOX LH
|
|
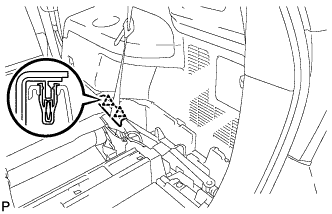
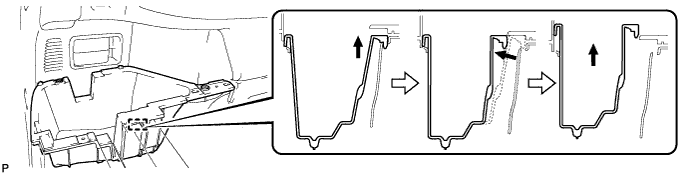
- Remove the 2 deck side trim clips and clip.
Remove the deck side trim box LH as shown in the illustration.

| 7.
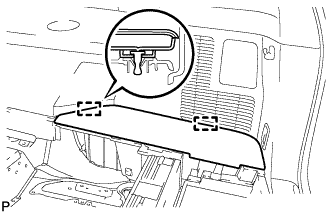
REMOVE REAR SEAT SIDE COVER RH
|
|
- Disengage the 2 clips and remove the rear seat side cover RH.
| 8.
REMOVE JACK CARRIER SUPPORT |
|
| 9.
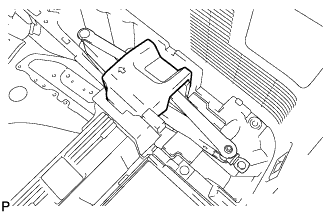
REMOVE JACK CARRIER CUSHION (for LHD)
|
|
- Remove the jack carrier cushion.
| 10.
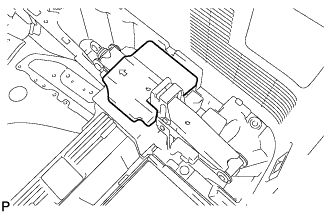
REMOVE JACK CARRIER CUSHION (for RHD)
|
|
- Remove the jack carrier cushion.
| 11.
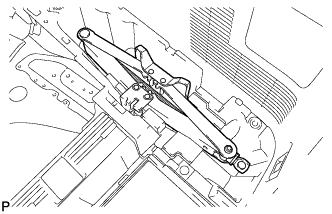
REMOVE JACK ASSEMBLY (for LHD)
|
|
- Remove the jack assembly.
| 12.
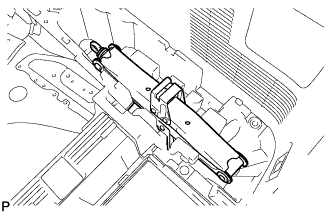
REMOVE JACK ASSEMBLY (for RHD)
|
|
- Remove the jack assembly.
| 13.
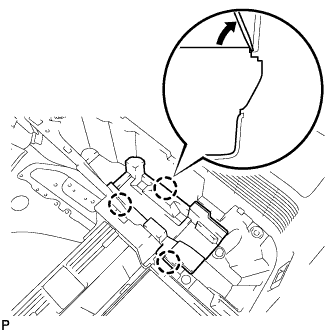
REMOVE JACK CARRIER ASSEMBLY (for LHD)
|
|
- Using a screwdriver, disengage the 3 claws and remove the jack carrier assembly.
| 14.
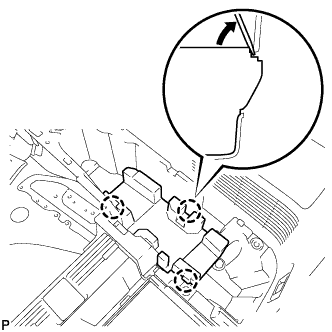
REMOVE JACK CARRIER ASSEMBLY (for RHD)
|
|
- Using a screwdriver, disengage the 3 claws and remove the jack carrier assembly.
| 15.
REMOVE DECK SIDE TRIM BOX RH
|
|
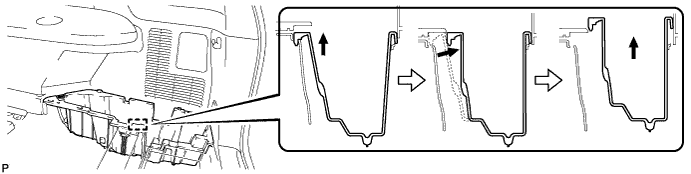
- Remove the 2 deck side trim clips and clip.
Remove the deck side trim box RH as shown in the illustration.
| 16.
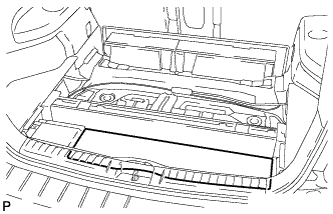
REMOVE REAR MAT
|
|
- Remove the rear mat.
| 17.
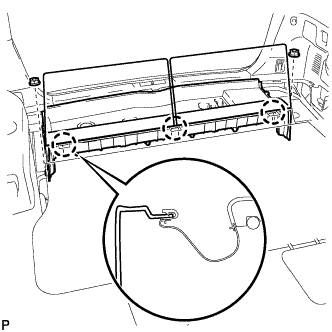
REMOVE DECK FLOOR BOARD ASSEMBLY
|
|
- Disengage the 3 claws.
Remove the 2 nuts and deck floor board assembly.
| 18.
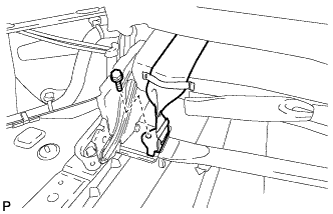
DISCONNECT REAR NO. 2 SEAT OUTER BELT ASSEMBLY LH
|
|
- Remove the bolt and disconnect the rear No. 2 seat outer belt assembly LH.
| 19.
DISCONNECT REAR NO. 2 SEAT OUTER BELT ASSEMBLY RH
|
|
- HINT:
- Use the same procedure as for the LH side.
| 20.
REMOVE CENTER SEAT CUSHION COVER SUB-ASSEMBLY
|
|
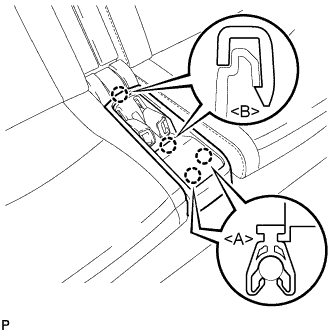
- Disengage the 2 claws <A>.
Disengage the 2 claws <B> and remove the center seat cushion cover sub-assembly.
| 21.
REMOVE REAR NO. 2 SEAT ASSEMBLY
|
|
Remove the bolt on the front of the seat.
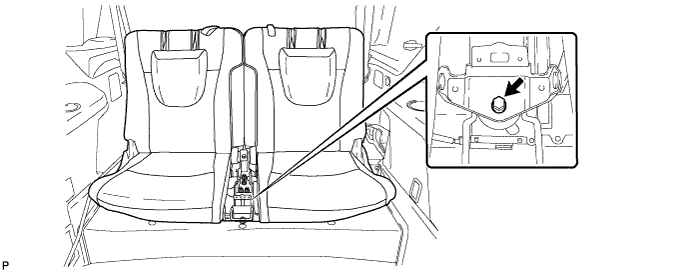
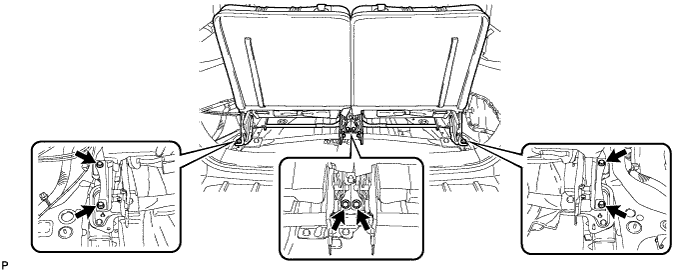
Remove the 6 bolts on the rear of the seat and the rear No. 2 seat assembly.
| 22.
REMOVE INDOOR ELECTRICAL KEY OSCILLATOR |
|
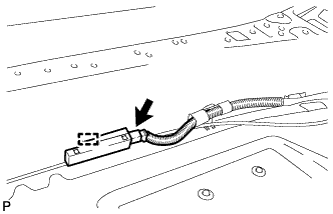
- Disengage the clamp.
Disconnect the connector and remove the indoor electrical key oscillator.