Security Horn Circuit
Circuit diagnosis · Vehicles built from Jul 2010
Versions by build date: May 2007 – Jul 2008 Aug 2008 – Jun 2010 from Jul 2010
DESCRIPTION
When the theft deterrent system is switched from the armed state to the alarm sounding state, the main body ECU controls the security horn.WIRING DIAGRAM
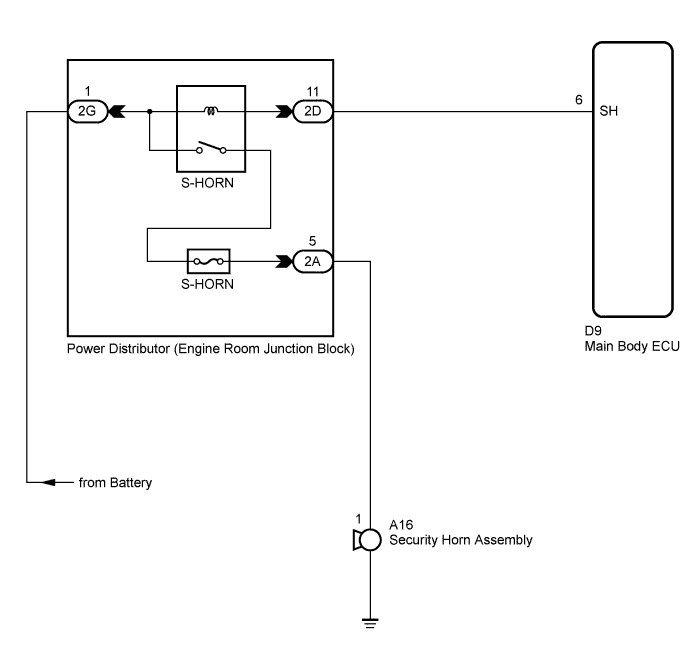

INSPECTION PROCEDURE
| 1. CHECK HARNESS AND CONNECTOR (MAIN BODY ECU - ENGINE ROOM JUNCTION BLOCK) |
 |
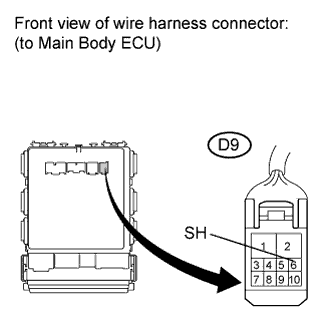
- Disconnect the D9 ECU connector.
Connect a negative battery lead to terminal 6 (SH) of the D9 ECU connector.
Check operation of the security horn.
- OK:
Measurement Condition
|
Specified Condition
|
Battery negative (-) → D9-6 (SH)
|
Horn sounds
|
|
NG |
 |
|
|
|
| OK |
|
 |
|
| PROCEED TO NEXT CIRCUIT INSPECTION SHOWN IN PROBLEM SYMPTOMS TABLE (Click here)
|
|
| 2. INSPECT SECURITY HORN ASSEMBLY |
|
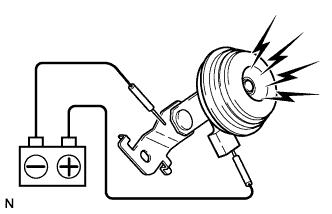
- Remove the security horn assembly (Click here).
Connect a positive battery lead to terminal 1 of the security horn assembly, and a negative battery lead to the horn body.
Check operation of the horn.
- OK:
Measurement Condition
|
Specified Condition
|
Battery positive (+) → Terminal 1
|
Horn sounds
|
Battery negative (-) → Horn body
|
|
NG |
 |
|
|
|
| OK |
|
 |
|
| 3. CHECK HARNESS AND CONNECTOR (ENGINE ROOM JUNCTION BLOCK - SECURITY HORN ASSEMBLY) |
|
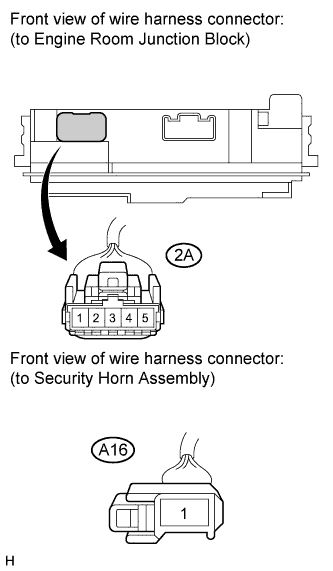
- Disconnect the 2A engine room junction block connector and A16 security horn assembly connector.
Measure the resistance according to the value(s) in the table below.
- Standard resistance:
Tester Connection
|
Condition
|
Specified Condition
|
2A-5 - A16-1
|
Always
|
Below 1 Ω
|
2A-5 - Body ground
|
Always
|
10 kΩ or higher
|
|
NG |
|
|
| REPAIR OR REPLACE HARNESS OR CONNECTOR |
|
|
| OK |
|
|
|
| 4. CHECK HARNESS AND CONNECTOR (BATTERY - ENGINE ROOM JUNCTION BLOCK) |
|
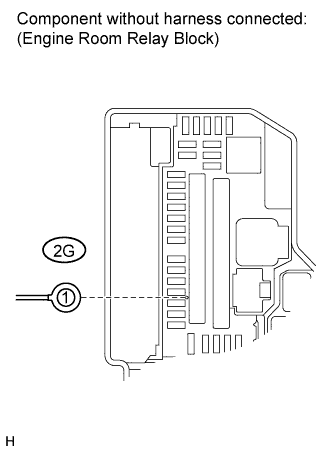
- Disconnect the 2G engine room junction block assembly connector.
Measure the voltage on the junction block side according to the value(s) in the table below.
- Standard voltage:
Tester Connection
|
Condition
|
Specified Condition
|
2G-1 - Body ground
|
Always
|
11 to 14 V
|
|
NG |
|
|
| REPAIR OR REPLACE HARNESS OR CONNECTOR |
|
|
| OK |
|
|
|
| 5. CHECK HARNESS AND CONNECTOR (ENGINE ROOM JUNCTION BLOCK - MAIN BODY ECU) |
|
Disconnect the 2D engine room junction block connector.
Disconnect the D9 ECU connector.
Measure the resistance according to the value(s) in the table below.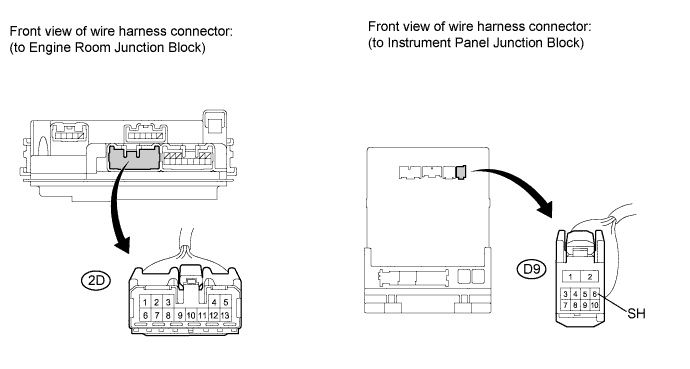
- Standard resistance:
Tester Connection
|
Condition
|
Specified Condition
|
2D-11 - D9-6 (SH)
|
Always
|
Below 1 Ω
|
D9-6 (SH) - Body ground
|
Always
|
10 kΩ or higher
|
|
NG |
|
|
| REPAIR OR REPLACE HARNESS OR CONNECTOR |
|
|
| OK |
|
|
|
| REPLACE ENGINE ROOM JUNCTION BLOCK |
|