REMOVAL
Removal / installation · Vehicles built Aug 2008 – Jun 2010
Versions by build date: May 2007 – Jul 2008 Aug 2008 – Jun 2010 from Jul 2010
| 1.
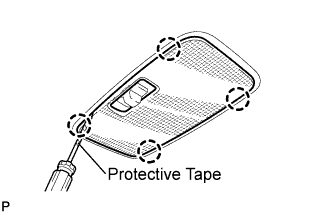
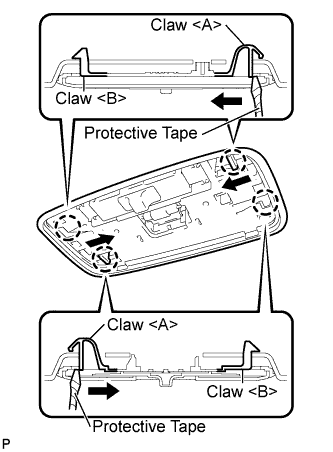
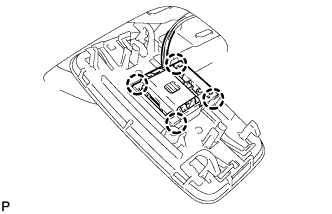
REMOVE NO. 1 ROOM LIGHT ASSEMBLY (for Standard)
|
 |
- Using a screwdriver, disengage the 4 claws and remove the lens cover.
- HINT:
- Tape the screwdriver tip before use.
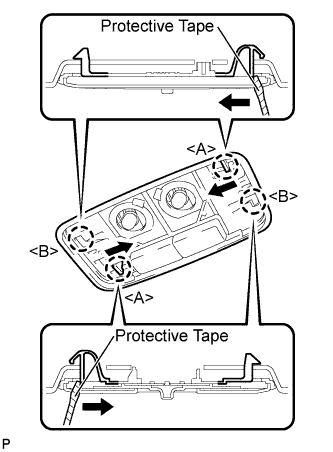
- Using a screwdriver, disengage the 2 claws <A> as shown in the illustration.
- HINT:
- Tape the screwdriver tip before use.
Disengage the 2 claws <B>.
- Using a screwdriver, disengage the 4 claws and remove the No. 1 room light assembly.
| 2.
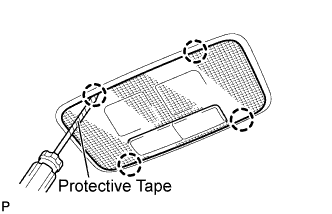
REMOVE NO. 1 ROOM LIGHT ASSEMBLY (for Independent Type)
|
|
- Using a screwdriver, disengage the 4 claws and remove the lens cover.
- HINT:
- Tape the screwdriver tip before use.
- Using a screwdriver, disengage the 2 claws <A> as shown in the illustration.
- HINT:
- Tape the screwdriver tip before use.
Disengage the 2 claws <B>.
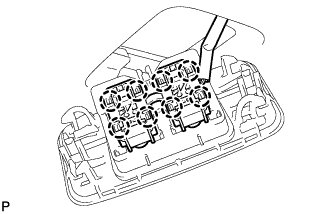
- Using a screwdriver, disengage the 8 claws and remove the No. 1 room light assembly.