 |
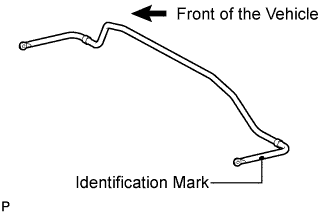
Temporarily install the rear stabilizer bar with the identification mark positioned on the left side of the vehicle.
REAR STABILIZER BAR (for 4WD) > INSTALLATION |
| 1. TEMPORARILY INSTALL REAR STABILIZER BAR |
|
Temporarily install the rear stabilizer bar with the identification mark positioned on the left side of the vehicle.
| 2. TEMPORARILY INSTALL REAR STABILIZER BAR BRACKET LH (for Front Side) |
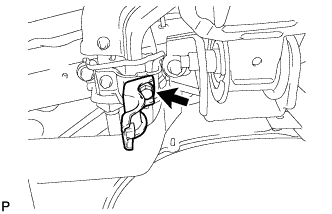 |
Temporarily install the rear stabilizer bar bracket LH (front side) with the bolt.
| 3. TEMPORARILY INSTALL REAR STABILIZER BAR BRACKET RH (for Front Side) |
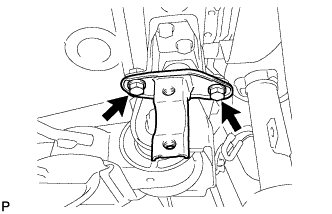 |
Temporarily install the rear stabilizer bar bracket RH (front side) with the 2 bolts.
| 4. INSTALL REAR STABILIZER BUSHING (for LH Side) |
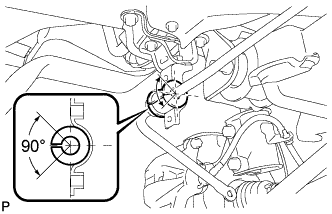 |
Install the rear stabilizer bushing (LH side) to the rear stabilizer bar.
| 5. INSTALL REAR STABILIZER BUSHING (for RH Side) |
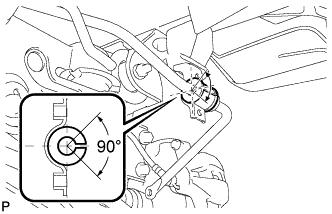 |
Install the rear stabilizer bushing (RH side) to the rear stabilizer bar.
| 6. INSTALL REAR STABILIZER BAR BRACKET LH (for Rear Side) |
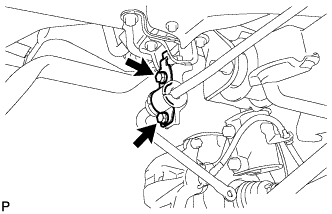 |
Install the rear stabilizer bar bracket LH (rear side) with the 2 bolts.
| 7. INSTALL REAR STABILIZER BAR BRACKET RH (for Rear Side) |
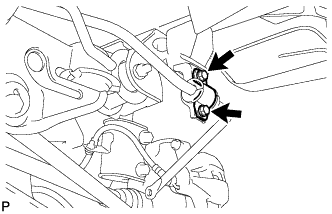 |
Install the rear stabilizer bar bracket RH (rear side) with the 2 bolts.
| 8. FULLY TIGHTEN REAR STABILIZER BAR BRACKET LH (for Front Side) |
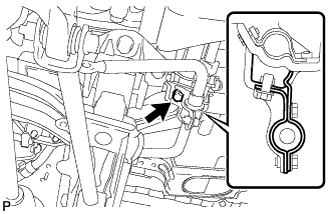 |
Fully tighten the bolt.
| 9. FULLY TIGHTEN REAR STABILIZER BAR BRACKET RH (for Front Side) |
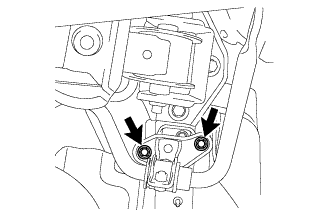 |
Fully tighten the 2 bolts.
| 10. INSTALL REAR STABILIZER LINK ASSEMBLY LH |
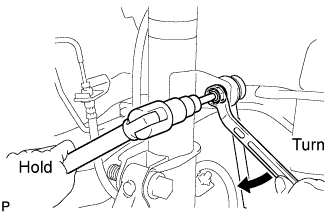 |
Install the rear stabilizer link assembly LH to the rear shock absorber with coil spring LH with the nut.
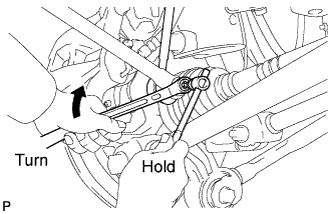 |
Install the rear stabilizer link assembly LH to the rear stabilizer bar with the nut.
| 11. INSTALL REAR STABILIZER LINK ASSEMBLY RH |
| 12. INSTALL TAIL EXHAUST PIPE ASSEMBLY |
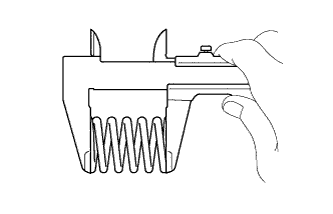 |
Using vernier calipers, measure the free length of the compression spring.
| Minimum | 40.5 mm (1.59 in.) |
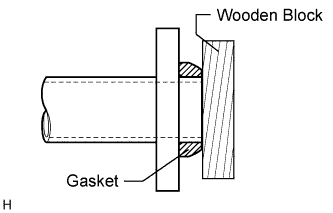 |
Using a plastic-faced hammer and wooden block, tap in a new gasket until its surface is flush with the center exhaust pipe assembly.
Connect the exhaust pipe support, and install the tail exhaust pipe assembly.
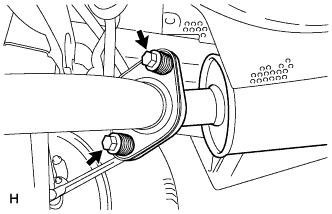 |
Install the 2 compression springs and 2 bolts.
| 13. INSPECT FOR EXHAUST GAS LEAK |
| 14. INSTALL REAR WHEELS |
| 15. INSTALL SPARE WHEEL CARRIER LOCK COVER (w/ Cover) |
| 16. INSTALL SPARE TIRE |
| 17. INSTALL LOWER SPARE WHEEL CARRIER HINGE COVER (w/ Cover) |
| 18. INSTALL DECK TRIM SERVICE HOLE COVER |
| 19. INSTALL REAR MAT |
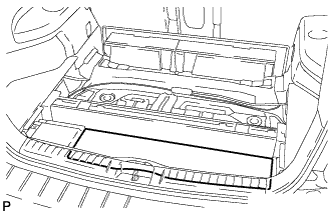 |
Install the rear mat.
| 20. INSTALL TONNEAU COVER ASSEMBLY (w/ Tonneau Cover) |
Install the tonneau cover assembly.
| 21. INSTALL NO. 2 DECK BOARD SUB-ASSEMBLY (w/ Tonneau Cover) |
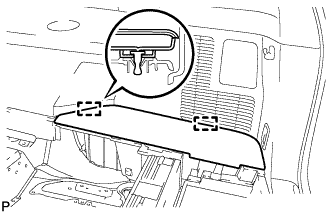 |
Engage the 2 guides and install the No. 2 deck board sub-assembly.
| 22. INSTALL NO. 3 DECK BOARD SUB-ASSEMBLY (w/ Tonneau Cover) |
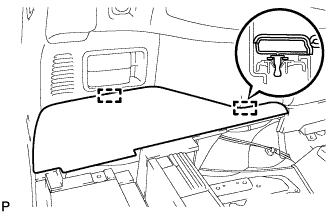 |
Engage the 2 guides and install the No. 3 deck board sub-assembly.
| 23. INSTALL DECK BOARD ASSEMBLY |
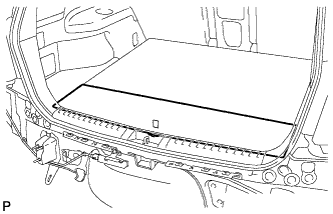 |
Install the deck board sub-assembly.