 |
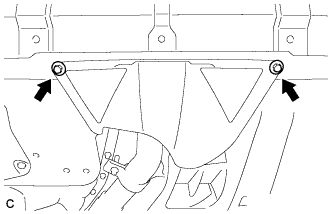
Remove the 2 bolts and engine under cover assembly RR.
THROTTLE BODY > REMOVAL |
| 1. REMOVE ENGINE UNDER COVER ASSEMBLY |
|
Remove the 2 bolts and engine under cover assembly RR.
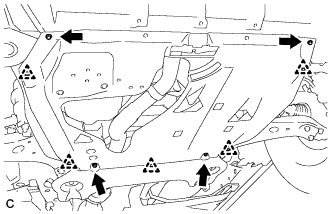 |
Remove the 2 bolts, 2 screws, 5 clips and engine under cover assembly.
| 2. REMOVE NO. 1 ENGINE UNDER COVER |
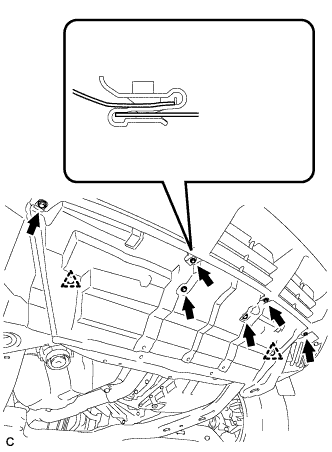 |
Remove the 6 bolts, 2 clips and No. 1 engine under cover.
| 3. DRAIN ENGINE COOLANT |
Loosen the radiator drain cock plug.
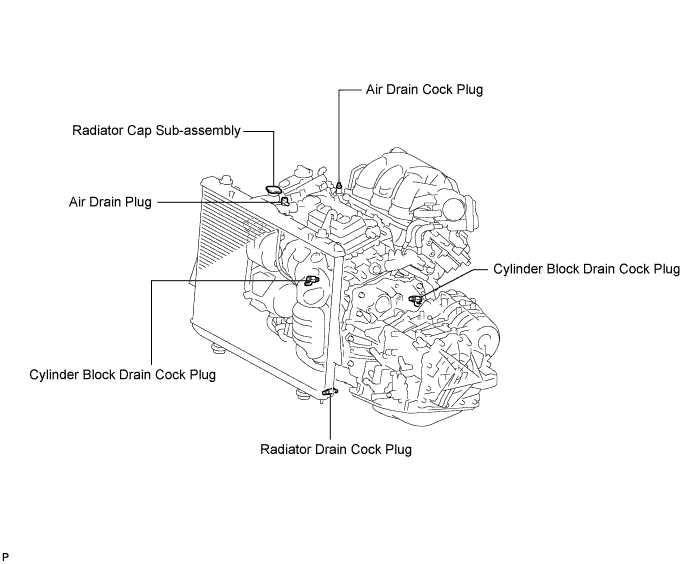
Remove the radiator cap sub-assembly from the radiator assembly.
Loosen the 2 cylinder block drain cock plugs.
| 4. REMOVE FRONT WIPER ARM AND BLADE ASSEMBLY LH |
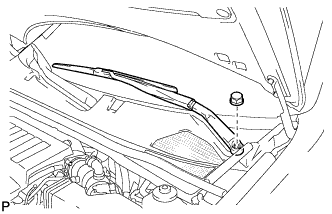 |
Remove the nut, and the front wiper arm and blade assembly LH.
| 5. REMOVE FRONT WIPER ARM AND BLADE ASSEMBLY RH |
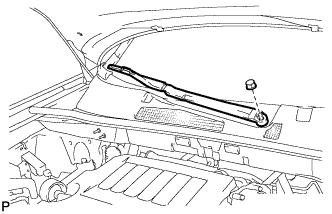 |
Remove the nut, and the front wiper arm and blade assembly RH.
| 6. REMOVE COWL TOP VENTILATOR LOUVER SUB-ASSEMBLY |
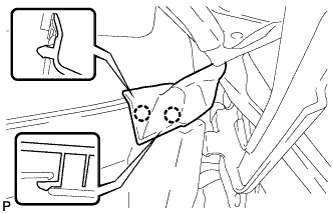 |
Disengage the 2 claws and disconnect the front fender to cowl side seal LH.
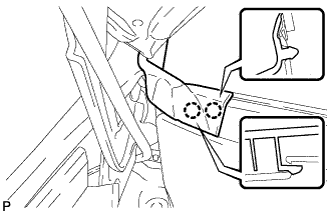 |
Disengage the 2 claws and disconnect the front fender to cowl side seal RH.
Remove the 2 clips.
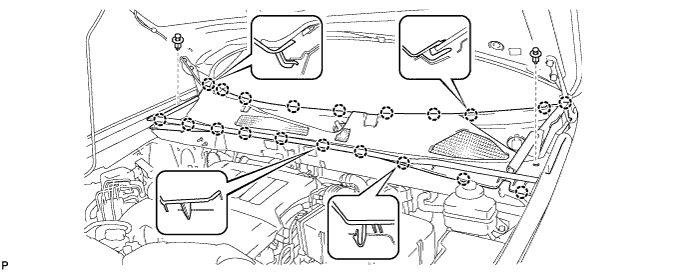
Disengage the 20 claws and remove the cowl top ventilator louver sub-assembly.
| 7. REMOVE WINDSHIELD WIPER MOTOR AND LINK ASSEMBLY |
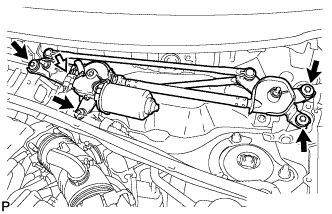 |
Disconnect the connector.
Remove the 4 bolts, and the windshield wiper motor and link assembly.
| 8. REMOVE OUTER COWL TOP PANEL SUB-ASSEMBLY |
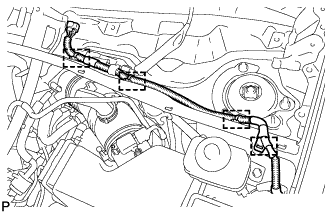 |
Disengage the 4 clamps and separate the wiper wire harness from the outer cowl top panel sub-assembly.
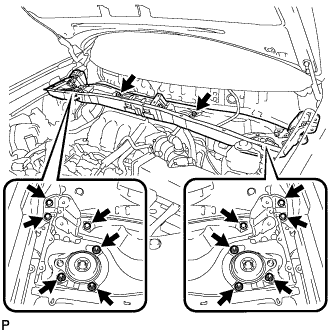 |
Remove the 8 bolts, 6 nuts, and the outer cowl top panel sub-assembly.
| 9. REMOVE V-BANK COVER SUB-ASSEMBLY |
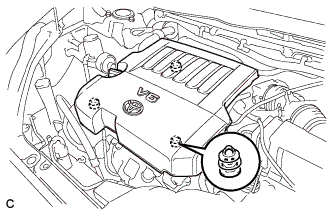 |
Hold the front of the V-bank cover and raise it to disengage the 2 clips on the front of the V-bank cover sub-assembly. Continue rising the V-bank cover sub-assembly to disengage the clip on the rear of the V-bank cover sub-assembly and remove the cover.
| 10. REMOVE AIR CLEANER CAP SUB-ASSEMBLY |
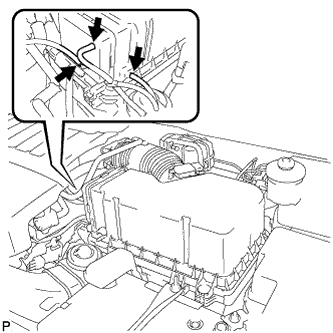 |
Disconnect the 3 vacuum hoses.
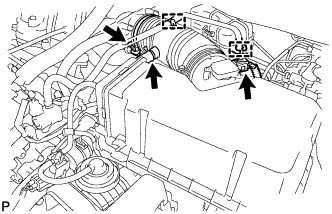 |
Loosen the No. 1 air cleaner hose clamp.
Disconnect the hose clamps and No. 2 ventilation hose.
Disconnect the mass air flow meter connector.
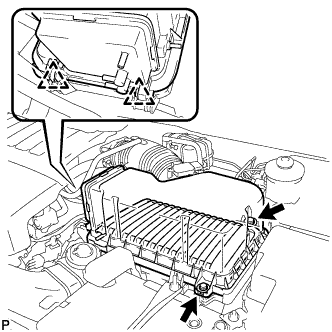 |
Release the 2 clips, and remove the 2 bolts.
Remove the air cleaner cap sub-assembly and air cleaner filter element.
| 11. REMOVE THROTTLE BODY |
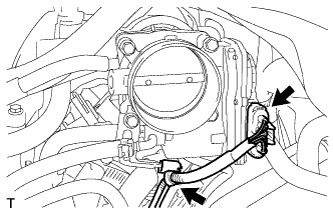 |
Disconnect the throttle body connector and clamp.
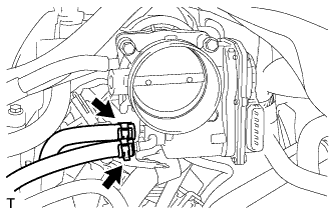 |
Disconnect the 2 water by-pass hoses from the throttle body.
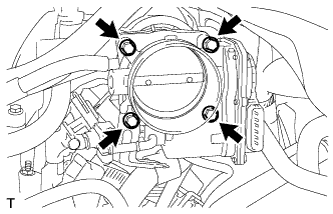 |
Remove the 4 bolts and throttle body.
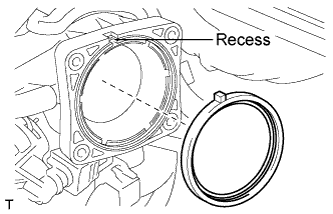 |
Remove the throttle body gasket from the intake air surge tank.