 |
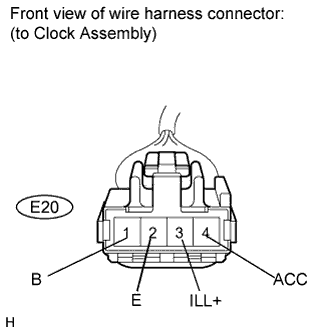
Disconnect the E20 connector.
CLOCK SYSTEM > ON-VEHICLE INSPECTION |
| 1. INSPECT CLOCK ASSEMBLY (w/o Multi-information Display) |
|
Disconnect the E20 connector.
Measure the voltage according to the value(s) in the table below.
| Tester Connection | Condition | Specified Condition |
| E20-1 (B) - Body ground | Always | 11 to 14 V |
| E20-3 (ILL+) - Body ground | Ignition switch on (IG), light control switch OFF | Below 1 V |
| Ignition switch on (IG), light control switch TAIL or HEAD | 11 to 14 V | |
| E20-4 (ACC) - Body ground | Ignition switch off | Below 1 V |
| Ignition switch on (ACC) | 11 to 14 V |
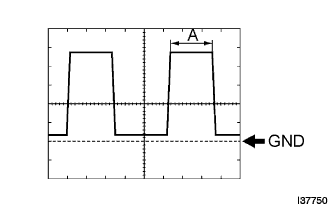 |
Waveform (Reference): Using oscilloscope:
| Item | Condition |
| Tool setting | 2 V/DIV., 1 ms./DIV. |
| Vehicle condition | Ignition switch on (IG), light control switch TAIL/HEAD |
Measure the resistance according to the value(s) in the table below.
| Tester Connection | Condition | Specified Condition |
| E20-2 (E) - Body ground | Always | Below 1 Ω |
| 2. INSPECT CLOCK ASSEMBLY (w/ Multi-information Display) |
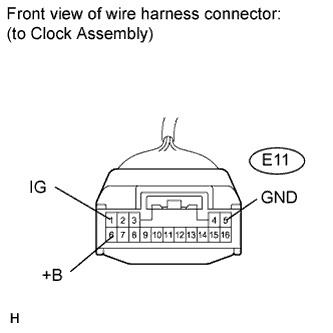 |
Disconnect the E11 connector.
Measure the voltage according to the value(s) in the table below.
| Tester Connection | Condition | Specified Condition |
| E11-1 (IG) - Body ground | Ignition switch off | Below 1 V |
| Ignition switch on (IG) | 11 to 14 V | |
| E11-6 (+B) - Body ground | Always | 11 to 14 V |
Measure the resistance according to the value(s) in the table below.
| Tester Connection | Condition | Specified Condition |
| E11-5 (GND) - Body ground | Always | Below 1 Ω |
| 3. INSPECT CLOCK ASSEMBLY (w/ Multi-information Display) |
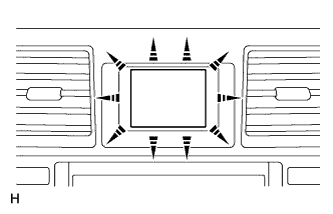 |
Ignition switch off.
Press the "DISP" button and hold it down.
Ignition switch on (IG).
Ignition switch off to finish this test mode.