Home › ENGINE › 2GR-FE COOLING › THERMOSTAT

THERMOSTAT > REMOVAL

for Preparation Click here


1. REMOVE V-BANK COVER SUB-ASSEMBLY


    A162365
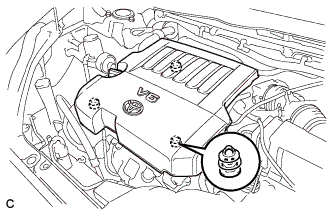
  1. Hold the front of the V-bank cover and raise it to disengage the 2 clips on the front of the V-bank cover sub-assembly. Continue rising the V-bank cover sub-assembly to disengage the clip on the rear of the V-bank cover sub-assembly and remove the cover.

    NOTICE:
    Attempting to disengage both front and rear clips at the same time may cause the V-bank cover sub-assembly to break.
2. REMOVE ENGINE UNDER COVER ASSEMBLY


    A171849
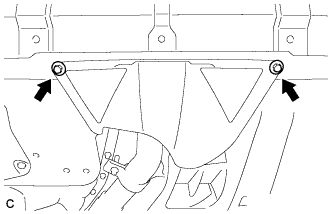
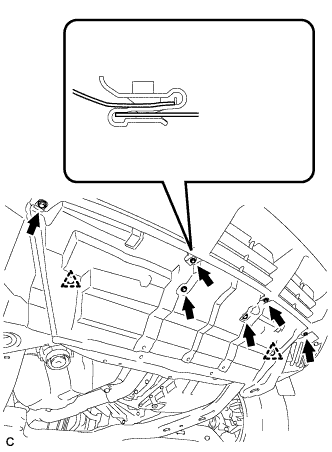
  1. Remove the 2 bolts and engine under cover assembly RR.


    A171850
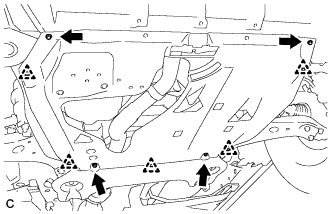
  1. Remove the 2 bolts, 2 screws, 5 clips and engine under cover assembly.


3. REMOVE NO. 1 ENGINE UNDER COVER


    A171855
  1. Remove the 6 bolts, 2 clips and No. 1 engine under cover.


4. REMOVE FRONT WHEEL RH


5. REMOVE FRONT FENDER MOULDING SUB-ASSEMBLY RH

HINT:
Use the same procedures for the RH side and LH side .


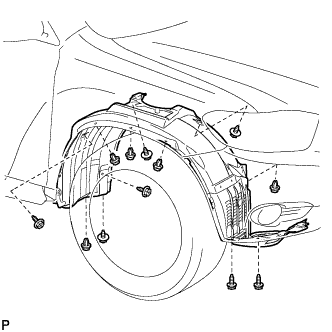
6. REMOVE FRONT FENDER LINER RH


    B174753E01
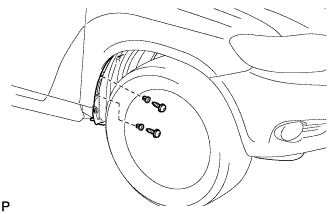
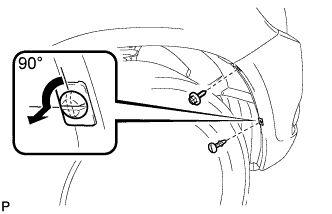
  1. Remove the screw.

  1. Using a screwdriver, turn the pin 90 degrees and remove the pin hold clip.


    B174750
  1. Using a 4 mm hexagon wrench, remove the 2 screws.

  1. Remove the 2 grommets.

    HINT:
    The grommets need to be replaced with new ones because they will break when they are removed.


    B174752
  1. Remove the 5 clips, 7 screws and front fender liner RH.


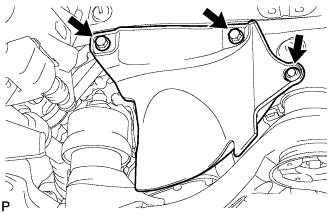
7. REMOVE FRONT FENDER APRON SEAL RH


    A171853
  1. Remove the 2 bolts, clip and front fender apron seal RH.


8. DRAIN ENGINE COOLANT


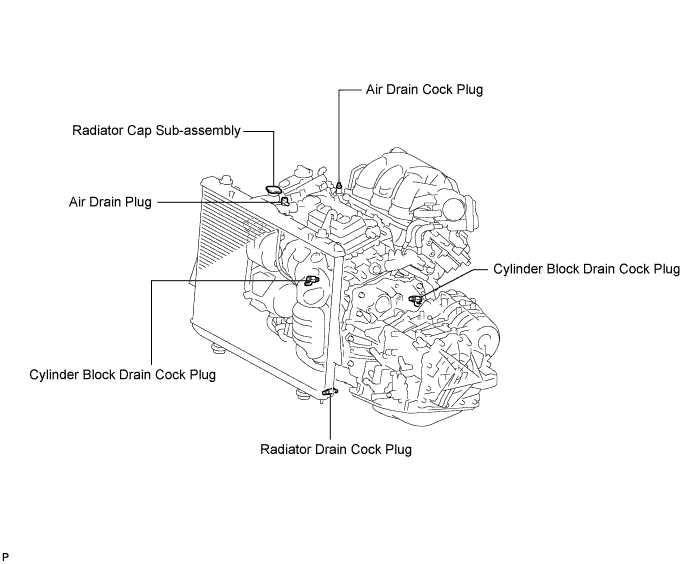
  1. Loosen the radiator drain cock plug.


    A169414E01

    HINT:
    Collect the coolant in a container and dispose of it according to the regulations in your area.

  1. Remove the radiator cap sub-assembly from the radiator assembly.

    NOTICE:
    Do not remove the radiator cap sub-assembly while the engine and radiator are still hot. Pressurized, hot engine coolant and steam may be released and cause serious burns.

  1. Loosen the 2 cylinder block drain cock plugs.


9. REMOVE V-RIBBED BELT


    A162386E01
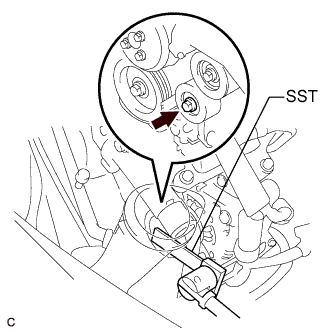
  1. Using SST, release the V-ribbed belt tension by turning the V-ribbed belt tensioner assembly counterclockwise, and remove the V-ribbed belt from the V-ribbed belt tensioner assembly.

    SST
    09961-00950  


    A095070
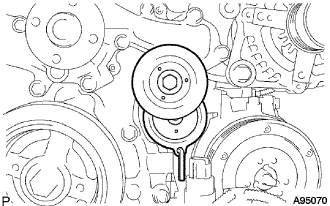
  1. While turning the V-ribbed belt tensioner assembly counterclockwise, align with its holes, and then insert the 5 mm bi-hexagon wrench into the holes to fix the V-ribbed belt tensioner assembly.


10. DISCONNECT NO. 2 RADIATOR HOSE


    A162797
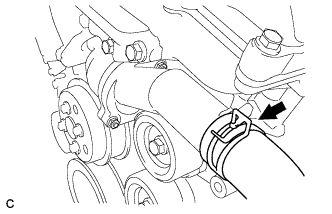
  1. Disconnect the No. 2 radiator hose from the engine.


11. REMOVE NO. 2 IDLER PULLEY SUB-ASSEMBLY


    A195782E01
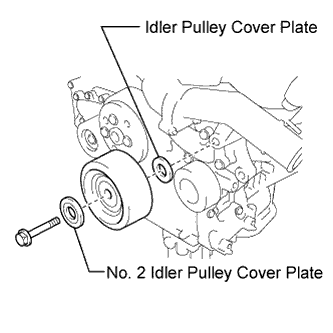
  1. Remove the bolt, idler pulley cover plate, No. 2 idler pulley cover plate and No. 2 idler pulley sub-assembly.

    HINT:
    Plate diameter:
    Idler pulley cover plate: 33.6 mm (1.32 in.)
    No. 2 idler pulley cover plate: 37.8 mm (1.49 in.)


12. REMOVE WATER INLET


    A162796
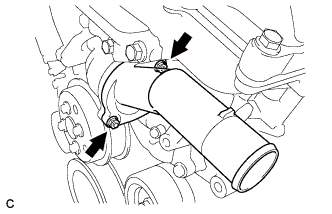
  1. Remove the 2 nuts and water inlet.


13. REMOVE THERMOSTAT
  1. Remove the thermostat from the water inlet housing

  1. Remove the gasket from the thermostat.