 |
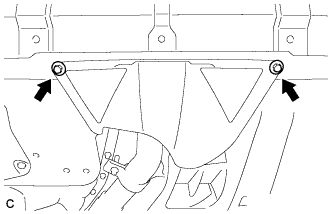
Remove the 2 bolts and engine under cover assembly RR.
FRONT CRANKSHAFT OIL SEAL > REMOVAL |
| 1. REMOVE FRONT WHEEL RH |
| 2. REMOVE ENGINE UNDER COVER ASSEMBLY |
|
Remove the 2 bolts and engine under cover assembly RR.
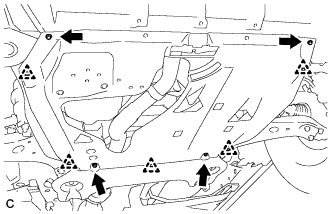 |
Remove the 2 bolts, 2 screws, 5 clips and engine under cover assembly.
| 3. REMOVE NO. 1 ENGINE UNDER COVER |
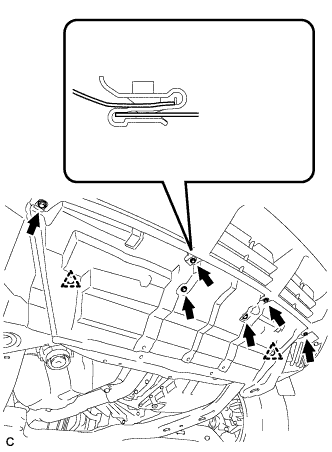 |
Remove the 6 bolts, 2 clips and No. 1 engine under cover.
| 4. REMOVE FRONT FENDER MOULDING SUB-ASSEMBLY RH |
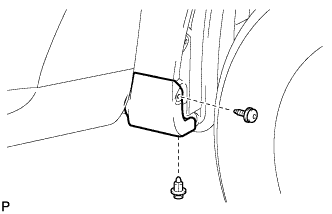 |
Remove the clip.
Using a 4 mm hexagon wrench, remove the screw.
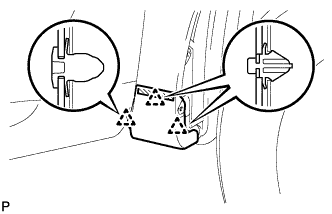 |
Peel off the front fender side protector and disengage the 3 clips, and then remove the front fender moulding sub-assembly RH.
Remove the pad from the front fender moulding sub-assembly RH.
Remove the 2 clips No. 4 from the front fender moulding sub-assembly RH.
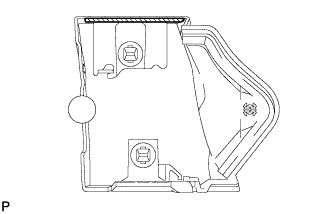 |
Remove the front fender side protector from the front fender moulding sub-assembly RH.
| 5. REMOVE FRONT FENDER LINER RH |
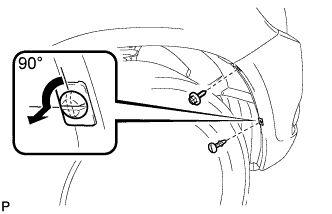 |
Remove the screw.
Using a screwdriver, turn the pin 90 degrees and remove the pin hold clip.
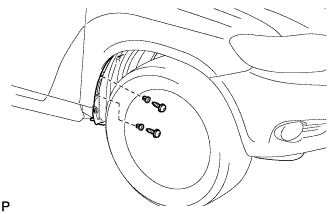 |
Using a 4 mm hexagon wrench, remove the 2 screws.
Remove the 2 grommets.
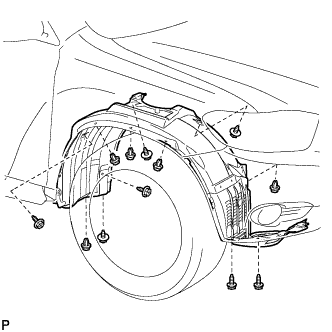 |
Remove the 5 clips, 7 screws and front fender liner RH.
| 6. REMOVE FRONT FENDER APRON SEAL RH |
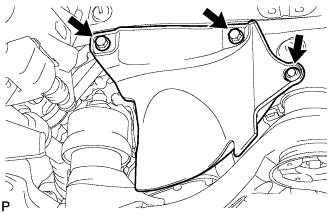 |
Remove the 2 bolts, clip and front fender apron seal RH.
| 7. REMOVE V-RIBBED BELT |
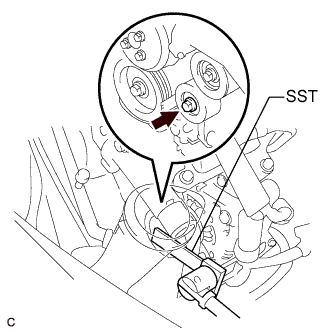 |
Using SST, release the V-ribbed belt tension by turning the V-ribbed belt tensioner assembly counterclockwise, and remove the V-ribbed belt from the V-ribbed belt tensioner assembly.
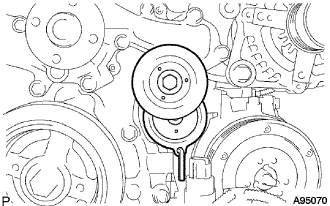 |
While turning the V-ribbed belt tensioner assembly counterclockwise, align with its holes, and then insert the 5 mm bi-hexagon wrench into the holes to fix the V-ribbed belt tensioner assembly.
| 8. REMOVE CRANKSHAFT PULLEY |
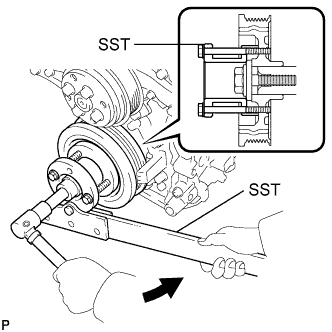 |
Using SST, loosen the crankshaft pulley bolt.
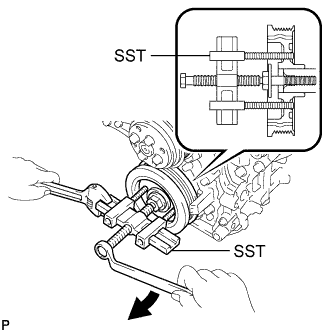 |
Using SST, remove the crankshaft pulley bolt and crankshaft pulley.
| 9. REMOVE TIMING CHAIN CASE OIL SEAL |
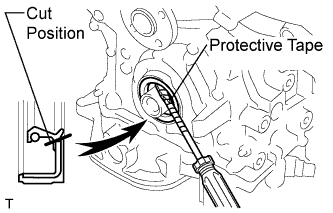 |
Using a screwdriver, pry out the oil seal.