 |
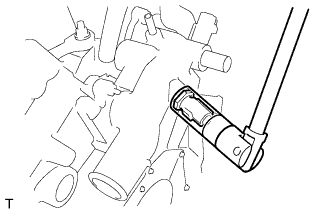
Using a 19 mm deep socket wrench, install the engine coolant temperature sensor and a new gasket.
- Torque:
- 20 N*m{ 200 kgf*cm , 14 ft.*lbf }
ENGINE UNIT > INSTALLATION |
| 1. INSTALL ENGINE COOLANT TEMPERATURE SENSOR |
|
Using a 19 mm deep socket wrench, install the engine coolant temperature sensor and a new gasket.
| 2. INSTALL KNOCK CONTROL SENSOR |
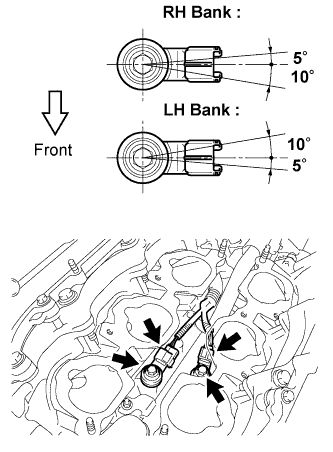 |
Install the 2 knock control sensors with the 2 bolts as shown in the illustration.
Connect the 2 knock control sensor connectors.
| 3. INSTALL KNOCK CONTROL SENSOR WIRE |
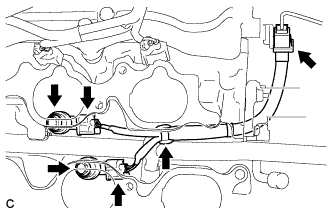 |
Connect the 2 knock control sensor connectors and 3 clamps.
| 4. INSTALL ENGINE OIL PRESSURE SWITCH ASSEMBLY |
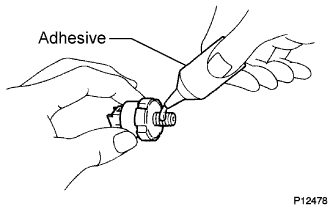 |
Clean the threads of the oil pressure switch. Apply adhesive to 2 or 3 threads of the oil pressure switch assembly.
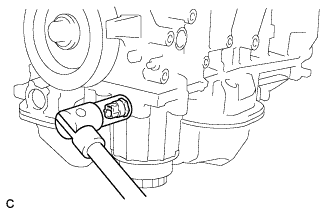 |
Using a 24 mm deep socket wrench, install the oil pressure switch.
| 5. INSTALL NO. 1 VACUUM SWITCHING VALVE |
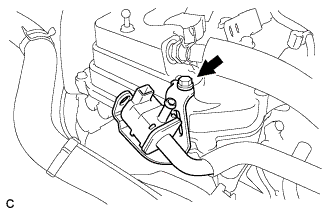 |
Install the bolt and No. 1 vacuum switching valve.
| 6. INSTALL RADIO SETTING CONDENSER |
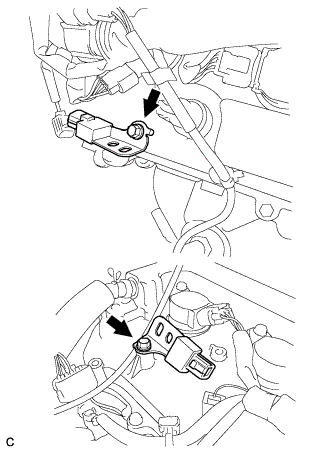 |
Install the 2 bolts and 2 radio setting condensers.
| 7. INSTALL WATER PUMP PULLEY |
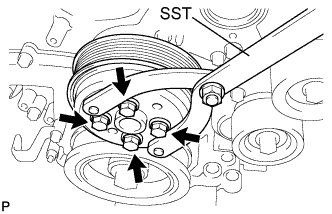 |
Temporarily install the water pump pulley with the 4 bolts.
Using SST, hold the water pump pulley.
Tighten the 4 bolts.
| 8. INSTALL NO. 2 IDLER PULLEY SUB-ASSEMBLY |
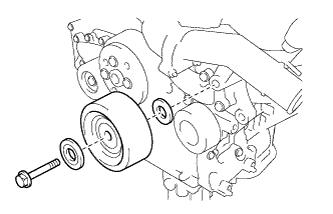 |
Install the idler pulley cover plate, No. 2 idler pulley sub-assembly and No. 2 idler pulley cover plate with the bolt.
| 9. INSTALL NO. 2 TIMING GEAR COVER |
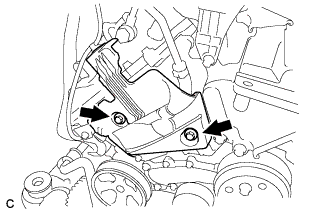 |
Install the No. 2 timing gear cover with the 2 bolts.
| 10. INSTALL V-RIBBED BELT TENSIONER ASSEMBLY |
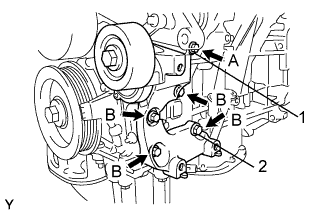 |
Temporarily install the V-ribbed belt tensioner assembly with the 5 bolts.
Install the V-ribbed belt tensioner assembly by tightening the bolt 1 and bolt 2 in the order shown in the illustration.
Tighten the other bolts.
| 11. INSTALL GENERATOR ASSEMBLY |
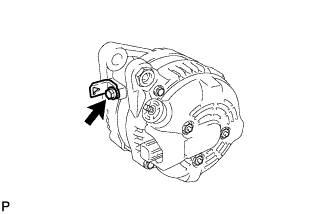 |
Install the wire harness clamp stay with the bolt.
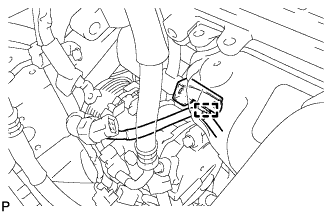 |
Connect the generator bracket with the wire harness clamp.
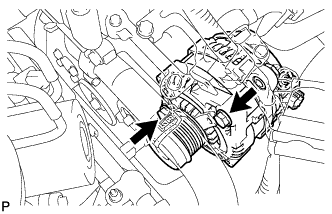 |
Install generator assembly with the 2 bolts.
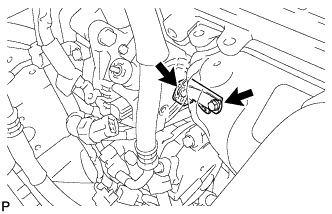 |
Temporally install the 2 bolts.
|
Fully tighten the 2 bolts.
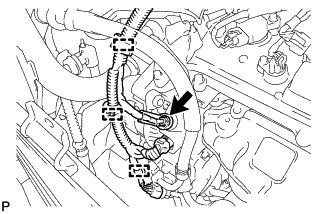 |
Connect the generator connector to the generator assembly.
Install the generator wire with the nut.
Install the terminal cap.
Connect the 3 wire harness clamps.
Connect the magnetic clutch connector to the compressor and magnetic clutch.
| 12. INSTALL TRANSVERSE ENGINE MOUNTING BRACKET (for 4WD) |
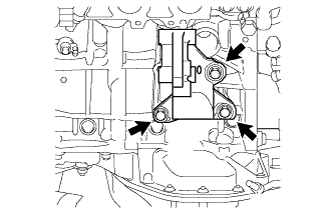 |
Install the transverse engine mounting bracket with the 3 bolts.
| 13. INSTALL TRANSVERSE ENGINE MOUNTING BRACKET (for 2WD) |
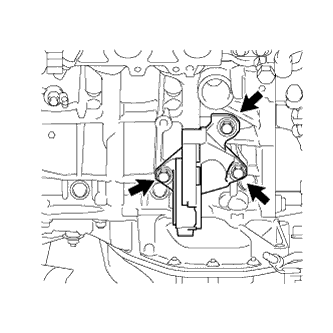 |
Install the transverse engine mounting bracket with the 3 bolts.
| 14. INSTALL TRANSVERSE ENGINE MOUNTING BRACKET |
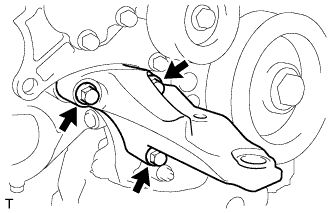 |
Install the transverse engine mounting bracket with the 3 bolts.
| 15. INSTALL EXHAUST MANIFOLD SUB-ASSEMBLY LH |
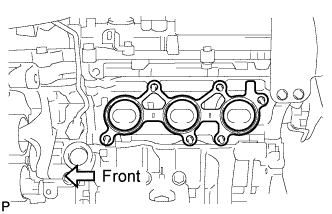 |
Install a new gasket as shown in the illustration.
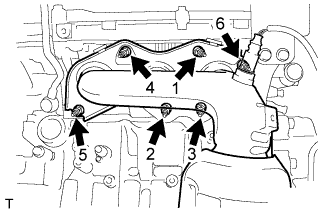 |
Install the exhaust manifold sub-assembly LH with the 6 nuts in the order shown in the illustration.
| 16. INSTALL NO. 2 EXHAUST MANIFOLD HEAT INSULATOR |
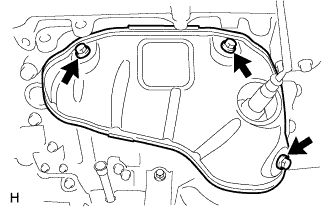 |
Install the No. 2 exhaust manifold heat insulator with the 3 bolts.
| 17. INSTALL NO. 2 MANIFOLD STAY |
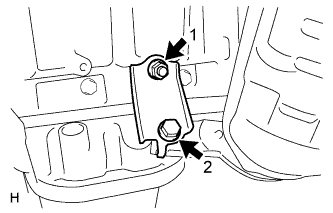 |
Install the No. 2 manifold stay with the bolt and nut in the order shown in the illustration.
| 18. INSTALL NO. 2 ENGINE OIL LEVEL DIPSTICK GUIDE |
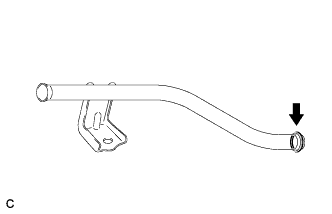 |
Install a new O-ring to the No. 2 engine oil level dipstick guide.
Apply a light coat of engine oil to the O-rings.
Push in the No. 2 engine oil level dipstick guide end into the No. 1 engine oil level dipstick guide.
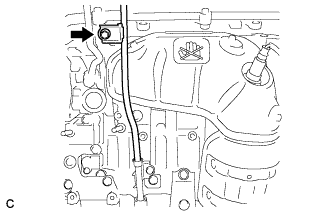 |
Install the No. 2 engine oil level dipstick guide with the bolt.
Install the engine oil level dipstick.
| 19. INSTALL EXHAUST MANIFOLD SUB-ASSEMBLY RH |
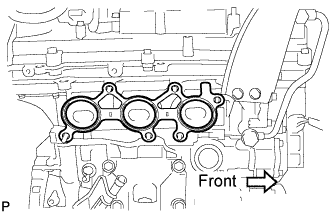 |
Install a new gasket as shown in the illustration.
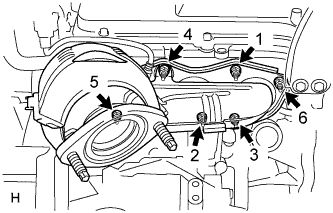 |
Install the exhaust manifold sub-assembly RH with the 6 nuts in the order shown in the illustration.
| 20. INSTALL INTAKE MANIFOLD |
| Tightening Parts | ||
| Intake Manifold and Cylinder Head Sub-assembly RH | ||
| Intake Manifold and Cylinder Head Sub-assembly LH |
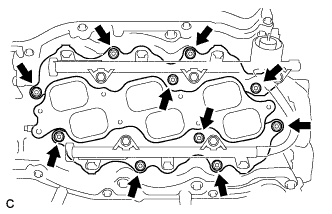 |
Set a new gasket on each cylinder head.
Set the intake manifold on the cylinder heads.
Install and tighten the 6 bolts and 4 nuts uniformly in several steps.
| 21. INSTALL NO. 2 ENGINE MOUNTING STAY RH |
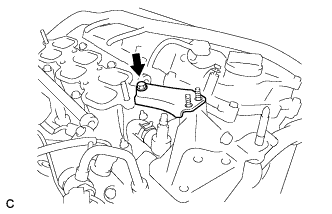 |
Install the No. 2 mounting stay RH with the bolt.
| 22. INSTALL IGNITION COIL ASSEMBLY |
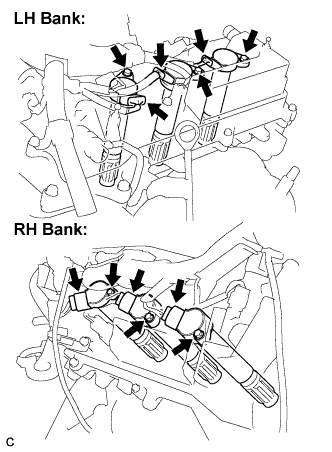 |
Install the 6 ignition coils with the 6 bolts.
Connect the 6 ignition coil connectors.
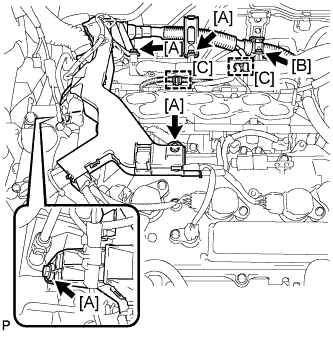 |
Install the 4 bolts [A].
Install the nut [B].
Install the 2 clamps [C].
| 23. INSTALL ENGINE HANGERS |
Install the 2 engine hangers with the 4 bolts as shown in the illustration.
Attach the engine sling device and hang the engine with the chain block.
| 24. REMOVE ENGINE STAND |