 |
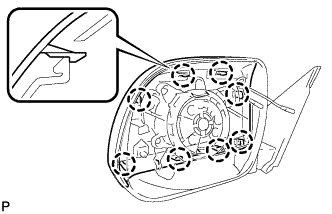
Engage the 8 claws to install the outer mirror cover to the outer rear view mirror assembly with cover.
- NOTICE:
- If there is a gap between the cover and the mirror body, it may cause noise when driving.
DOOR MIRROR FOOT LIGHT > INSTALLATION |
| 1. INSTALL OUTER MIRROR COVER |
|
Engage the 8 claws to install the outer mirror cover to the outer rear view mirror assembly with cover.
| 2. INSTALL OUTER MIRROR GLASS (w/o Heater) |
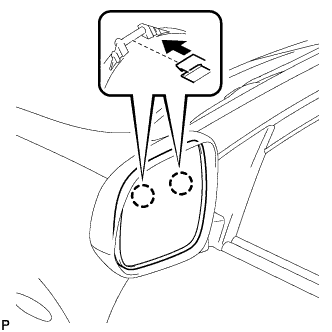 |
Engage the 2 claws on the upper part of the outer mirror glass to the outer mirror.
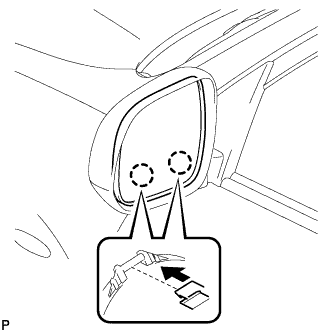 |
Engage the 2 claws on the lower part of the outer mirror glass to the outer mirror as shown in the illustration.
| 3. INSTALL OUTER MIRROR GLASS (w/ Heater) |
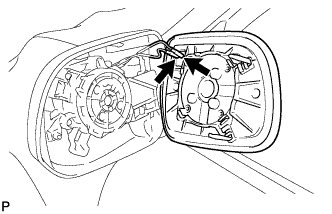 |
Connect the 2 connectors.
|
Engage the 2 claws on the upper part of the outer mirror glass to the outer mirror.
|
Engage the 2 claws on the lower part of the outer mirror glass to the outer mirror as shown in the illustration.
| 4. INSTALL OUTER REAR VIEW MIRROR ASSEMBLY WITH COVER |
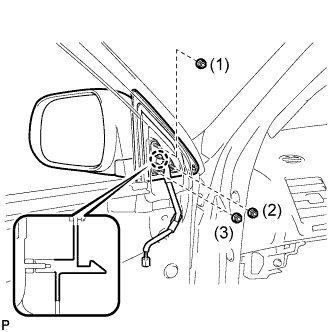 |
Engage the claw, and temporarily install the outer rear view mirror assembly with cover.
Tighten the 3 nuts in the order shown in the illustration to install the outer rear view mirror assembly with cover.
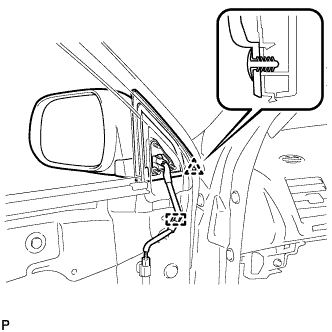 |
Engage the clamp and connect the connector.
Install the clip.
| 5. INSTALL FRONT DOOR TRIM BOARD SUB-ASSEMBLY |
Connect the connector.
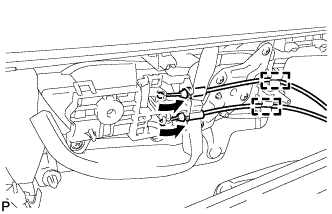 |
Connect the front door lock remote control cable and front door inside locking cable to the front door inside handle sub-assembly.
Engage the 2 clamps.
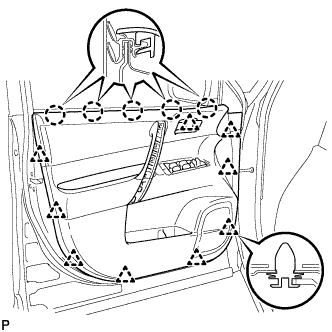 |
Engage the front door trim board with the 5 claws on the front door inner glass weatherstrip.
Engage the 9 clips.
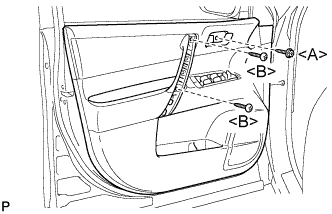 |
Install the 2 screws <B>.
Install the screw <A> and front door trim board to the front door panel.
| 6. INSTALL COURTESY LIGHT ASSEMBLY |
Connect the connector.
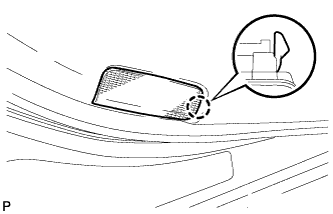 |
Engage the claw and install the courtesy light assembly.
| 7. INSTALL ASSIST GRIP COVER |
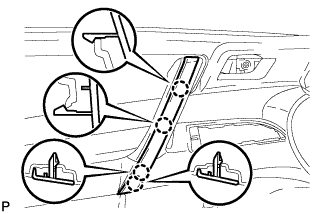 |
Engage the 4 claws and install the assist grip cover.
| 8. INSTALL FRONT ARMREST UPPER BASE PANEL |
Connect the connector.
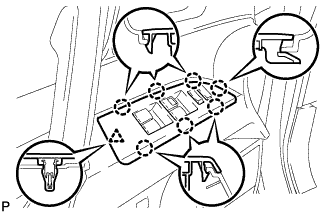 |
Engage the 7 claws and clip and install the front armrest upper base panel.
| 9. INSTALL FRONT DOOR INSIDE HANDLE BEZEL PLUG |
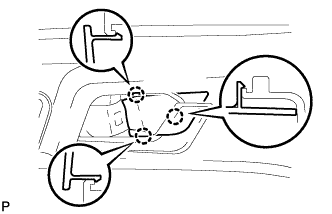 |
Engage the 3 claws and install the front door inside handle bezel plug.
| 10. INSTALL FRONT DOOR LOWER FRAME BRACKET GARNISH |
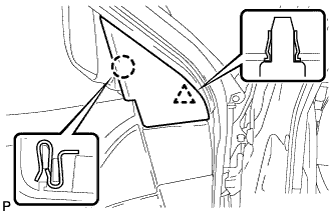 |
Engage the clip and claw, and install the front door lower frame bracket garnish.