 |
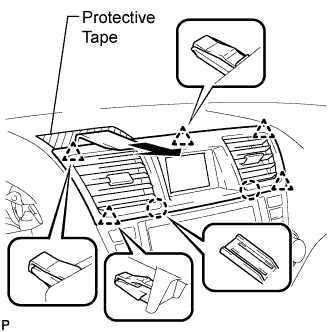
Apply protective tape to the areas shown in the illustration.
CLOCK (w/o Multi-information Display) > REMOVAL |
| 1. REMOVE CENTER INSTRUMENT PANEL REGISTER ASSEMBLY |
|
Apply protective tape to the areas shown in the illustration.
Using a moulding remover, disengage the 2 claws and 5 clips, and then remove the center instrument panel register assembly as shown in the illustration.
| 2. REMOVE CENTER INSTRUMENT CLUSTER FINISH PANEL ASSEMBLY |
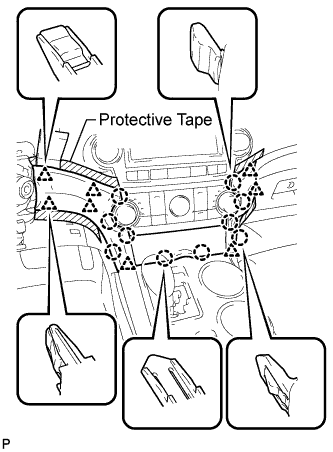 |
Apply protective tape to the areas shown in the illustration.
Using a moulding remover, disengage the 10 claws and 8 clips starting from the upper part of the center instrument cluster finish panel assembly.
Disconnect each connector and remove the center instrument cluster finish panel assembly.
| 3. REMOVE HEATER CONTROL AND ACCESSORY ASSEMBLY |
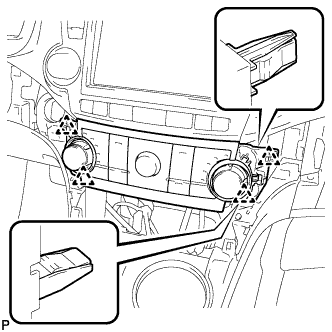 |
Disengage the 4 clips and remove the heater control and accessory assembly.
Disconnect the connector.
| 4. REMOVE RADIO RECEIVER ASSEMBLY WITH BRACKET |
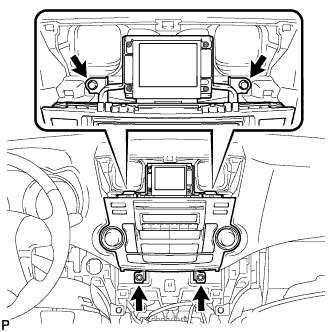 |
Remove the 4 bolts.
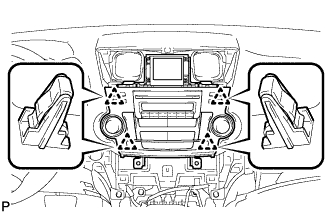 |
Pull the radio receiver assembly with bracket toward the rear of the vehicle and disengage the 4 clips.
Disconnect each connector and remove the radio receiver assembly with bracket.
| 5. REMOVE NO. 1 RADIO BRACKET |
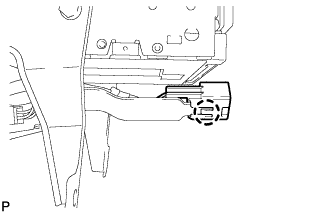 |
Disengage the claw and remove the connector.
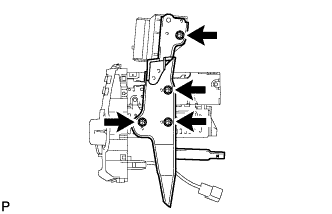 |
Remove the 4 screws and No. 1 radio bracket.
| 6. REMOVE NO. 2 RADIO BRACKET |
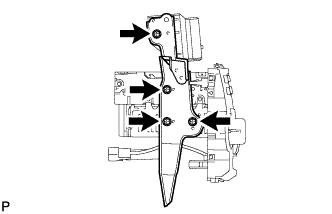 |
Remove the 4 screws and No. 1 radio bracket.
| 7. REMOVE CLOCK ASSEMBLY |