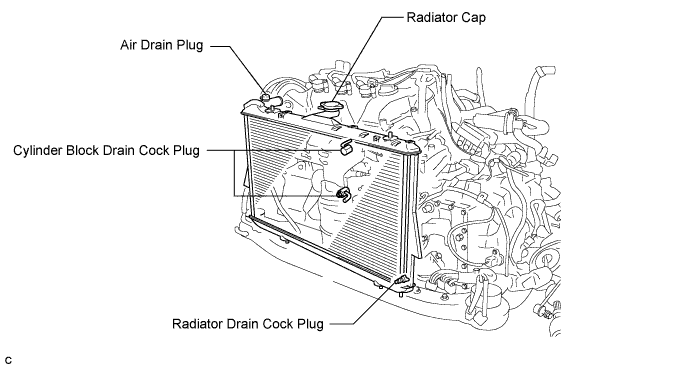
Remove the radiator cap.
RADIATOR > REMOVAL |
| 1. REMOVE NO. 1 ENGINE UNDER COVER |
| 2. DRAIN ENGINE COOLANT (for Engine) |
Loosen the radiator drain cock plug.
Loosen the cylinder block drain cock plugs.
Remove the radiator cap.
| 3. REMOVE COOL AIR INTAKE DUCT SEAL |
Remove the 11 clips and cool air intake duct seal.
| 4. REMOVE AIR CLEANER CAP SUB-ASSEMBLY |
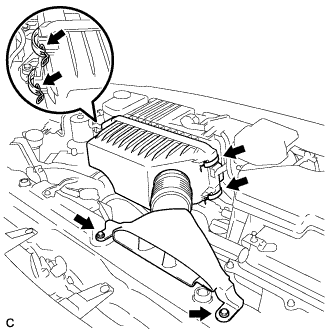 |
Remove the 2 bolts, 4 clamps and air cleaner cap sub-assembly.
Remove the air cleaner filter element from the air cleaner case.
| 5. DISCONNECT NO. 1 RADIATOR HOSE |
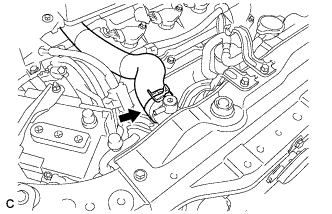 |
Disconnect the No. 1 radiator hose from the radiator.
| 6. DISCONNECT NO. 2 RADIATOR HOSE |
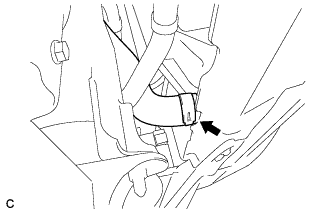 |
Disconnect the No. 2 radiator hose from the radiator.
| 7. DISCONNECT COOLING FAN ECU CONNECTOR |
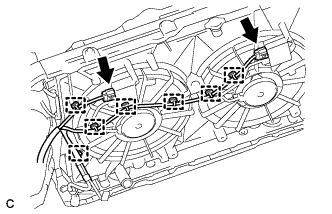 |
Detach the 7 wire harness clamps from the fan shroud.
Disconnect the 2 cooling fan ECU connectors.
| 8. REMOVE RADIATOR GRILLE |
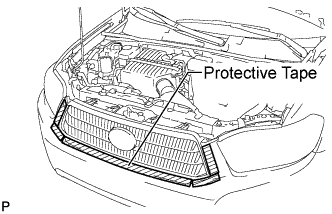 |
Put protective tape around the radiator grille.
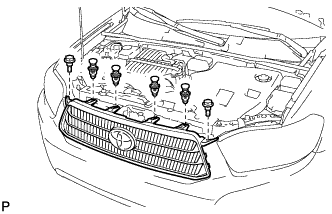 |
Remove the 2 bolts and 4 clips.
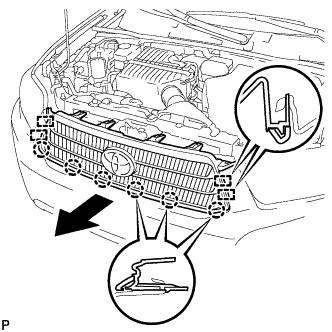 |
Disengage the 6 claws and 4 guides, and remove the radiator grille.
| 9. REMOVE HOOD LOCK ASSEMBLY (w/o Engine Hood Courtesy Switch) |
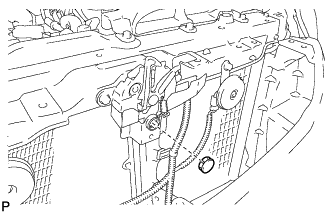 |
Remove the hood lock nut cap.
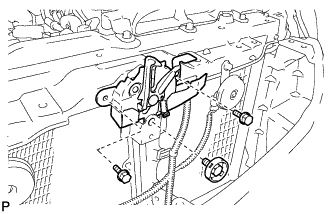 |
Remove the 3 bolts.
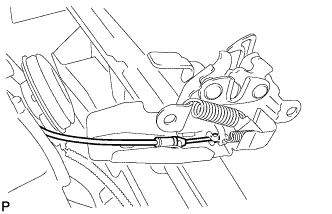 |
Disconnect the hood lock control cable and remove the hood lock assembly.
| 10. REMOVE HOOD LOCK ASSEMBLY (w/ Engine Hood Courtesy Switch) |
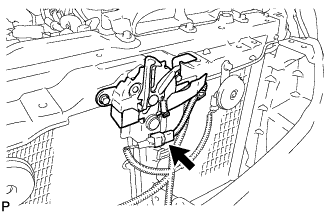 |
Disconnect the connector.
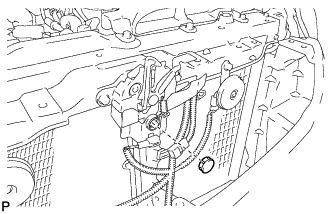 |
Remove the hood lock nut cap.
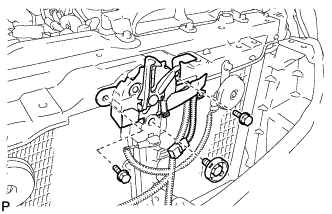 |
Remove the 3 bolts.
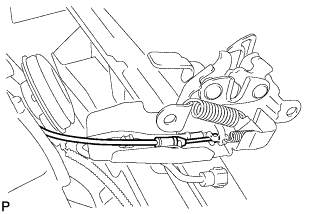 |
Disconnect the hood lock control cable and remove the hood lock assembly.
| 11. REMOVE HOOD LOCK SUPPORT SUB-ASSEMBLY |
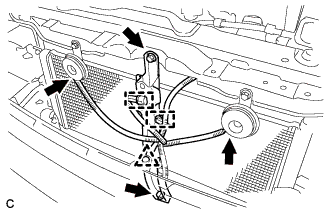 |
Disconnect the 2 connectors.
Remove the 2 clamps and clip.
Remove the 2 bolts and hood lock support sub-assembly.
| 12. REMOVE UPPER RADIATOR SUPPORT SUB-ASSEMBLY |
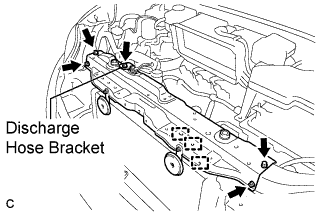 |
Detach the 3 hood lock control cable clamps from the upper radiator support sub-assembly.
Remove the bolt and discharge hose bracket.
Remove the 4 bolts and upper radiator support sub-assembly.
| 13. SEPARATE COOLER CONDENSER ASSEMBLY |
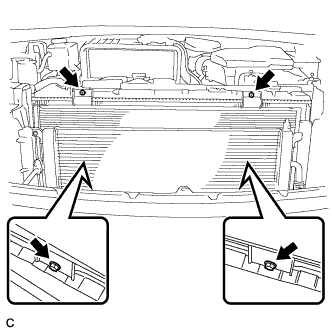 |
Remove the 4 bolts and move the cooler condenser assembly to remove the radiator assembly and fan assembly with motor.
| 14. REMOVE RADIATOR ASSEMBLY AND FAN ASSEMBLY WITH MOTOR |
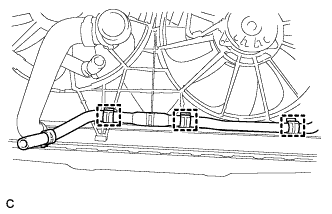 |
Separate the 3 water hose clamps from the fan shroud.
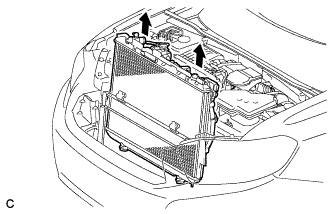 |
Remove the radiator assembly and fan assembly with motor.
| 15. REMOVE FAN ASSEMBLY WITH MOTOR |
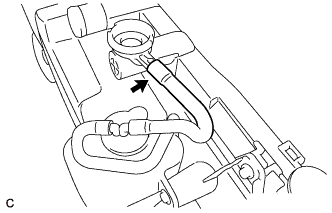 |
Disconnect the radiator reserve tank hose from the radiator assembly.
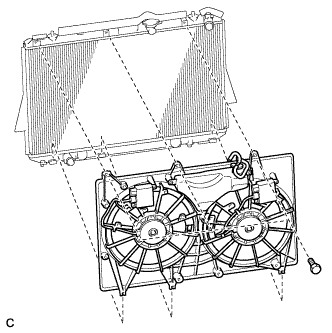 |
Remove the 3 bolts.
Pull up the fan assembly with motor from the radiator assembly to remove the fan assembly with motor.
| 16. REMOVE RADIATOR SUPPORT CUSHION |
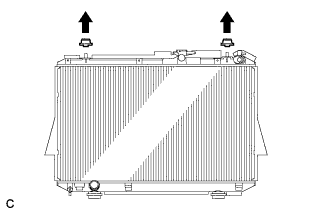 |
Remove the 2 radiator support cushions.
| 17. REMOVE LOWER RADIATOR SUPPORT |
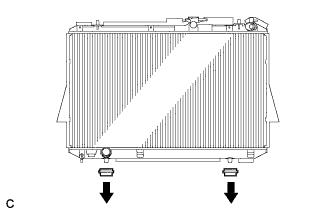 |
Remove the 2 lower radiator supports.