 |
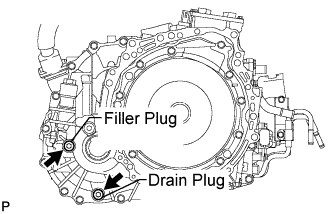
Using a socket hexagon wrench 10 mm, remove the filler plug and gasket.
HYBRID TRANSAXLE OIL SEAL > REMOVAL |
| 1. REMOVE NO. 1 ENGINE UNDER COVER |
Remove the 6 bolts, 2 screws, 2 clips and No. 1 engine under cover.
| 2. REMOVE NO. 2 ENGINE UNDER COVER |
Remove the 4 bolts and No. 2 engine under cover.
| 3. DRAIN HYBRID TRANSAXLE FLUID |
|
Using a socket hexagon wrench 10 mm, remove the filler plug and gasket.
Using a socket hexagon wrench 10 mm, remove the drain plug and gasket.
Using a socket hexagon wrench 10 mm, install the drain plug, and a new gasket.
| 4. REMOVE FRONT WHEELS |
| 5. REMOVE FRONT WIPER ARM AND BLADE ASSEMBLY LH |
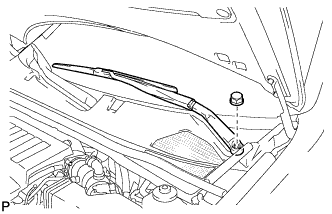 |
Remove the nut, and the front wiper arm and blade assembly LH.
| 6. REMOVE FRONT WIPER ARM AND BLADE ASSEMBLY RH |
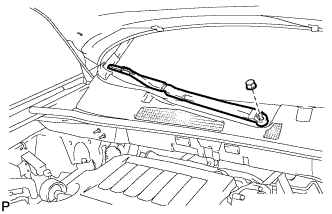 |
Remove the nut, and the front wiper arm and blade assembly RH.
| 7. REMOVE COWL TOP VENTILATOR LOUVER SUB-ASSEMBLY |
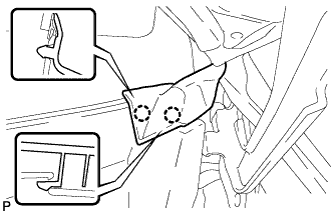 |
Disengage the 2 claws and disconnect the front fender to cowl side seal LH.
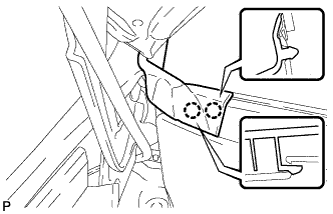 |
Disengage the 2 claws and disconnect the front fender to cowl side seal RH.
Remove the 2 clips.
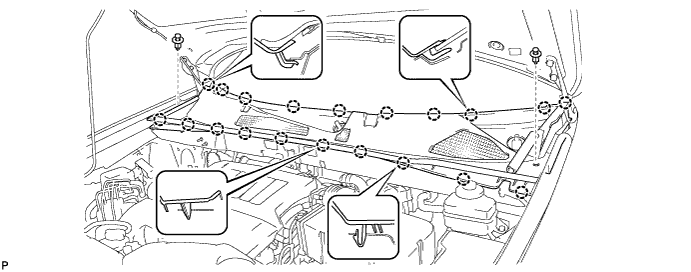
Disengage the 20 claws and remove the cowl top ventilator louver sub-assembly.
| 8. LOOSEN FRONT SUPPORT TO FRONT SHOCK ABSORBER NUT |
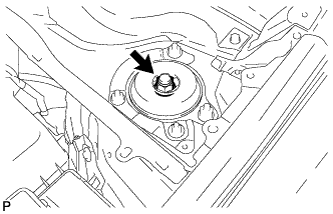 |
Loosen the front support to front shock absorber nut of the front shock absorber.
| 9. REMOVE WINDSHIELD WIPER MOTOR AND LINK ASSEMBLY |
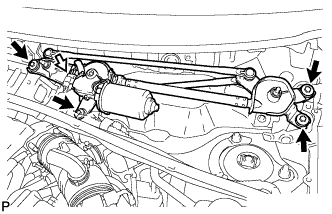 |
Disconnect the connector.
Remove the 4 bolts, and the windshield wiper motor and link assembly.
| 10. REMOVE OUTER COWL TOP PANEL SUB-ASSEMBLY |
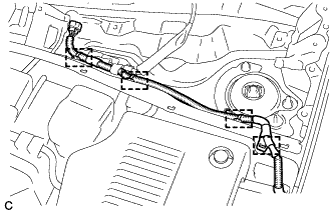 |
Disengage the 4 clamps and separate the wiper wire harness from the outer cowl top panel sub-assembly.
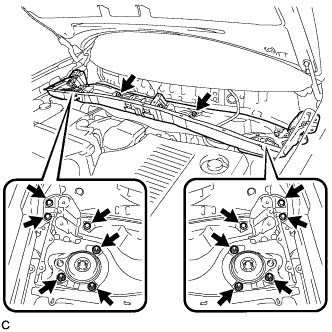 |
Remove the 8 bolts, 6 nuts, and the outer cowl top panel sub-assembly.
| 11. REMOVE FRONT AXLE SHAFT NUT |
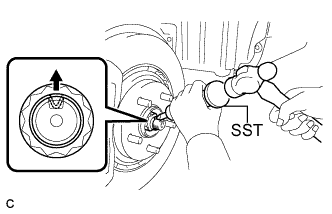 |
Using SST and a hammer, release the staked part of the front axle shaft nut LH.
While applying the brakes, remove the front axle shaft nut LH.
| 12. SEPARATE FRONT SPEED SENSOR |
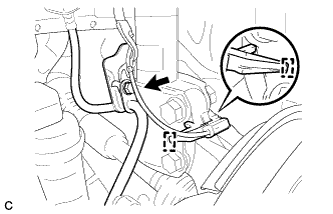 |
Remove the bolt and clamp, and separate the front speed sensor and front flexible hose.
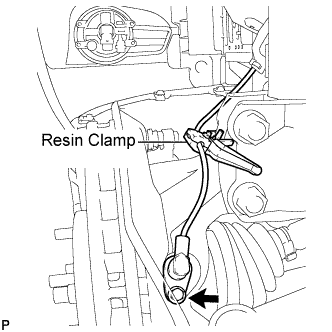 |
Remove the bolt and resin clamp, and separate the front speed sensor.
| 13. SEPARATE FRONT DISC BRAKE CALIPER ASSEMBLY |
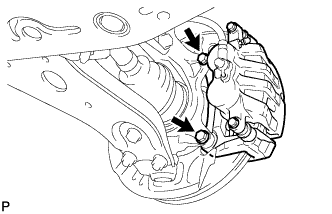 |
Remove the 2 bolts and separate the front disc brake caliper assembly.
| 14. REMOVE FRONT DISC |
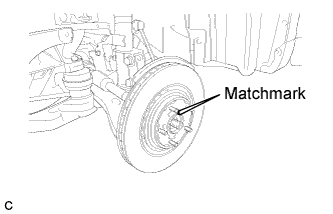 |
Remove the front disc.
| 15. SEPARATE TIE ROD ASSEMBLY |
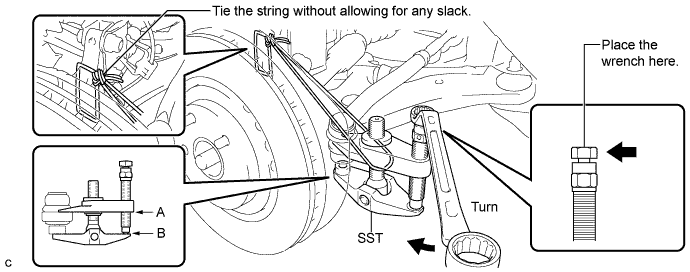
Remove the cotter pin and the nut.
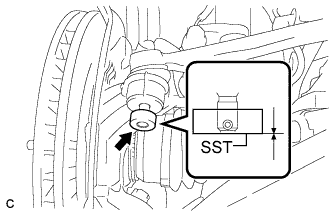 |
Install SST to the tie rod end.
Using SST, separate the tie rod end from the steering knuckle.
| 16. SEPARATE FRONT LOWER NO. 1 SUSPENSION ARM SUB-ASSEMBLY |
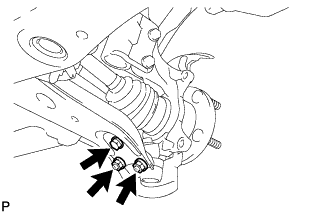 |
Remove the bolt and 2 nuts, and separate the front lower suspension arm from the front lower ball joint.
| 17. SEPARATE FRONT DRIVE SHAFT ASSEMBLY |
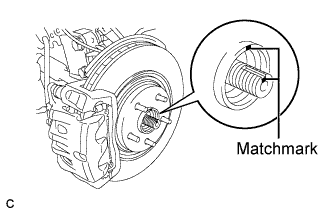 |
Put matchmarks on the front drive shaft assembly and the front axle hub sub-assembly.
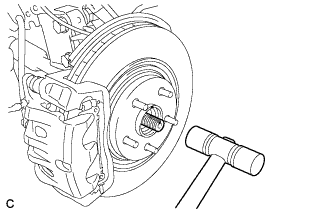 |
Using a plastic hammer, separate the front drive shaft assembly from the front axle assembly.
| 18. REMOVE FRONT AXLE ASSEMBLY |
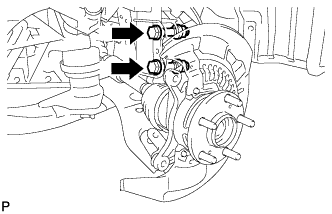 |
Remove the 2 bolts, 2 nuts and front axle assembly.
| 19. SEPARATE FRONT STABILIZER LINK ASSEMBLY |
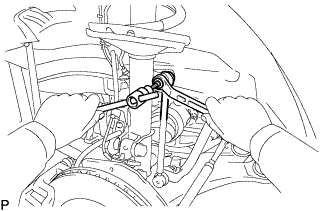 |
Remove the nut and separate the front stabilizer link assembly from the front shock absorber.
| 20. REMOVE FRONT SHOCK ABSORBER WITH COIL SPRING |
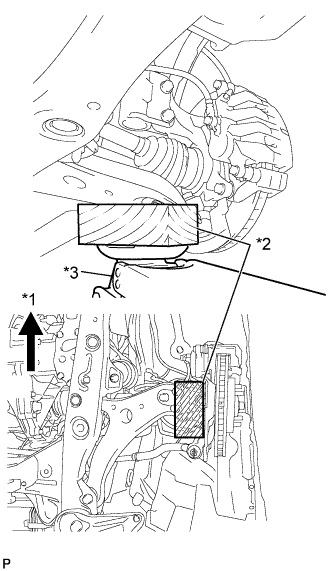 |
Support the front axle using a jack and wooden block.
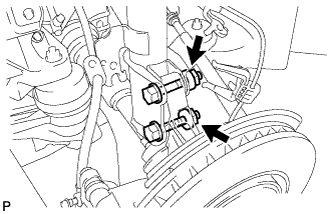 |
Remove the 2 bolts and 2 nuts, and separate the front shock absorber with coil spring (lower side) from the steering knuckle.
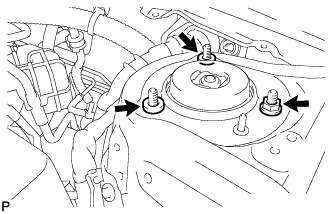 |
Remove the nut and 2 spacers on the upper side of the front shock absorber with coil spring.
| 21. REMOVE FRONT DRIVE SHAFT ASSEMBLY LH |
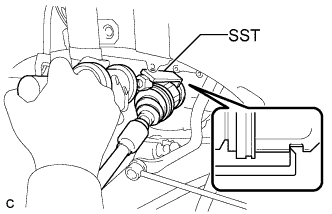 |
Using SST, remove the front drive shaft assembly LH.
| 22. REMOVE FRONT DRIVE SHAFT ASSEMBLY RH |
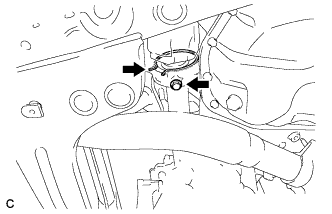 |
Remove the bearing bracket hole snap ring from the drive shaft bearing bracket.
Remove the bolt and front drive shaft assembly RH from the drive shaft bearing bracket.
| 23. REMOVE FRONT EXHAUST PIPE ASSEMBLY |
Disconnect the heated oxygen sensor connector.
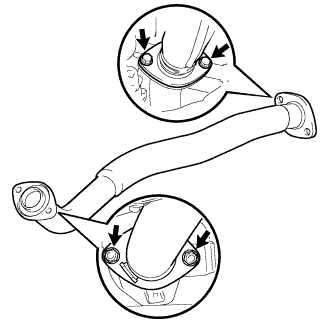 |
Remove the 2 bolts, 2 nuts and front exhaust pipe assembly.
Remove the 2 gaskets.
| 24. REMOVE FRONT NO. 3 EXHAUST PIPE SUB-ASSEMBLY |
Disconnect the heated oxygen sensor connector.
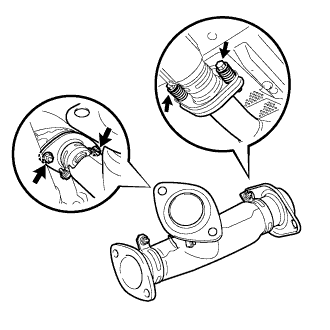 |
Remove the 2 bolts, 2 nuts and front No. 3 exhaust pipe sub-assembly.
Remove the 2 gaskets.
| 25. REMOVE HYBRID TRANSAXLE OIL SEAL |
Remove the oil seal on the LH side.
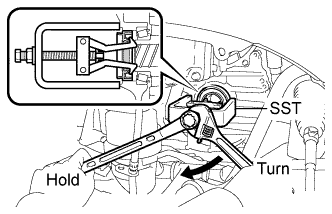 |
Using SST, remove the oil seal.
Remove the oil seal on the RH side.
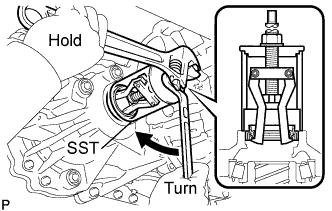 |
Using SST, remove the oil seal.