 |
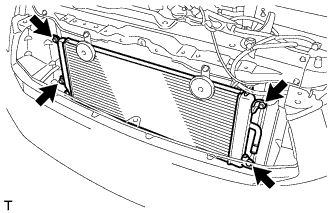
Install the radiator assembly to the cooler condenser assembly with the 4 bolts.
- Torque:
- 5.0 N*m{ 51 kgf*cm , 44 in.*lbf }
SUB RADIATOR > INSTALLATION |
| 1. INSTALL RADIATOR ASSEMBLY |
|
Install the radiator assembly to the cooler condenser assembly with the 4 bolts.
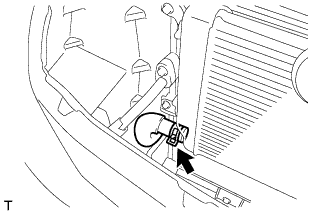 |
Connect the water hose to the radiator assembly with the clamp.
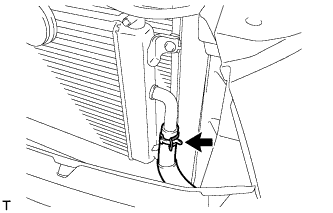 |
Connect the water hose to the radiator assembly with the clamp.
| 2. INSTALL HOOD LOCK SUPPORT SUB-ASSEMBLY |
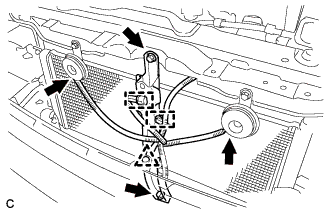 |
Install the hood lock support sub-assembly with the 2 bolts.
Install the clip and 2 clamps.
Connect the 2 connectors.
| 3. INSTALL UPPER RADIATOR SUPPORT SUB-ASSEMBLY |
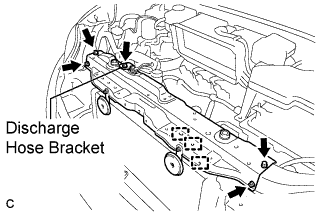 |
Install the upper radiator support sub-assembly with the 4 bolts.
Install the discharge hose bracket with the bolt.
Attach the 3 hood lock control cable clamps to the upper radiator support sub-assembly.
| 4. INSTALL HOOD LOCK ASSEMBLY (w/o Engine Hood Courtesy Switch) |
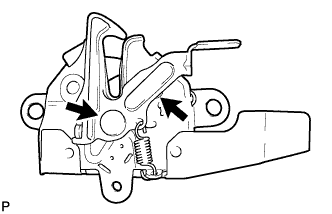 |
Apply MP grease to the sliding areas of the lock.
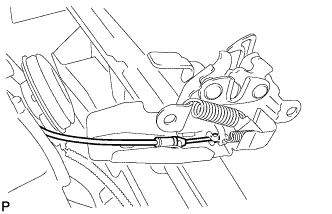 |
Connect the hood lock control cable.
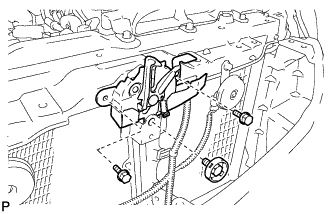 |
Install the hood lock assembly with the 3 bolts.
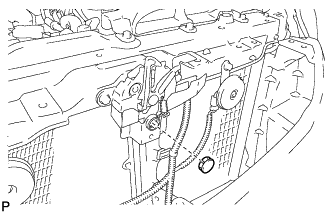 |
Install the hood lock nut cap.
| 5. INSTALL HOOD LOCK ASSEMBLY (w/ Engine Hood Courtesy Switch) |
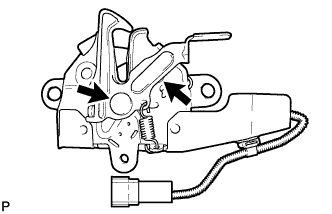 |
Apply MP grease to the sliding areas of the lock.
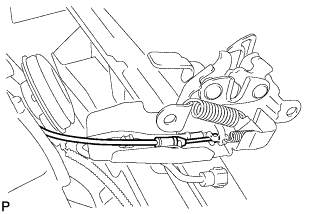 |
Connect the hood lock control cable.
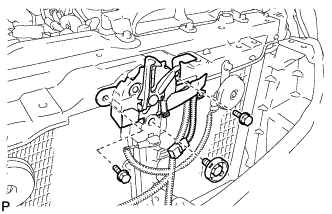 |
Install the hood lock assembly with the 3 bolts.
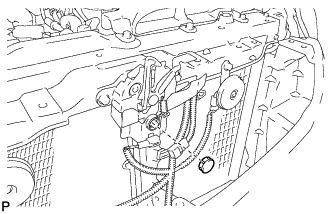 |
Install the hood lock nut cap.
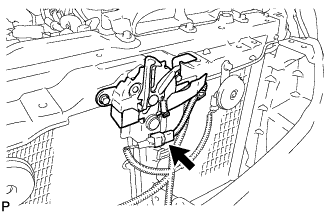 |
Connect the connector.
| 6. INSTALL AIR CLEANER CAP SUB-ASSEMBLY |
Install the air cleaner filter element to the air cleaner case.
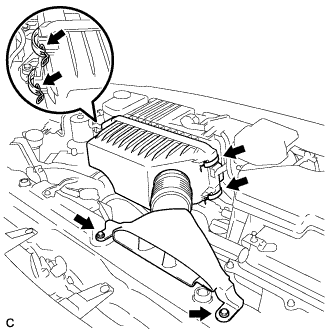 |
Install the 2 bolts, 4 clamps and air cleaner cap sub-assembly.
| 7. INSTALL RADIATOR GRILLE |
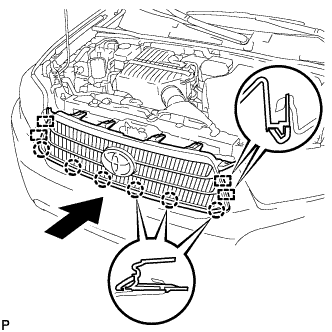 |
Engage the 4 guides and 6 claws, and install the radiator grille.
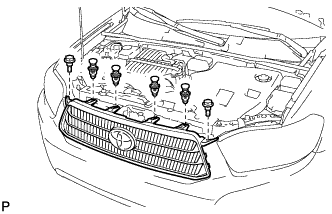 |
Install the 4 clips and 2 bolts.
| 8. INSPECT HOOD SUB-ASSEMBLY |
Check that the clearance measurements of areas A through D are within each standard range.
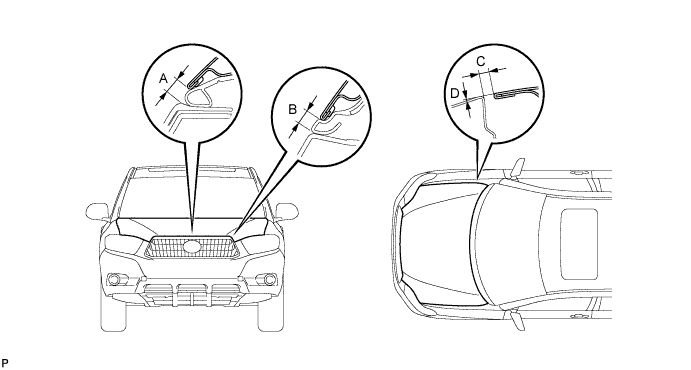
| Area | Measurement | Area | Measurement |
| A | 6.2 to 10.2 mm (0.244 to 0.402 in.) | C | 2.5 to 5.5 mm (0.098 to 0.217 in.) |
| B | 5.9 to 9.9 mm (0.232 to 0.390 in.) | D | -1.5 to 1.5 mm (-0.059 to 0.059 in.) |
| 9. ADJUST HOOD SUB-ASSEMBLY |
Horizontally and vertically adjust the hood.
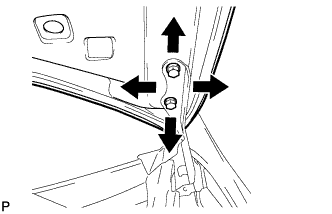 |
Loosen the 4 hinge bolts of the hood.
Adjust the clearance between the hood and front fender by moving the hood.
Tighten the 4 hinge bolts after the adjustment.
Adjust the height of the front end of the hood using the cushion rubber.
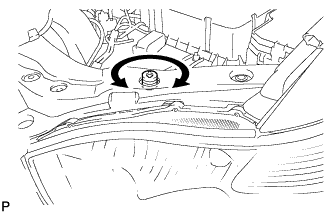 |
Adjust the cushion rubbers so that the heights of the hood and fender are aligned.
Adjust the hood lock.
|
Remove the hood lock nut cap.
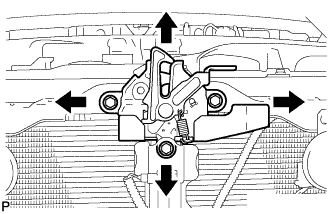 |
Loosen the 3 bolts.
Tighten the bolts after the adjustment.
|
Install the hood lock nut cap.
Check that the striker can engage with the hood lock smoothly.
| 10. ADD COOLANT (for Inverter) |
| DTC Code | Detection Item |
| P0A01-725 | Motor Electronics Coolant Temperature Sensor Circuit Range / Performance |
| P0A01-726 | Motor Electronics Coolant Temperature Sensor Circuit Range / Performance |
| P0A78-284 | Drive Motor "A" Inverter Performance |
| P0A7A-322 | Generator Inverter Performance |
| P0A93-346 | Inverter Cooling System Performance |
| P0A94-553 | DC / DC Converter Performance |
| P0AEE-276 | Motor Inverter Temperature Sensor "A" Circuit Range / Performance |
| P0AEE-277 | Motor Inverter Temperature Sensor "A" Circuit Range / Performance |
| P3221-314 | Generator Inverter Temperature Sensor Circuit Range / Performance |
| P3221-315 | Generator Inverter Temperature Sensor Circuit Range / Performance |
| P3226-562 | DC/DC Boost Converter Temperature Sensor |
| P3226-563 | DC/DC Boost Converter Temperature Sensor |
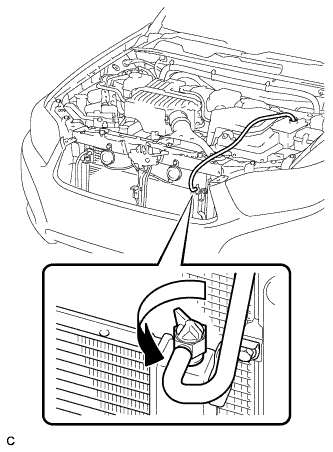 |
Loosen the bleeder plug shown in the illustration and connect a hose.
Add coolant to the reserve tank.
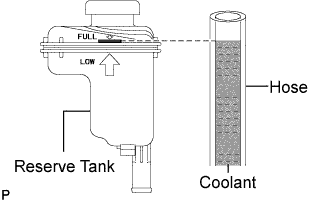 |
Add coolant until the level of coolant in the hose attached to the bleeder plug reaches the same level as the FULL line of the reserve tank.
When using the Techstream:
Connect the Techstream to the DLC3.
Turn the power switch on (IG).
On the Techstream, enter the following menus: Powertrain / Hybrid Control / Active Test / Activate the Water Pump.
Keep the coolant at the FULL level in the reserve tank to compensate for the drop in coolant level when the air bleeds.
When not using the Techstream:
Turn the power switch on (READY). [*1]
Turn the power switch off and add coolant to the FULL level because the coolant level drops as the air bleeds. [*2]
Repeat steps [*1] and [*2] until air bleeding from the coolant system is completed.
When the air is completely bled from the coolant system, tighten the plug.
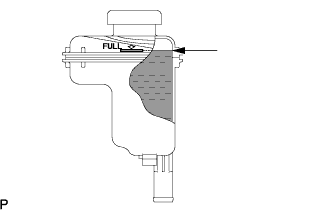 |
Add coolant to the FULL mark of the reserve tank.
| 11. INSPECT FOR COOLANT LEAK (for Inverter) |
Remove the reserve tank cap.
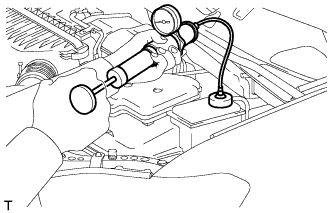 |
Install the radiator cap tester.
Pump the radiator cap tester to 37 kPa (0.38 kgf/ cm2, 5.4 psi), and then check that the pressure does not drop.
Reinstall the reserve tank cap.
| 12. INSTALL NO. 2 ENGINE ROOM SIDE COVER LH |
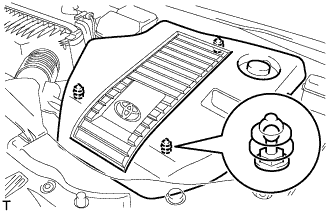 |
Fit the clips and install the No. 2 engine room side cover LH.