 |
Remove the clip.
HOOD LOCK CONTROL CABLE ASSEMBLY > REMOVAL |
| 1. REMOVE NO. 1 ENGINE UNDER COVER |
Remove the 6 bolts, 2 screws, 2 clips and No. 1 engine under cover.
| 2. REMOVE FRONT FENDER MOULDING SUB-ASSEMBLY LH |
|
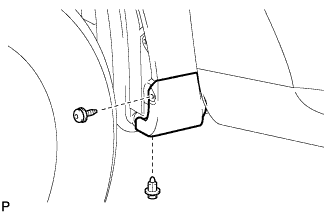
Remove the clip.
Using a 4 mm hexagon wrench, remove the screw.
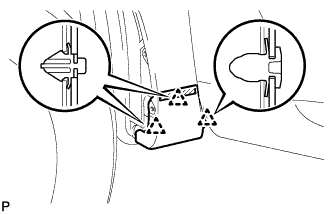 |
Peel off the front fender side protector and disengage the 3 clips, and then remove the front fender moulding sub-assembly.
Remove the pad from the front fender moulding sub-assembly.
Remove the 2 No. 4 clips from the front fender moulding sub-assembly.
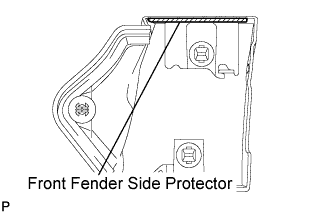 |
Remove the front fender side protector from the front fender moulding sub-assembly.
| 3. REMOVE FRONT FENDER LINER LH |
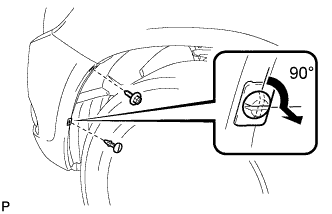 |
Remove the screw.
Using a screwdriver, turn the pin 90 degrees and remove the pin hold clip.
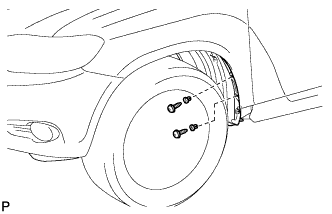 |
Using a 4 mm hexagon wrench, remove the 2 screws.
Remove the 2 grommets.
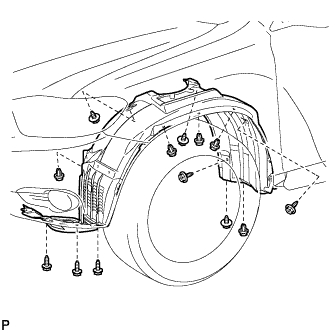 |
Remove the 5 clips, 8 screws and front fender liner LH.
| 4. REMOVE COOL AIR INTAKE DUCT SEAL |
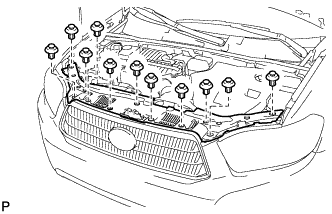 |
Remove the 11 clips and cool air intake duct seal.
| 5. REMOVE RADIATOR GRILLE |
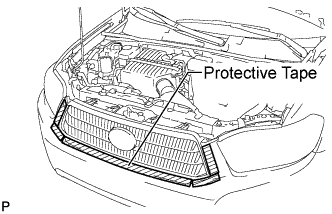 |
Put protective tape around the radiator grille.
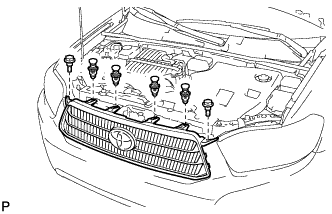 |
Remove the 2 bolts and 4 clips.
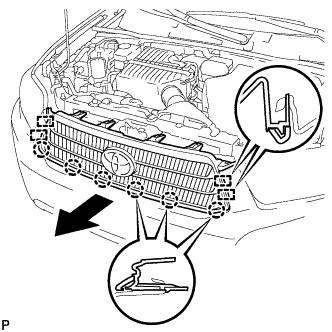 |
Disengage the 6 claws and 4 guides, and remove the radiator grille.
| 6. REMOVE HOOD LOCK ASSEMBLY (w/o Engine Hood Courtesy Switch) |
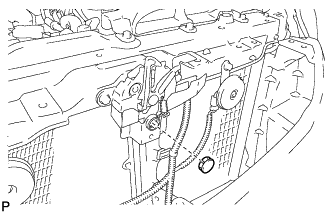 |
Remove the hood lock nut cap.
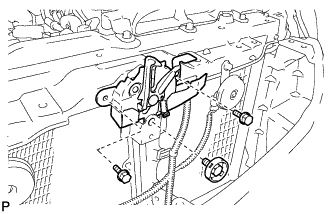 |
Remove the 3 bolts.
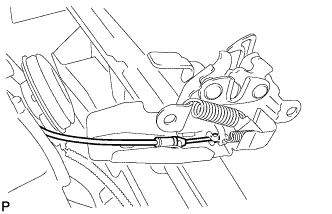 |
Disconnect the hood lock control cable and remove the hood lock assembly.
| 7. REMOVE HOOD LOCK ASSEMBLY (w/ Engine Hood Courtesy Switch) |
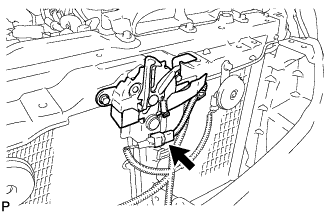 |
Disconnect the connector.
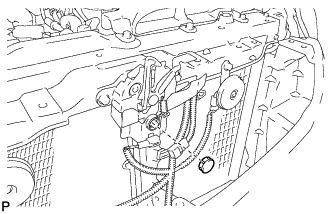 |
Remove the hood lock nut cap.
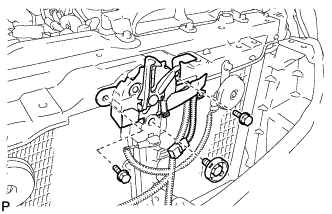 |
Remove the 3 bolts.
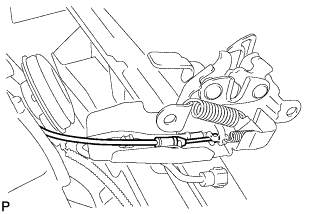 |
Disconnect the hood lock control cable and remove the hood lock assembly.
| 8. REMOVE HOOD LOCK CONTROL CABLE ASSEMBLY |
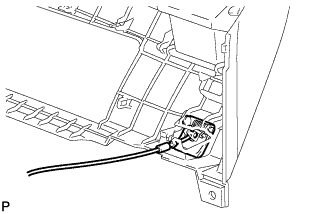 |
Disconnect the hood lock control cable from the hood lock control lever.
Using a screwdriver, disconnect the clamps shown in the illustration.
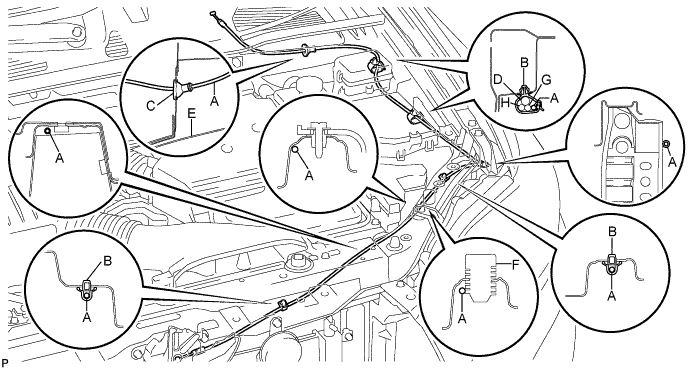
| Area | Part Name | Area | Part Name |
| A | Hood lock control cable | E | Fender liner |
| B | Clamp | F | Hood stopper rubber |
| C | Hood cable grommet | G | Front washer hose |
| D | Wire harness | H | Rear washer hose |
Pull the cable from the engine compartment and remove it.