 |
Remove the 2 bolts and 2 compression springs.
REAR LOWER ARM > REMOVAL |
| 1. REMOVE REAR WHEEL |
| 2. REMOVE TAIL EXHAUST PIPE ASSEMBLY (for RH Side) |
|
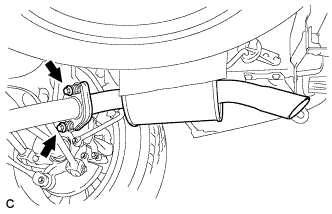
Remove the 2 bolts and 2 compression springs.
Remove the tail exhaust pipe assembly from the exhaust pipe support.
Remove the gasket from the center exhaust pipe assembly.
| 3. REMOVE CENTER EXHAUST PIPE ASSEMBLY (for RH Side) |
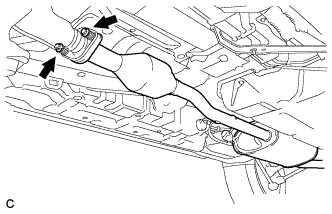 |
Remove the 2 bolts and 2 compression springs.
Remove the center exhaust pipe from the 3 exhaust pipe supports.
Remove the gasket from the front No. 3 exhaust pipe sub-assembly.
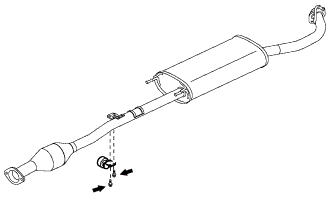 |
Remove the 2 bolts and exhaust pipe damper.
| 4. SEPARATE NO. 3 PARKING BRAKE CABLE ASSEMBLY |
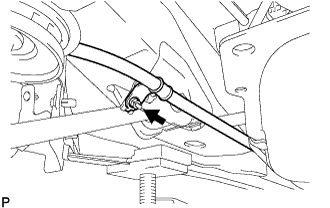 |
Remove the nut and separate the No. 3 parking brake cable assembly.
| 5. REMOVE REAR STRUT ROD ASSEMBLY |
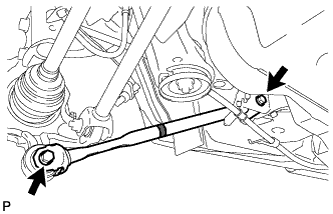 |
Remove the 2 bolts, the 2 nuts, and the rear strut rod assembly.
| 6. REMOVE REAR NO. 2 SUSPENSION ARM ASSEMBLY |
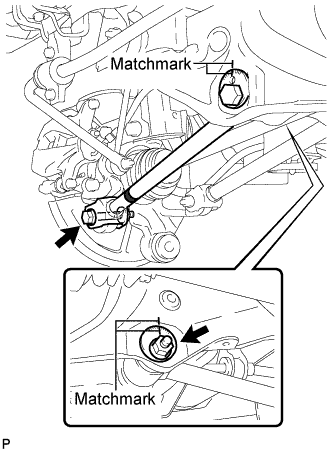 |
Put matchmarks on the adjust cams and the rear suspension member sub-assembly.
Remove the bolt and nut, and separate the rear No. 2 suspension arm assembly from the rear axle carrier sub-assembly.
Remove the nut, the No. 2 camber adjust cam, the rear suspension toe adjust cam sub-assembly, and the rear No. 2 suspension arm assembly.
| 7. REMOVE REAR NO. 1 SUSPENSION ARM ASSEMBLY |
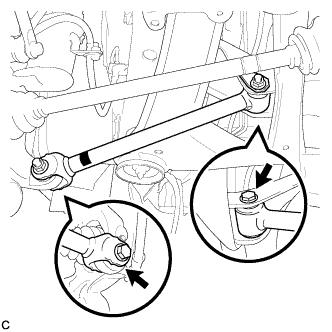 |
Remove the 2 bolts, the 2 nuts, and the rear No. 1 suspension arm assembly.