 |
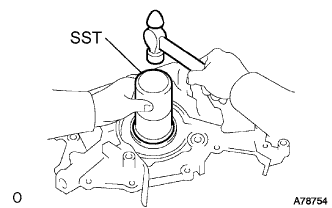
Using SST and a hammer, tap in a new oil seal until its surface is flush with the oil pump body edge.
- SST
- 09223-00010
- NOTICE:
- Do not tap the oil seal at an angle.
- Keep the lip free from foreign objects.
OIL PUMP > INSTALLATION |
| 1. INSTALL OIL PUMP SEAL |
|
Using SST and a hammer, tap in a new oil seal until its surface is flush with the oil pump body edge.
Apply MP grease to the oil seal lip.
| 2. INSTALL OIL PUMP ASSEMBLY |
Remove any old seal packing material from the contact surface.
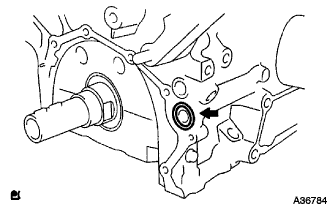 |
Apply a light coat of engine oil to a new O-ring and place it on the cylinder block.
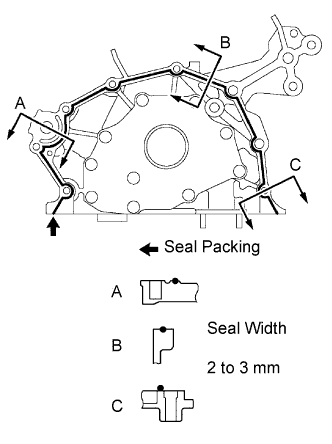 |
Apply a continuous bead of seal packing (width of 2 to 3 mm (0.08 to 0.12 in.)) as shown in the illustration.
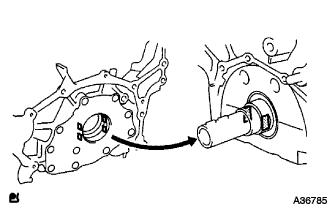 |
Align the key of the oil pump drive gear with the keyway located on the crankshaft, and slide the oil pump into place.
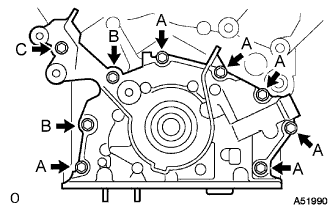 |
Install the oil pump with the 9 bolts. Tighten the bolts uniformly in several steps.
| 3. INSTALL CRANK POSITION SENSOR |
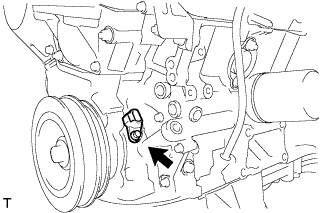 |
Install the crankshaft position sensor with the bolt.
| 4. INSTALL OIL PAN SUB-ASSEMBLY |
Remove any old seal packing from the contact surface.
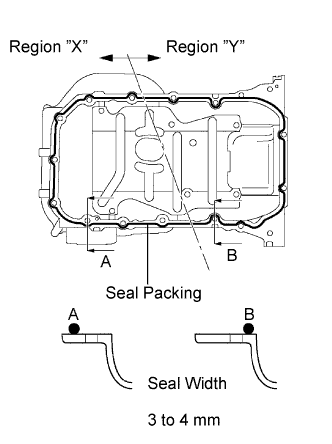 |
Apply a continuous bead of seal packing (Diameter 3 to 4 mm (0.12 to 0.16 in.)) as shown in the illustration.
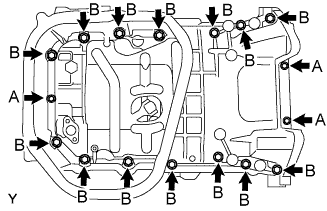 |
Install the oil pan No. 1 with the 17 bolts. Tighten the bolts uniformly in several steps.
| 5. INSTALL OIL STRAINER SUB-ASSEMBLY |
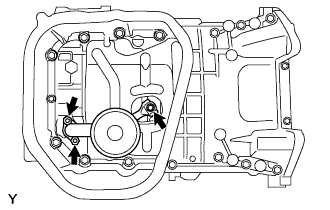 |
Install a new gasket and the oil strainer with the bolt and 2 nuts.
| 6. INSTALL NO. 2 OIL PAN SUB-ASSEMBLY |
Remove any old seal packing from the contact surface.
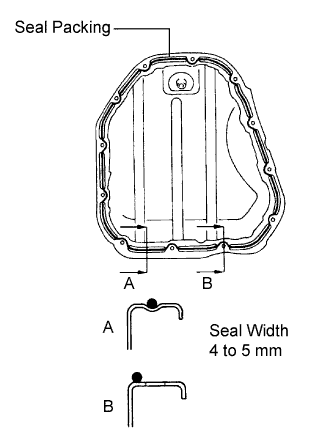 |
Apply a continuous bead of seal packing (Diameter 4 to 5 mm (0.16 to 0.20 in.)) as shown in the illustration.
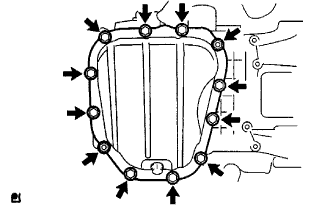 |
Install the oil pan No. 2 with the 10 bolts and 2 nuts.
| 7. INSTALL CRANKSHAFT TIMING PULLEY |
Align the keyway of the pulley with the key located on the crankshaft and slide the pulley into place.
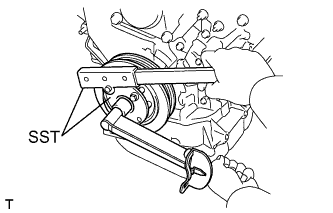 |
Using SST, install the pulley bolt.
| 8. INSTALL NO. 1 TIMING BELT IDLER SUB-ASSEMBLY |
Using a 10 mm socket hexagon wrench, install the plate washer and No. 1 timing belt idler with the pivot bolt.
| 9. INSTALL TIMING BELT |
Remove any oil or water on the pulleys, and keep them clean.
Inspect the idler pulleys.
Check that the idler pulley turns smoothly.
Visually check the seal portion of the idler pulley for oil leakage.
Inspect the water pump.
Turn the pulley, and check that the water pump bearing moves smoothly and does not make any noise.
Visually check the drain hole for coolant leakage.
Temporarily install the crankshaft pulley bolt and washer to the crankshaft.
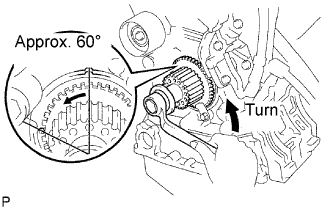 |
Turn the crankshaft counterclockwise by approximately 60°.
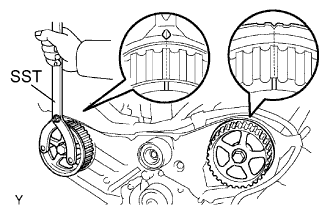 |
Using SST, turn the timing pulleys, and align the timing marks of the timing pulleys with the No. 3 timing belt cover.
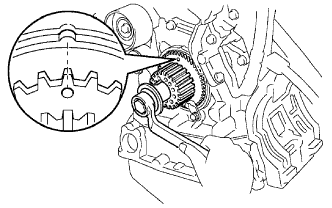 |
Turn the crankshaft, and align the timing mark of the crankshaft timing pulley with the oil pump body.
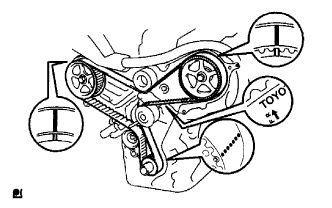 |
Face the front mark on the timing belt forward.
Align the installation mark on the timing belt with the timing mark of the crankshaft timing pulley.
Align the installation marks on the timing belt with the timing marks of the camshaft timing pulleys.
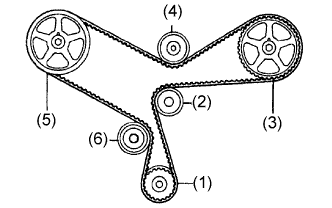 |
Install the timing belt in the following order.
| 1st | Crankshaft timing pulley |
| 2nd | Water pump pulley |
| 3rd | LH camshaft timing pulley |
| 4th | No. 2 idler pulley |
| 5th | RH camshaft timing pulley |
| 6th | No. 1 idler pulley |
| 10. INSTALL ENGINE ASSEMBLY WITH TRANSAXLE |