 |
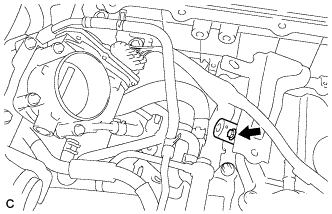
Install the camshaft timing oil control valve with the bolt.
- Torque:
- 8.0 N*m{ 82 kgf*cm , 71 in.*lbf }
CAMSHAFT OIL CONTROL VALVE > INSTALLATION |
| 1. INSTALL CAMSHAFT TIMING OIL CONTROL VALVE ASSEMBLY LH |
Apply a coat of engine oil to an O-ring of the oil control valve.
|
Install the camshaft timing oil control valve with the bolt.
Connect the camshaft timing oil control valve connector.
| 2. INSTALL CAMSHAFT TIMING OIL CONTROL VALVE ASSEMBLY RH |
Apply a coat of engine oil to an O-ring of the oil control valve.
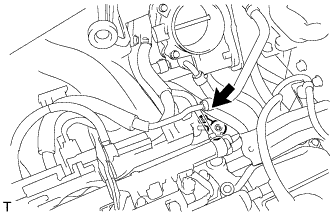 |
Install the camshaft timing oil control valve with the bolt.
| 3. INSTALL AIR CLEANER CASE SUB-ASSEMBLY |
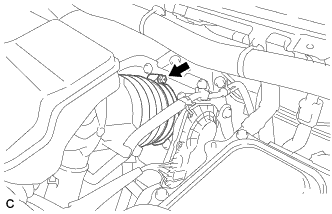 |
Align the tab on the throttle body with the groove on the air cleaner hose and tighten the hose clamp.
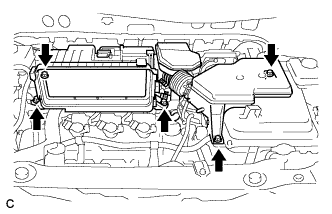 |
Install the air cleaner case sub-assembly with the 5 bolts.
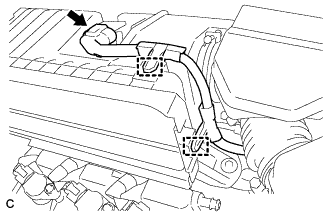 |
Connect the intake air flow meter connector.
Connect the 2 wire harness clamps to the air cleaner case.
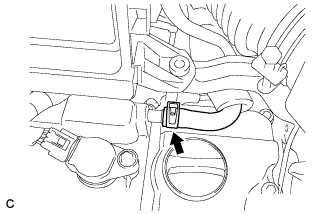 |
Connect the No. 1 ventilation hose.
| 4. INSTALL AIR CLEANER CAP SUB-ASSEMBLY |
Install the air cleaner filter element to the air cleaner case sub-assembly.
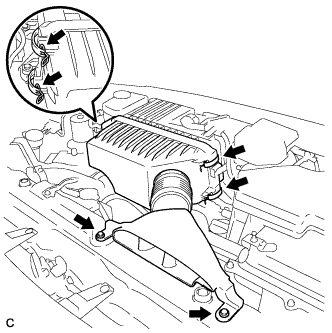 |
Install the air cleaner cap sub-assembly with the 4 clamps and 2 bolts.
| 5. INSTALL NO. 2 ENGINE ROOM SIDE COVER LH |
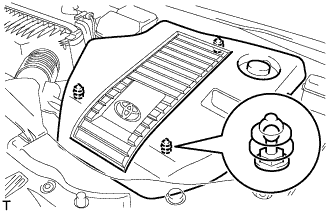 |
Fit the clips and install the No. 2 engine room side cover LH.
| 6. INSTALL COOL AIR INTAKE DUCT SEAL |
Install the cool air intake duct seal with the 11 clips.
| 7. INSTALL OUTER COWL TOP PANEL SUB-ASSEMBLY |
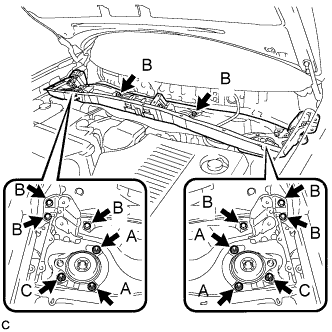 |
Install the outer cowl top panel sub-assembly with the 8 bolts and 6 nuts.
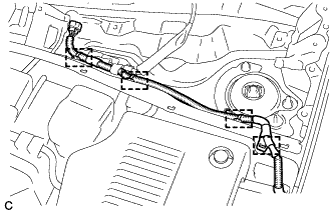 |
Engage the 4 clamps.
| 8. INSTALL WINDSHIELD WIPER MOTOR AND LINK ASSEMBLY |
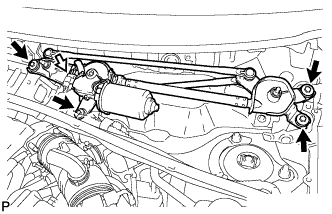 |
Install the windshield wiper motor and link assembly with the 4 bolts.
Connect the connector.
| 9. INSTALL COWL TOP VENTILATOR LOUVER SUB-ASSEMBLY |
Engage the 20 claws.
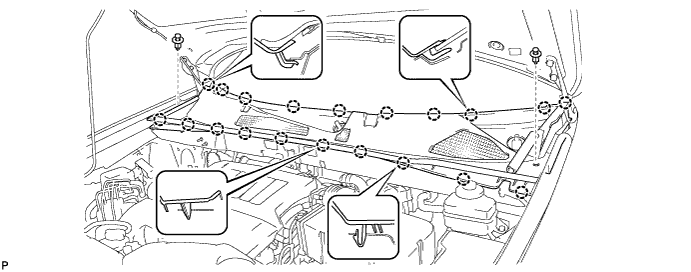
Install the cowl top ventilator louver sub-assembly with the 2 clips.
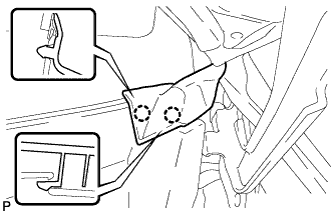 |
Engage the 2 claws and connect the front fender to cowl side seal LH.
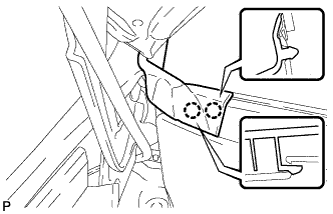 |
Engage the 2 claws and connect the front fender to cowl side seal RH.
| 10. INSTALL HOOD TO COWL TOP SEAL |
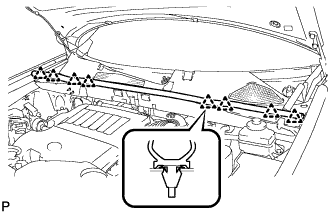 |
Engage the 8 clips and install the hood to cowl top seal.
| 11. INSTALL FRONT WIPER ARM AND BLADE ASSEMBLY RH |
Operate the wiper and stop the windshield wiper motor at the automatic stop position.
When reinstalling:
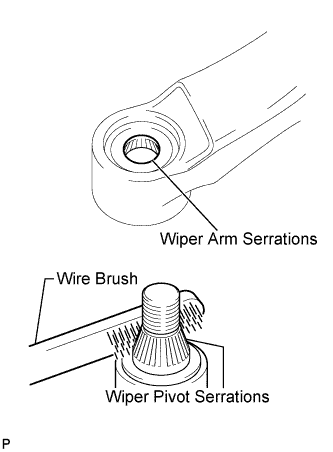 |
Clean the wiper arm serrations.
Clean the wiper pivot serrations with a wire brush.
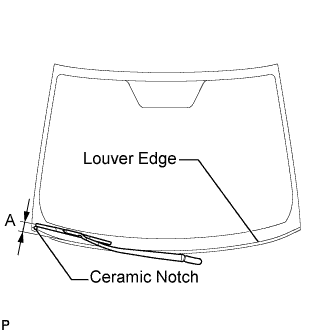 |
Install the front wiper arm and blade assembly RH with the nut to the position shown in the illustration.
| Area | Measurement |
| A | 25.6 mm (1.00 in.) |
| 12. INSTALL FRONT WIPER ARM AND BLADE ASSEMBLY LH |
Operate the wiper and stop the windshield wiper motor at the automatic stop position.
When reinstalling:
|
Clean the wiper arm serrations.
Clean the wiper pivot serrations with a wire brush.
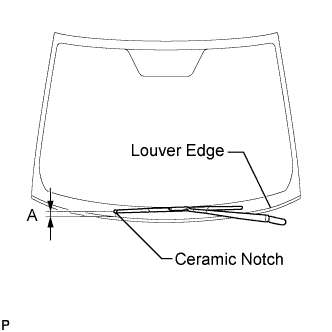 |
Install the front wiper arm and blade assembly LH with the nut to the position shown in the illustration.
| Area | Measurement |
| A | 31.9 mm (1.26 in.) |
Operate the front wipers while spraying washer fluid onto the windshield glass. Make sure that the front wipers function properly and the wipers do not come into contact with the vehicle body.